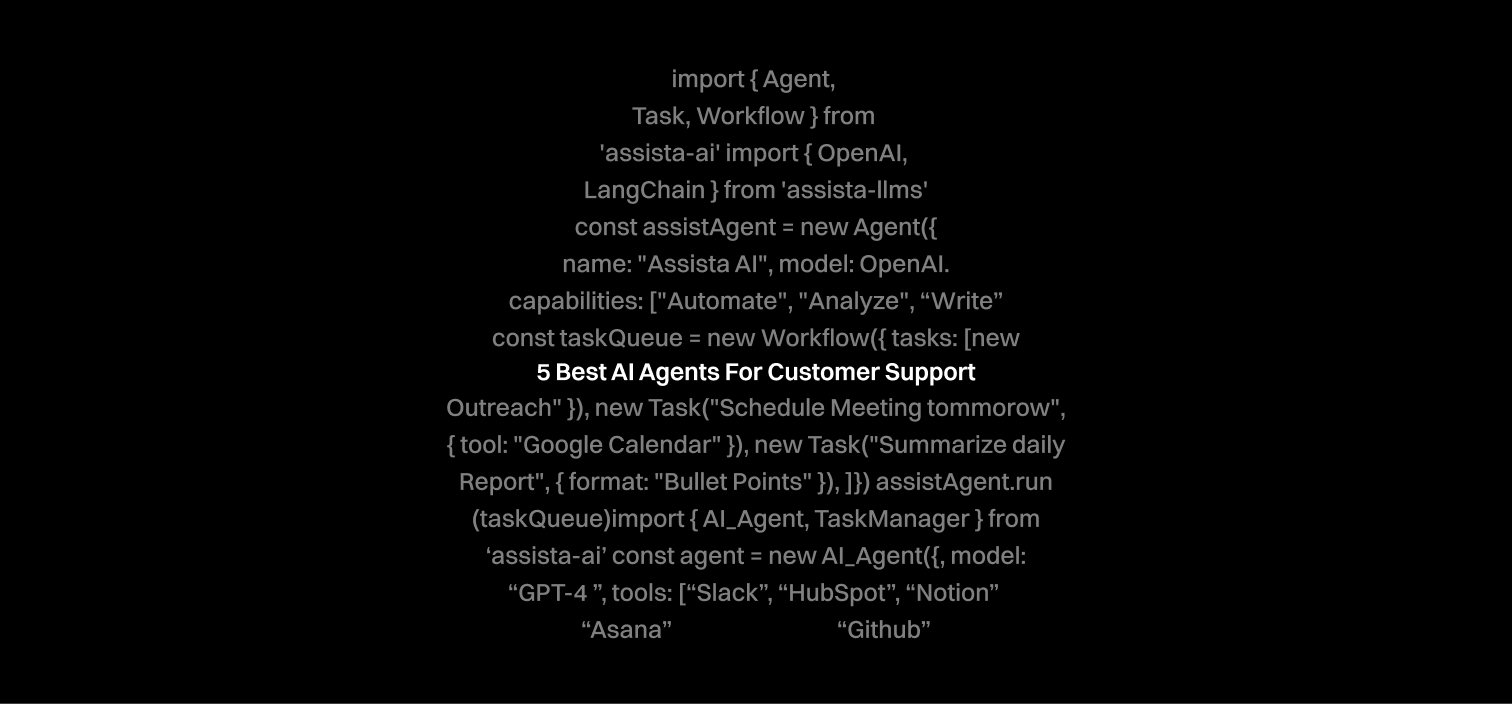
5 Best AI Agents for Customer Support
No business can thrive without customers. If you understand this reality, then you should be working towards the retention and satisfaction of your customers.
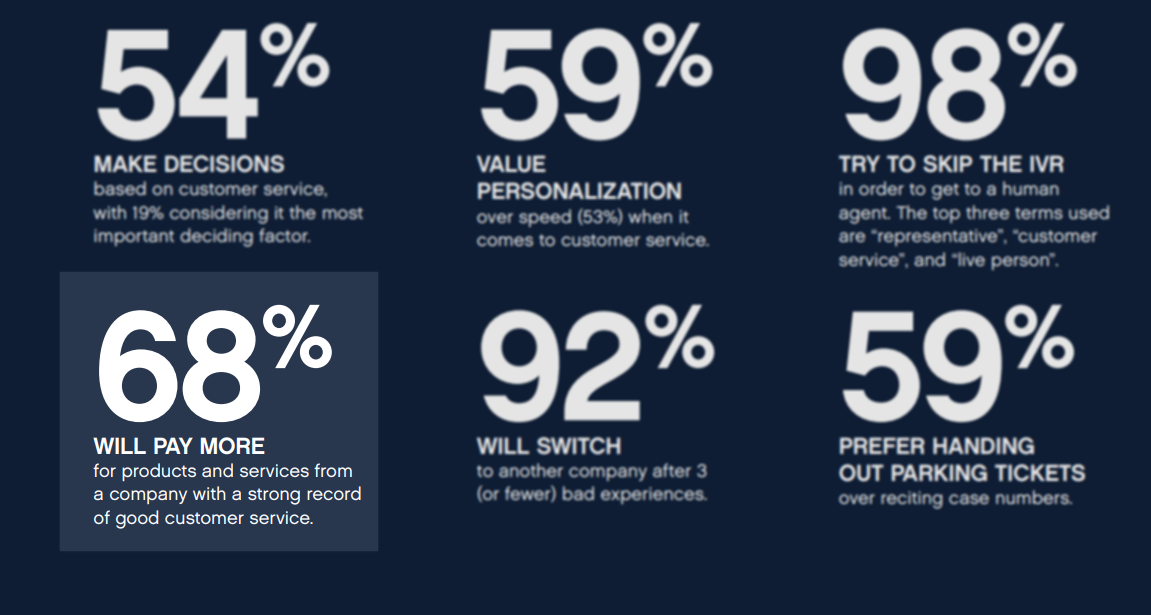
A survey from Hubspot indicates that 68% of customers will pay more for products and services from a company with a good customer service record.
To put it another way, your sales growth largely relies on how you treat your customers. However, there is a problem: you are not a robot. There is a limit on the support you can provide daily, even with a large team.
The good news is that there are lots of AI agents now that can handle high-volume customer queries within a matter of seconds.
Over the past 12 days, I have tested about 9 of them. In this article, I will share with you my top 5 Best AI agents for Customer Support, together with their features and pricing plans.
Let’s explore!
5 Best AI Support Agents
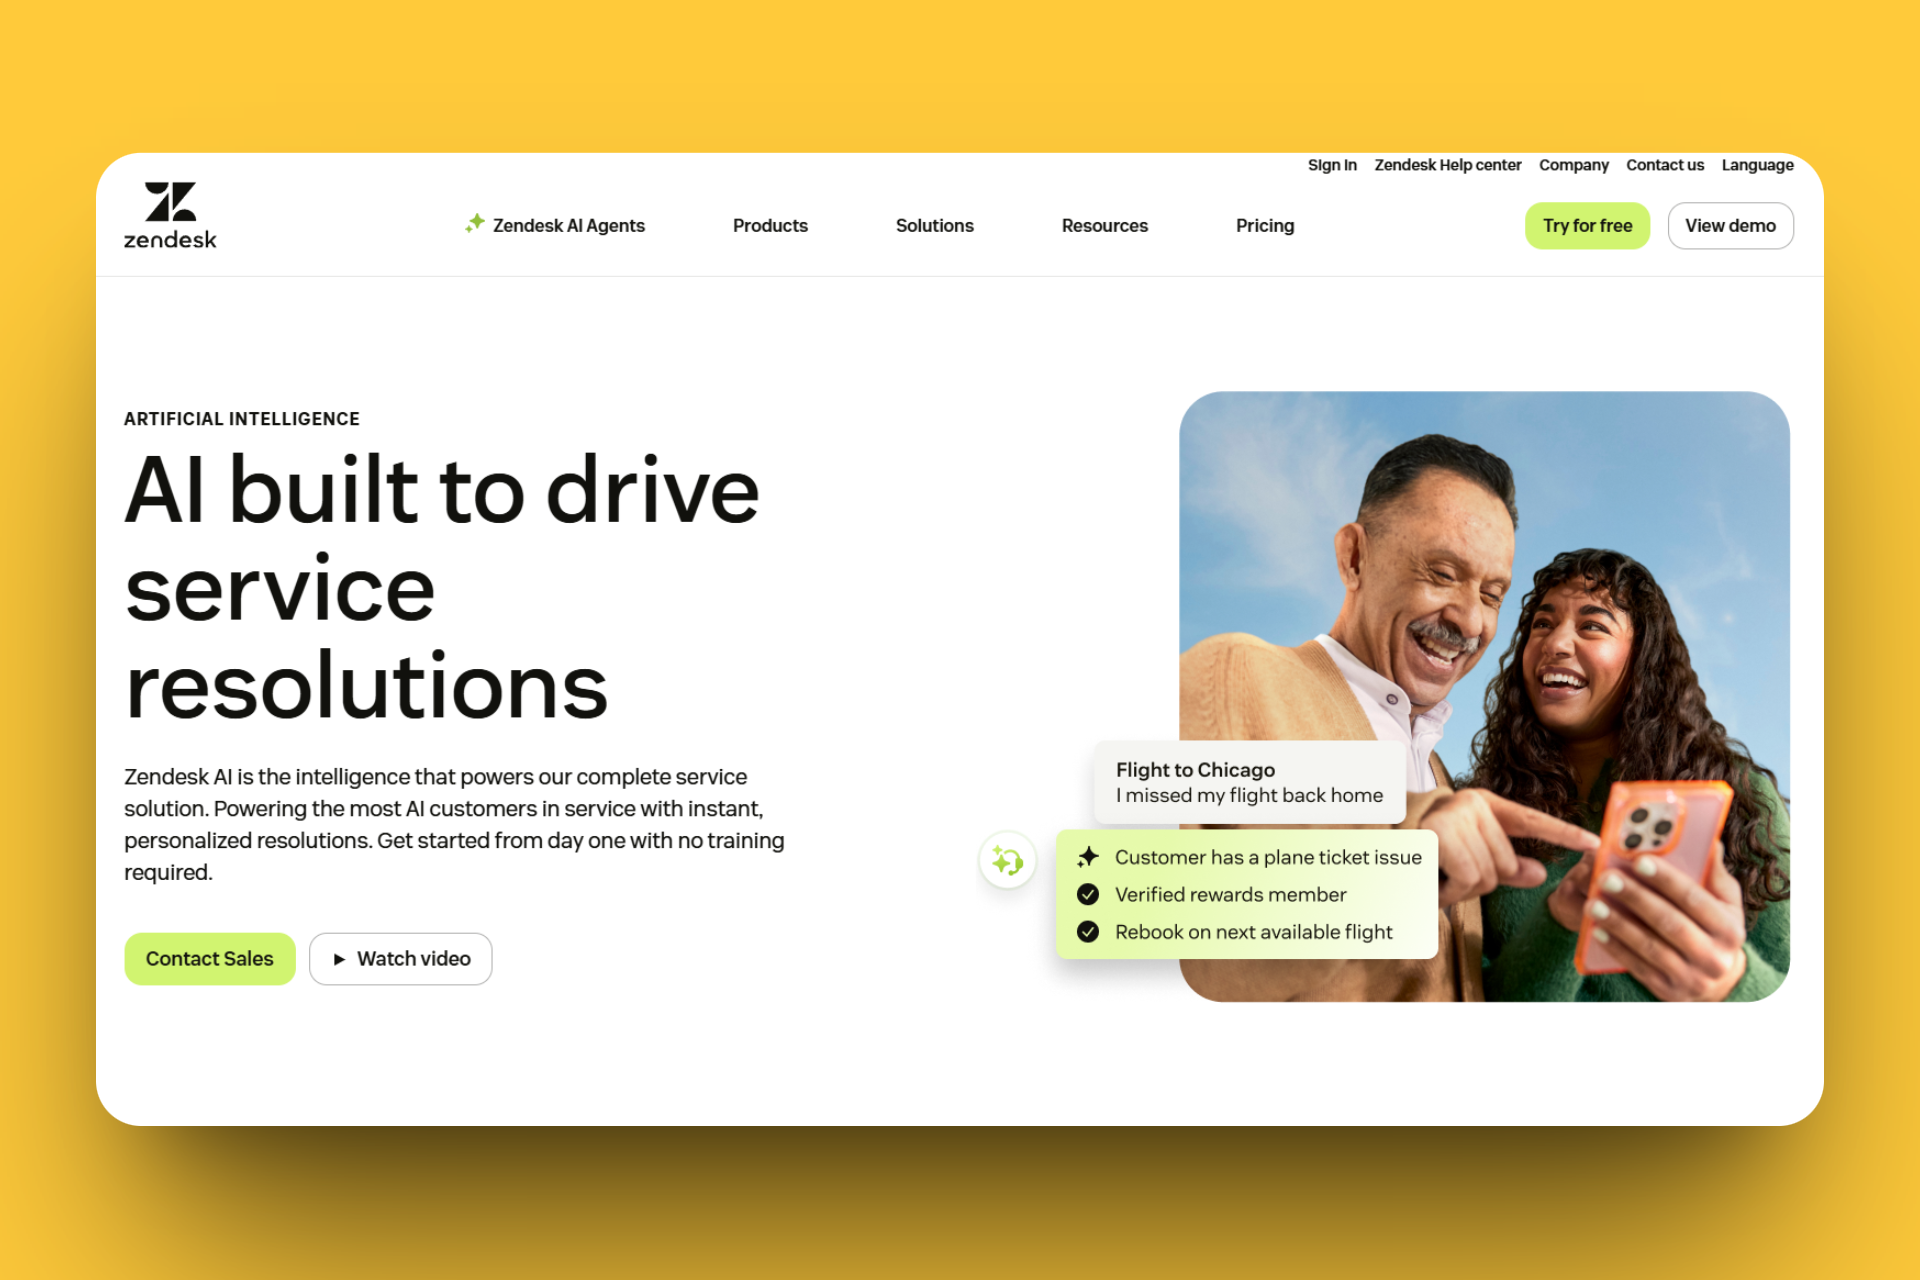
Zendesk AI
Zendesk AI is the first AI support agent we will discuss. You can create your agent in Zendesk by selecting the type, naming it, choosing a tone of voice, and providing a brand and help center. You can also set the AI agent’s greeting message and add a custom reply for any query beyond it.
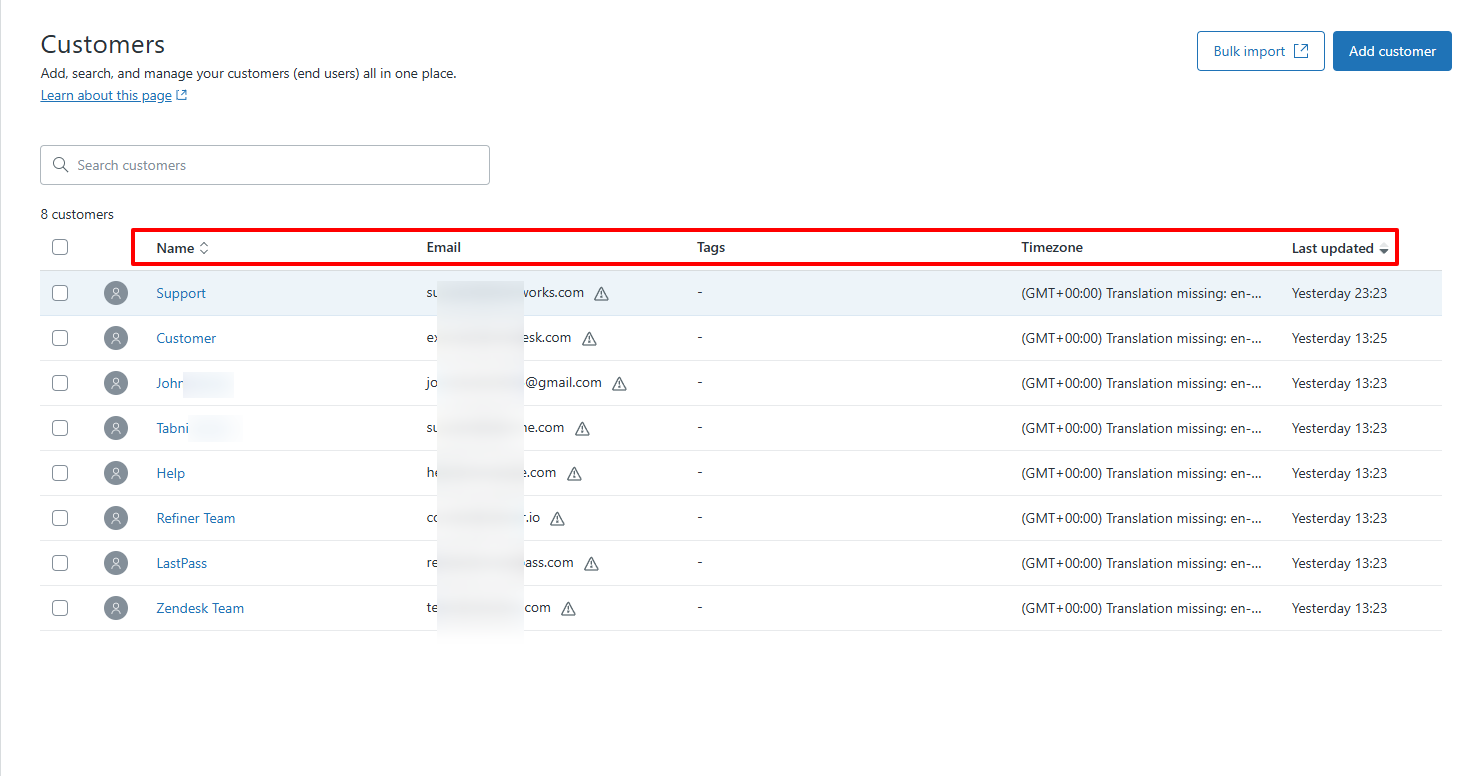
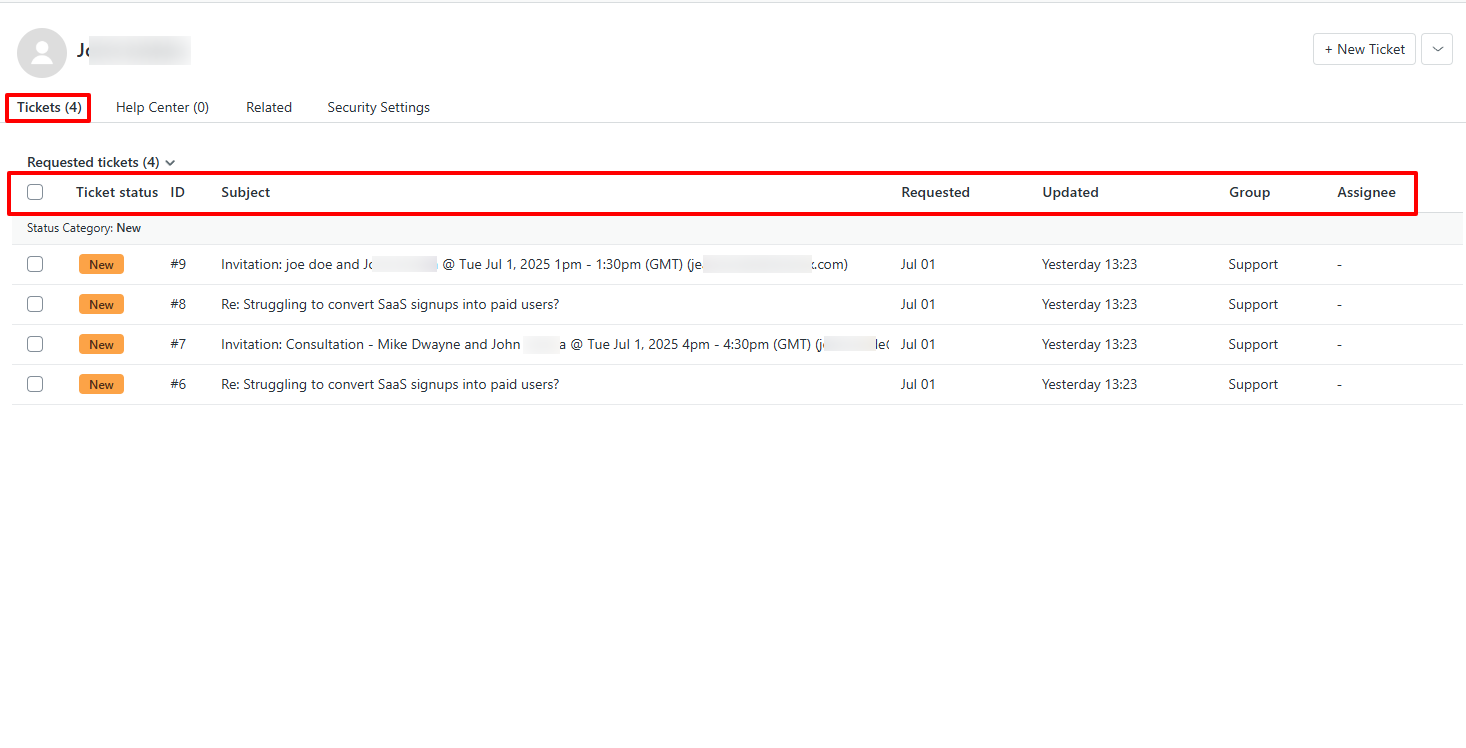
Zendesk’s Customers feature showcases your customers’ details such as their name, tags, email, timezone, and when their data was last updated. You can also see your customers’ tickets, including their status, subject, group, and assignee.
Moreover, I can use the Views feature to see all my tickets, including those unsolved, unassigned, recently updated, pending, and recently solved.

Last but not least, there is the Home dashboard. It shows ticket statistics during the week, the number of open tickets, and recent updates. It also displays the tickets assigned to me.
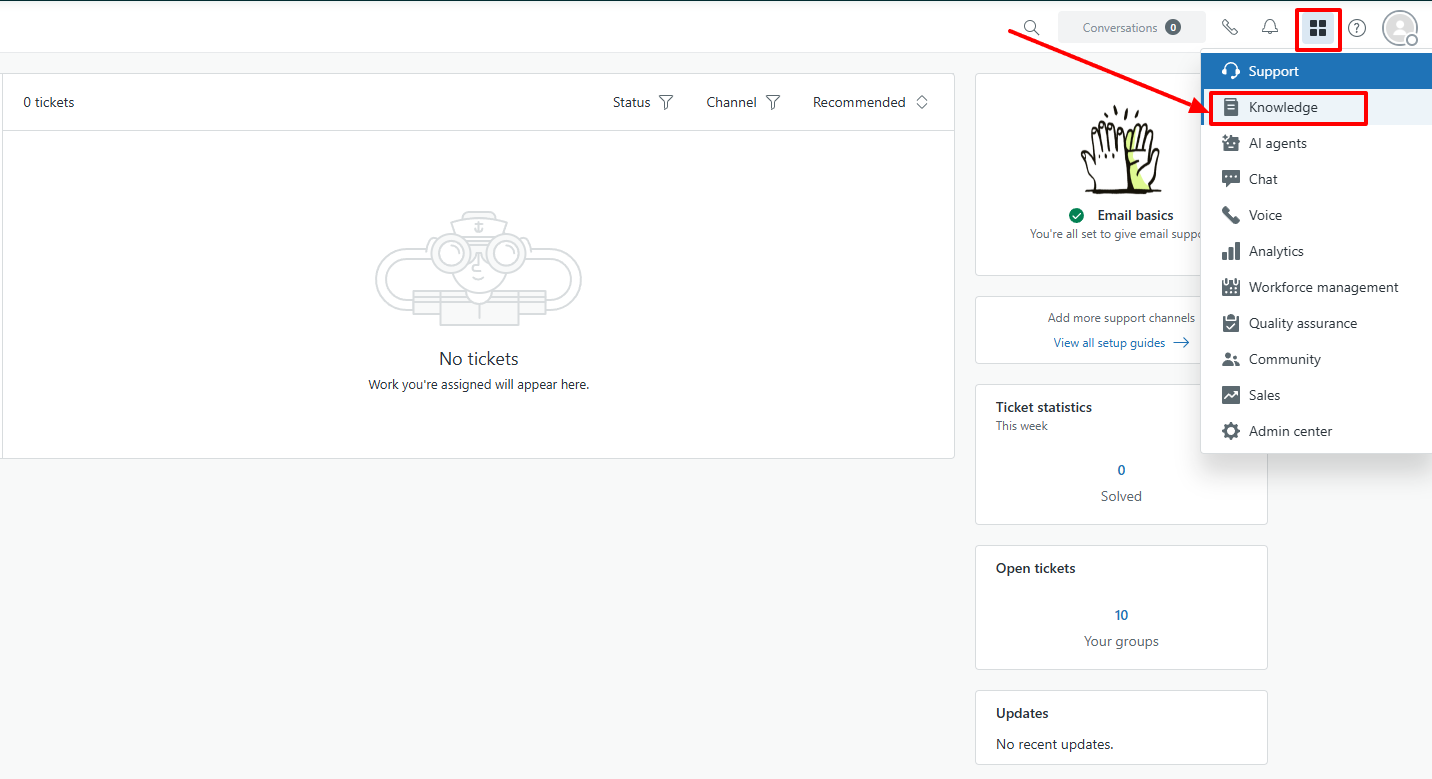
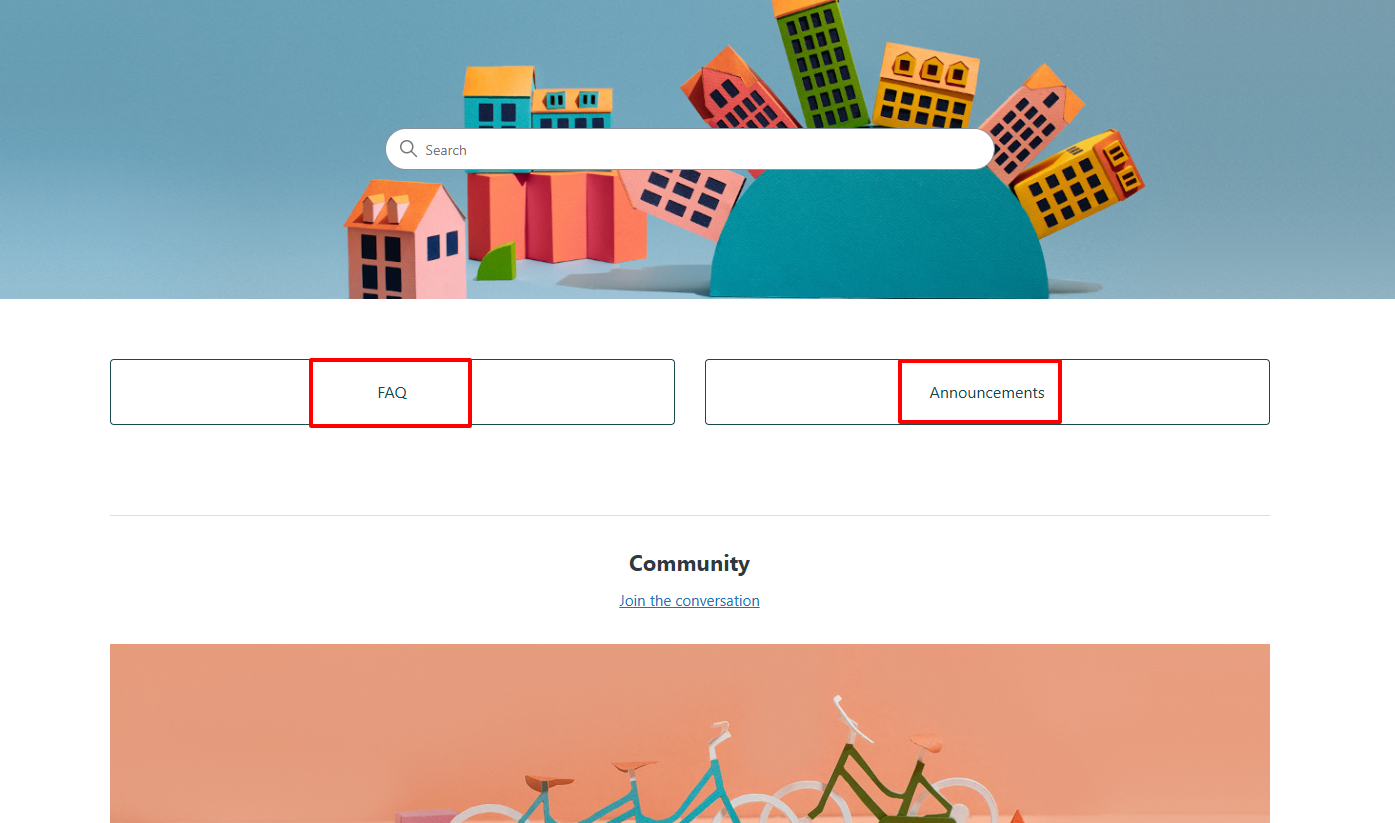
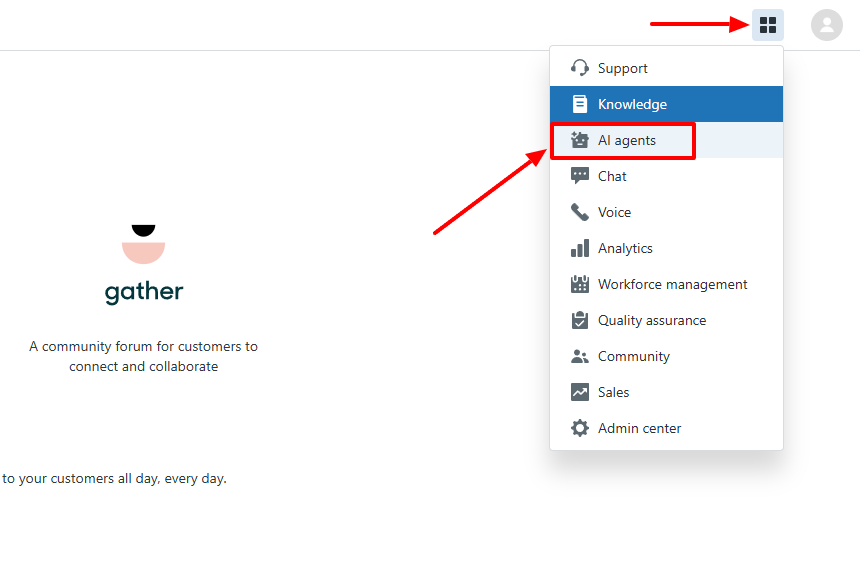
Before you even create your AI agent on Zendesk, you need to set up your help center. To do so, locate “Knowledge” at the far right of the interface.
You can then set up your FAQs and your Announcements. The information you add in there will help your AI agent’s reply system.
Additionally, there’s always the option to add new posts. These posts will be part of your help center.

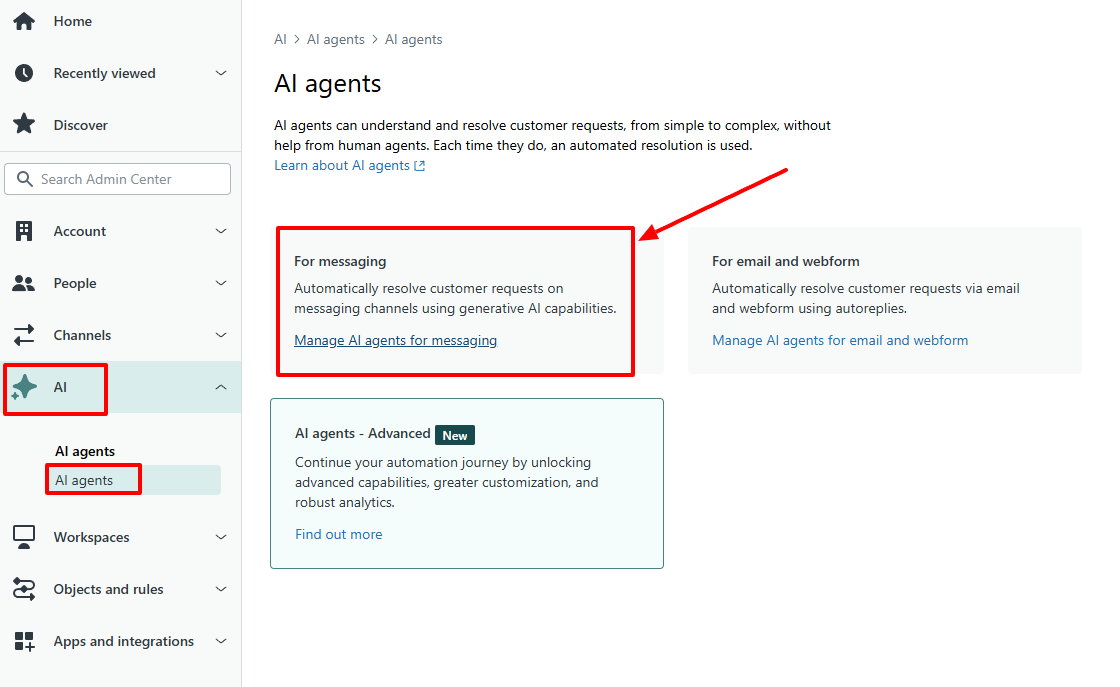
Now, let’s create our agent. To start, click “AI agents” from the menu.
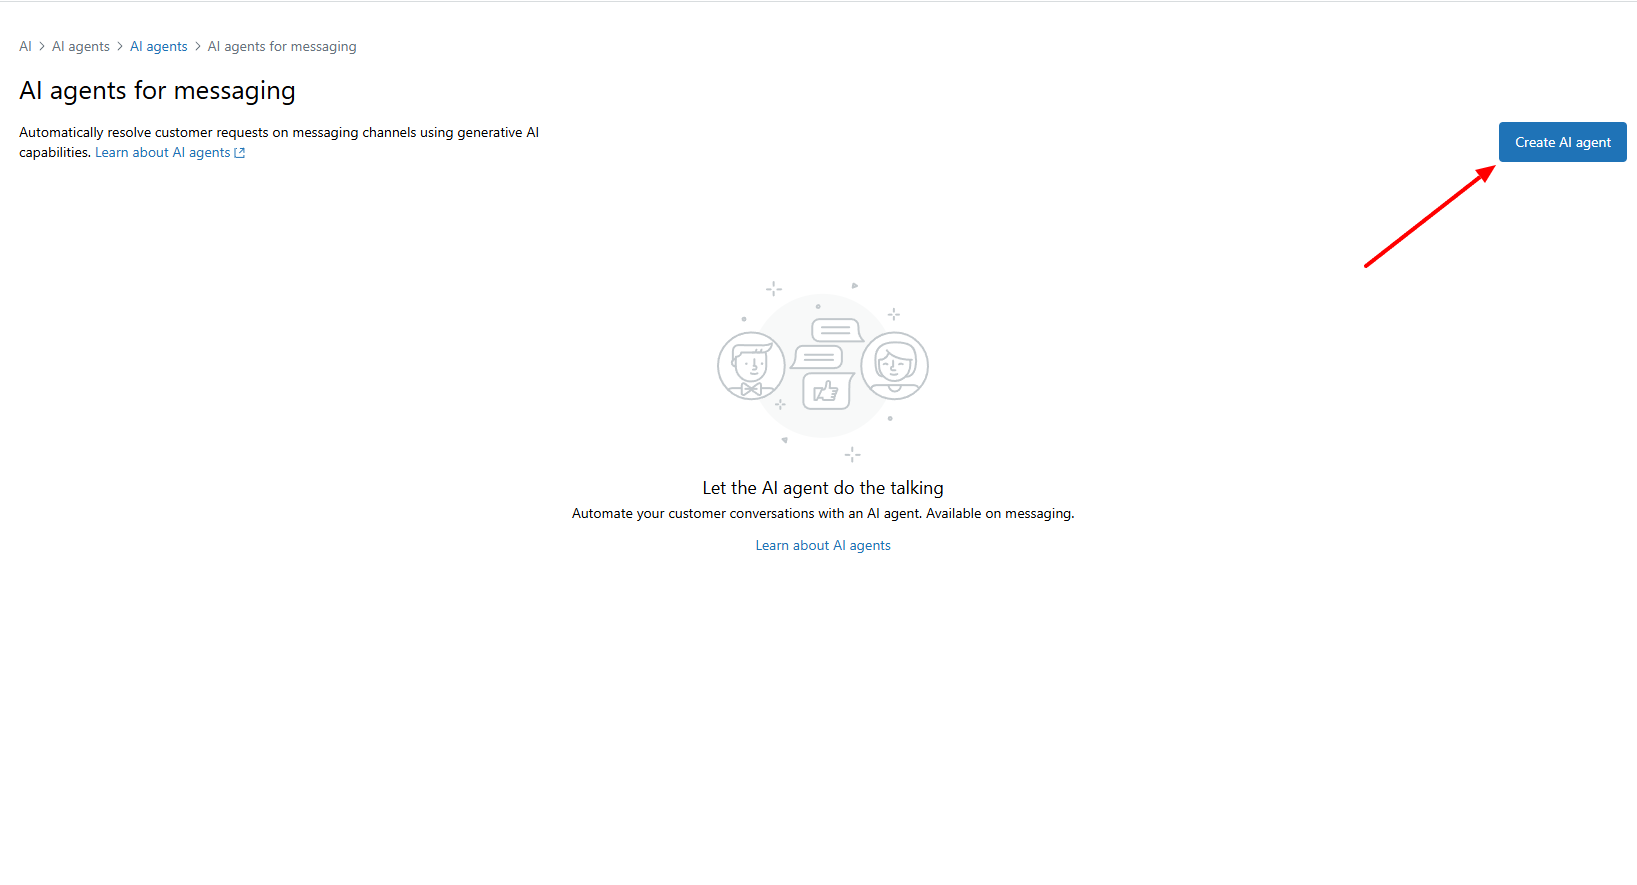
There are three different AI agent types you can create. In this example, however, I’ll create one for messaging.
Next, I’ll click the “Create AI agent” button.
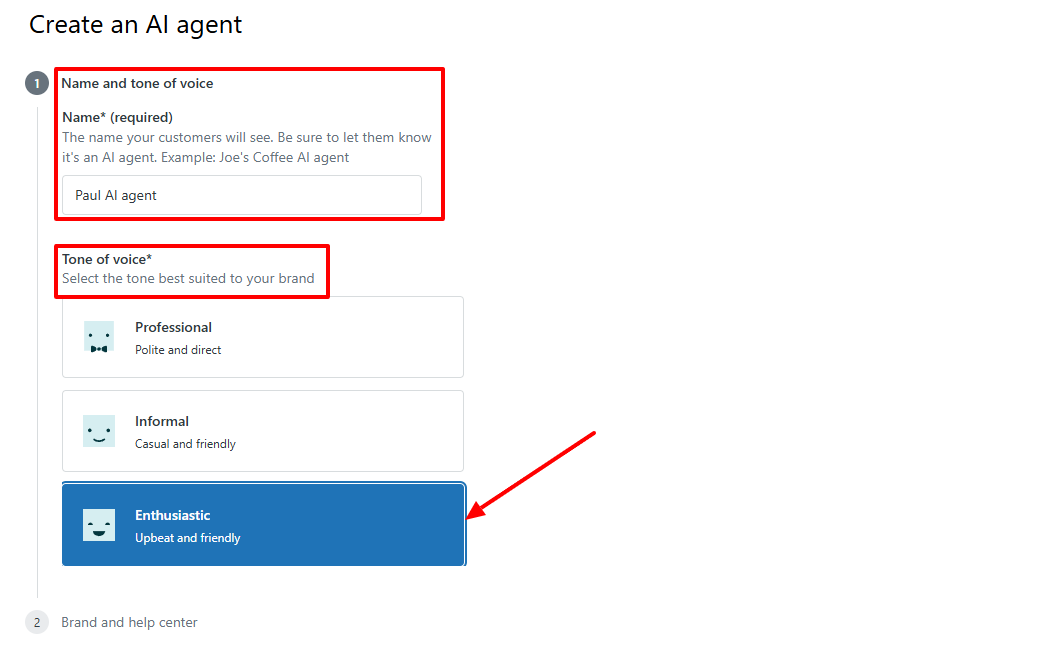
On the configuration page, you can name your agent and select a tone of voice. I’ll name mine “Paul AI agent” and choose the “Enthusiastic” tone.
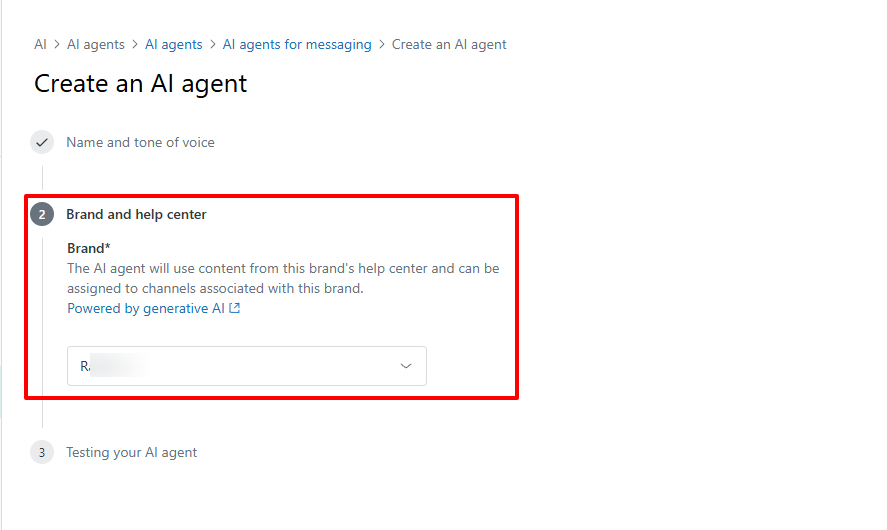
Next, choose your brand and help center.
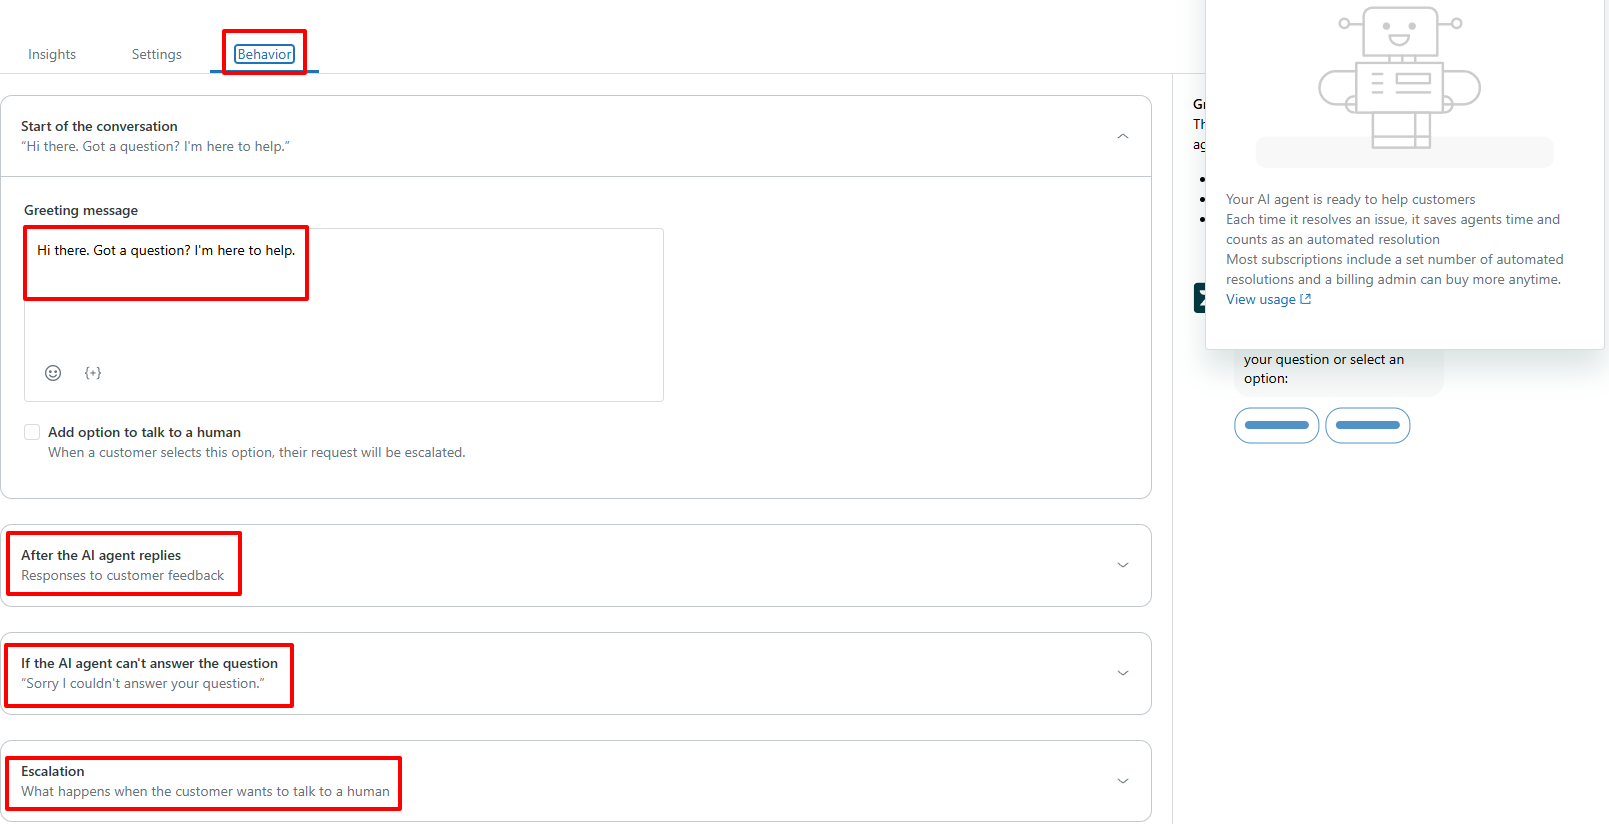
Under behavior, you can set your AI agent’s greeting message, set up its replies, add a custom message if the AI agent can’t answer, and configure what happens when the customer wants to talk to a human.
That’s it. You are all set! It’s time to publish your AI agent.

After publishing “Paul AI agent”, it goes live, and customers can ask questions.
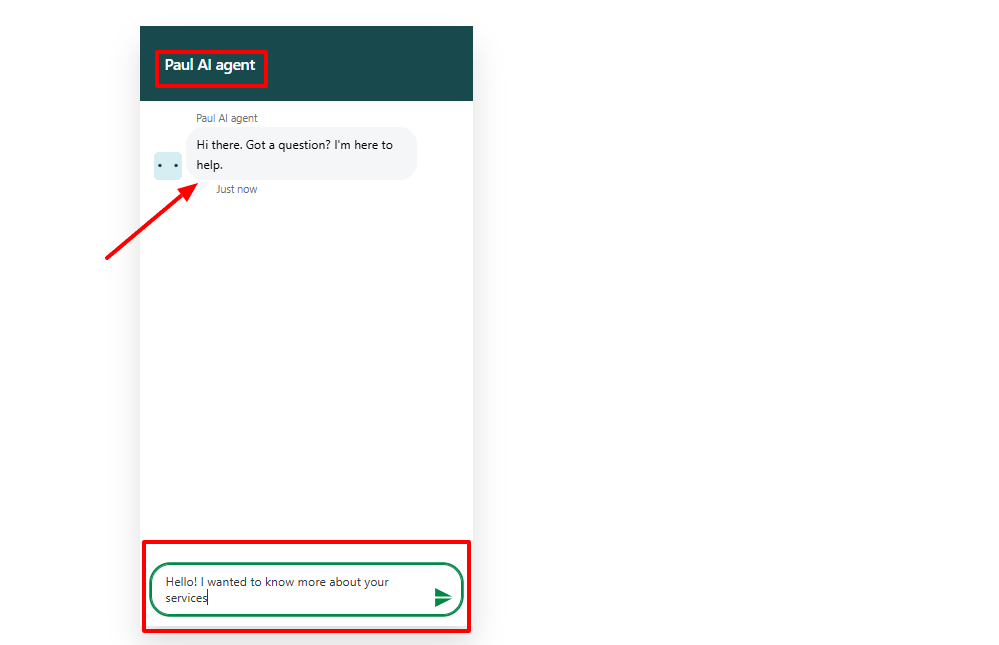
Once a customer inputs a query, Paul will reply based on the information available in the help center.

Having discussed one of Zendesk’s flagship features, let’s see what other features are in store.
Key Features
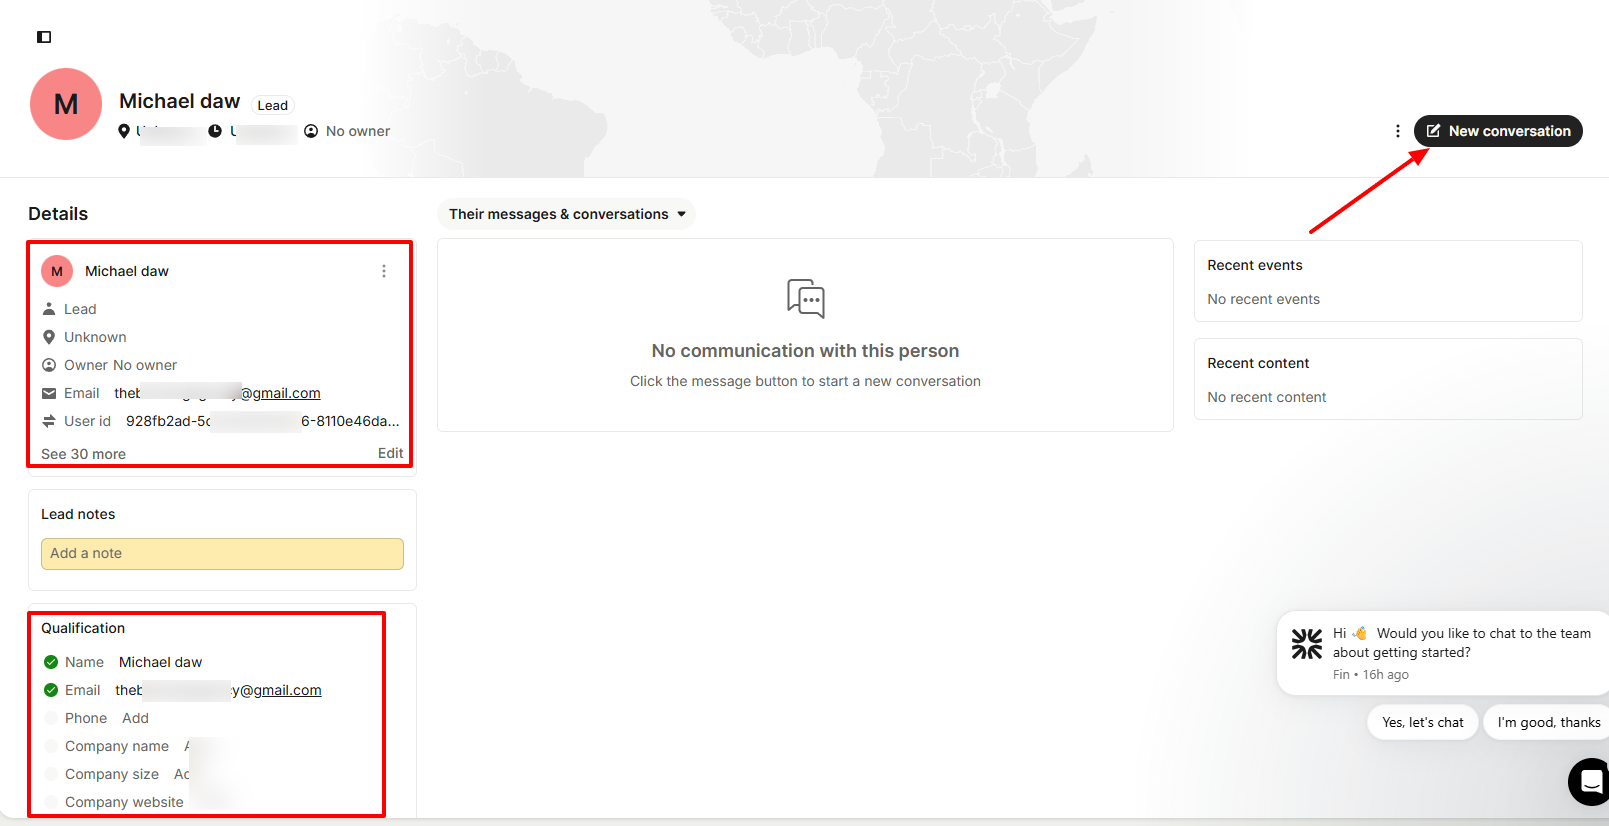
1 . Customers
The Customers feature in Zendesk offers a section that helps you add, search, and manage your customers and users in one place.
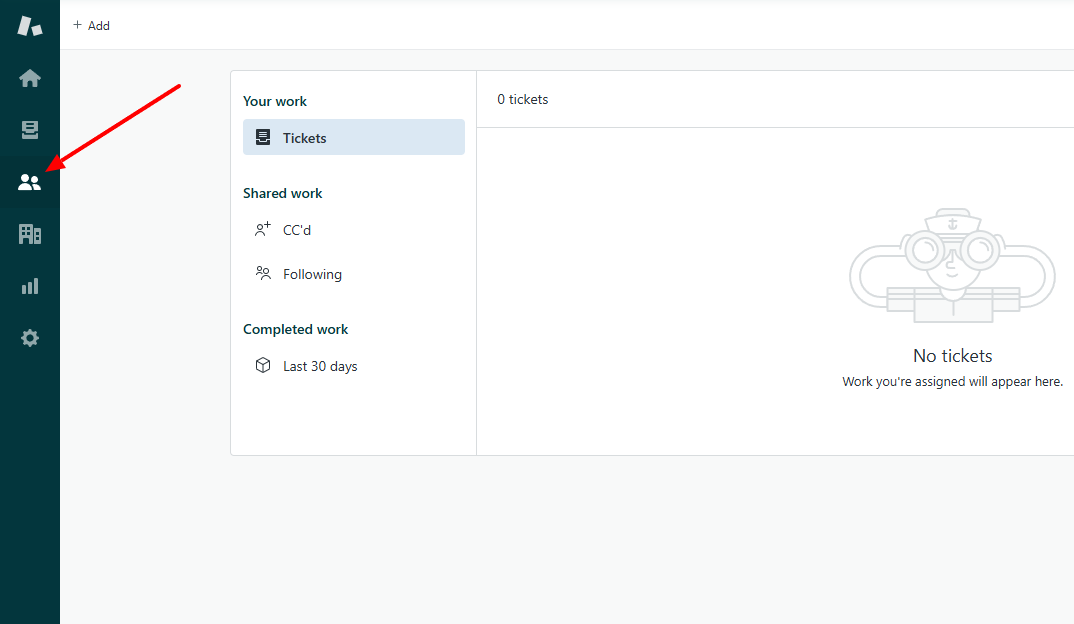
On the sidebar, find “Customers”.
You will have access to customer details like their name, email, tags, and timezone. You can also view when the details were last updated.
Clicking a customer’s name brings up information about their tickets, including their status, subject, when they were requested, and updated. You will also see their group and assignee.
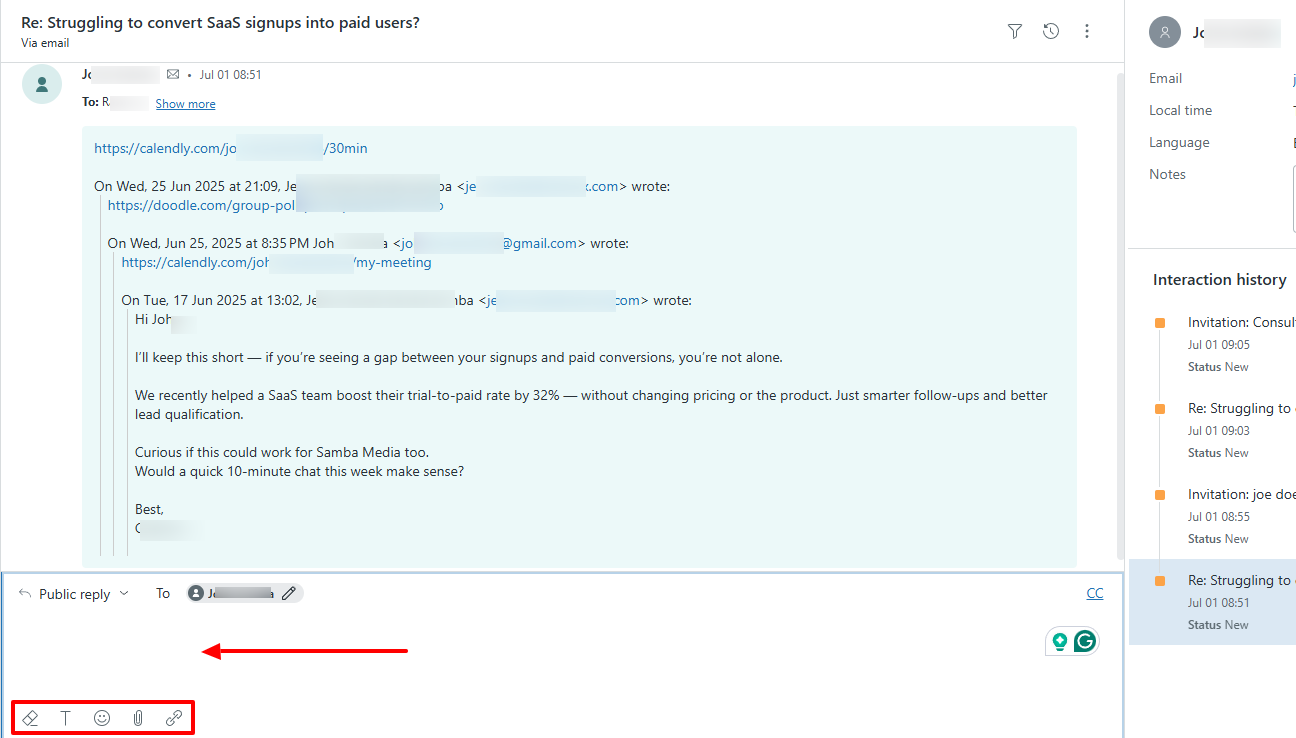
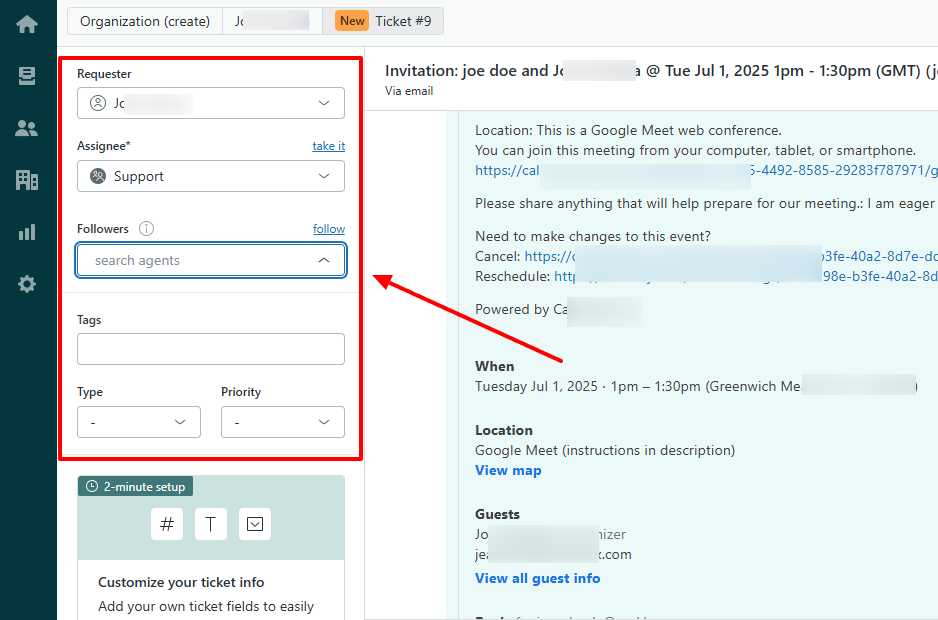
If you click on a ticket, you can read the content and instantly reply without the need to open your Gmail account.
2 . Views
Zendesk’s Views is a feature that displays all your tickets, including those unsolved, unassigned, recently updated, pending, and recently solved.
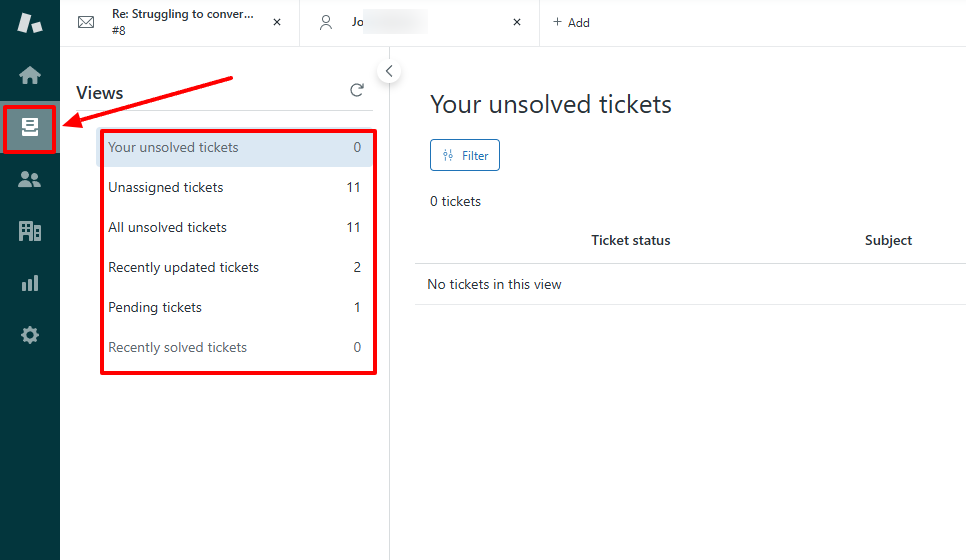
Simply select the ticket group, and it will show you all the tickets that fall under that category. For instance, I selected “Unassigned tickets,” and all my unassigned tickets with their status, subject, requester, and priority were displayed.
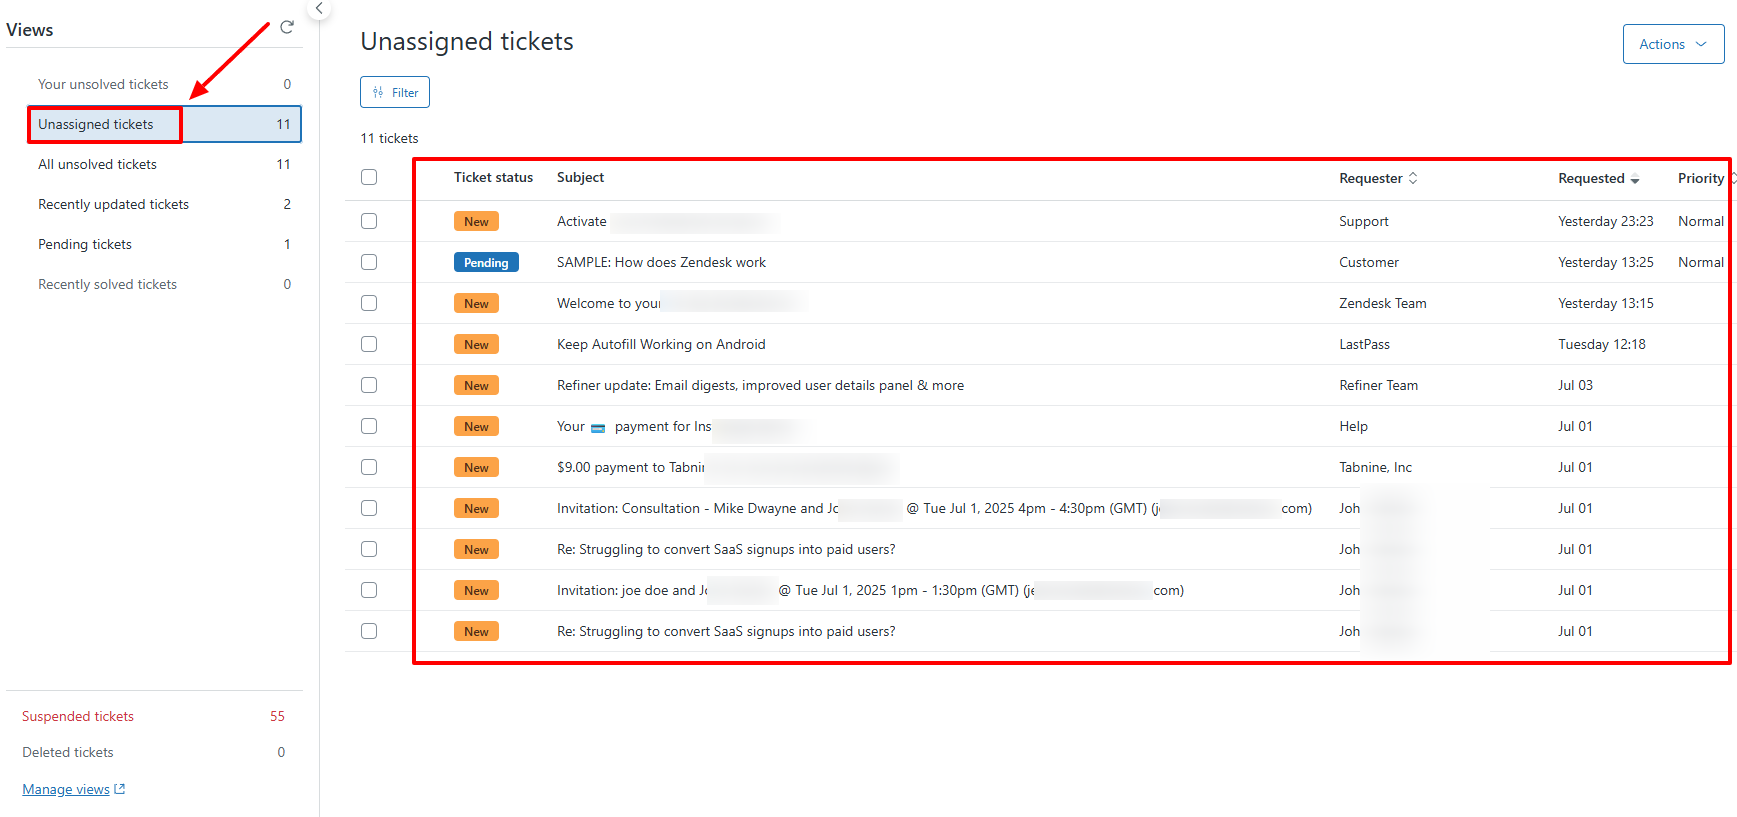
When you click on an unassigned ticket, you can choose a requester, an assignee, tags, type, and priority.
Best for:
Large companies seeking to track customer service and use an advanced ticketing system.
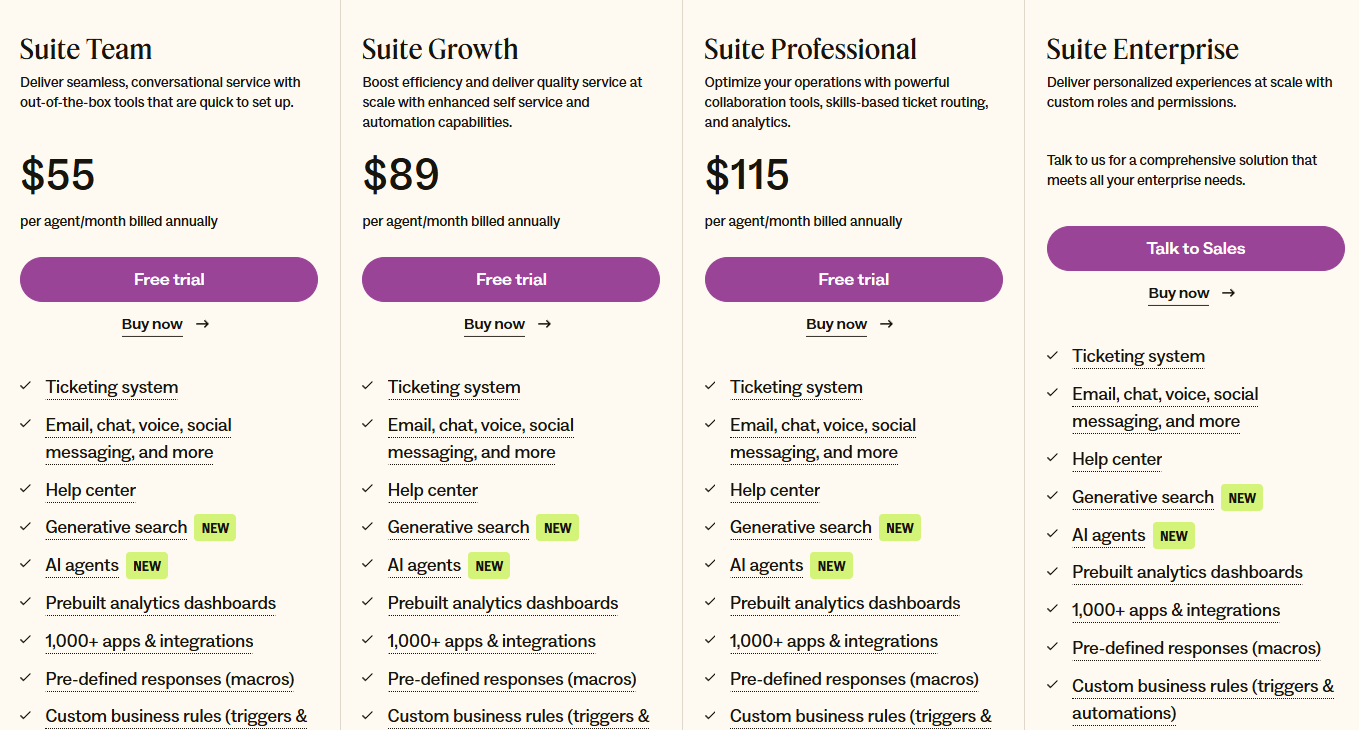
Pricing:
- Suite Team: $55/per agent/per month, billed annually
- Suite Growth: $89/per agent/per month, billed annually
- Suite Professional: $115/per agent/per month, billed annually
- Suite Enterprise: Custom pricing
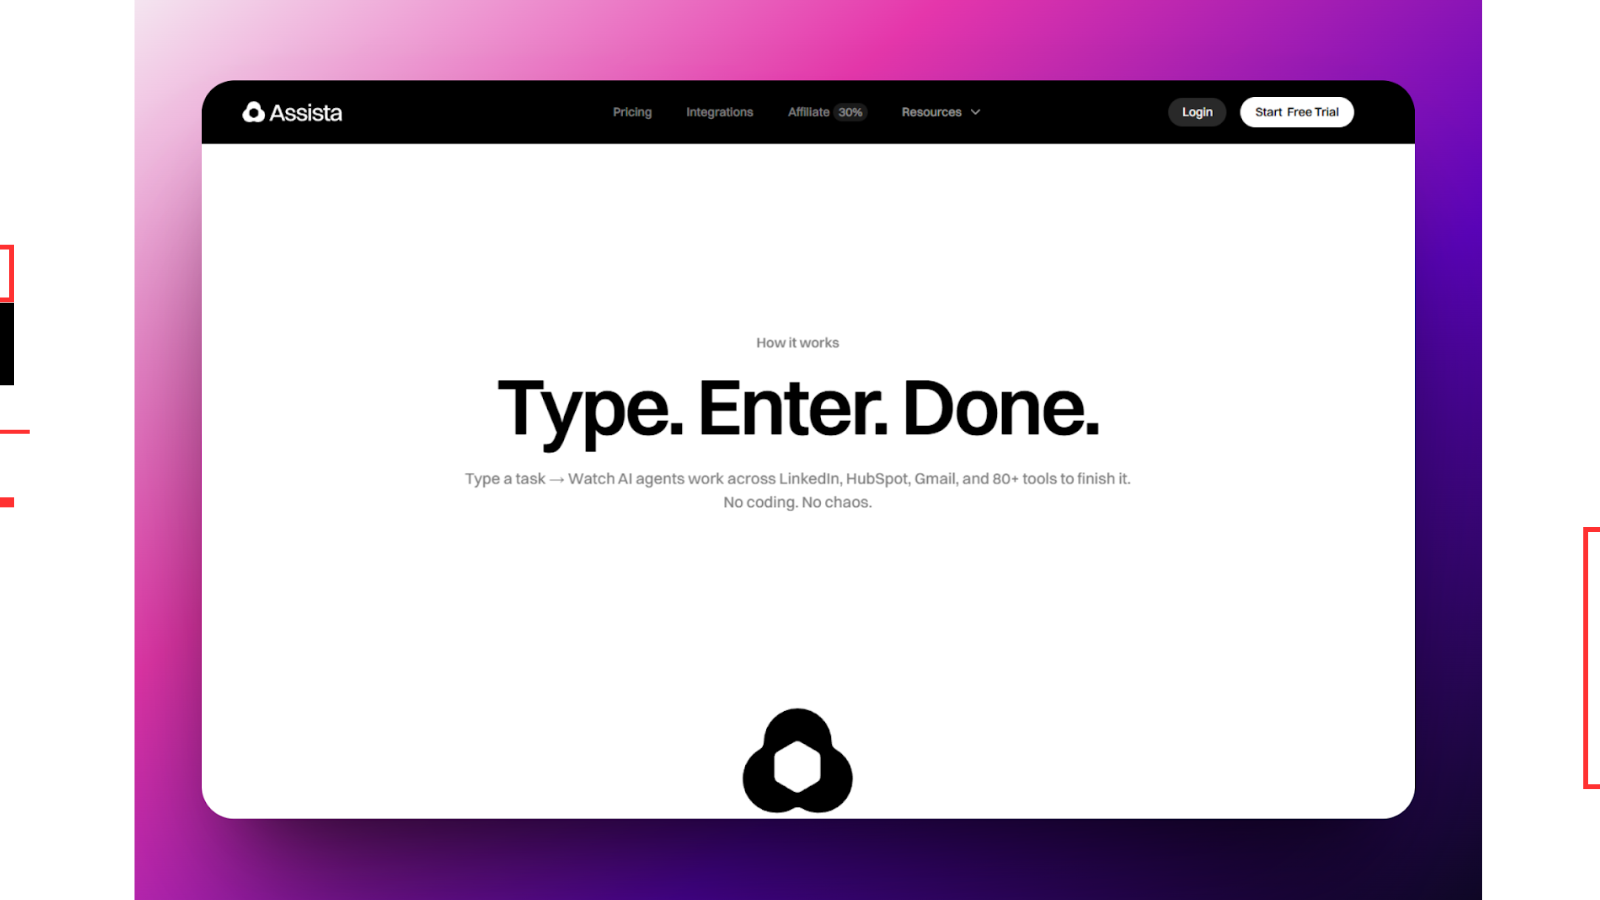
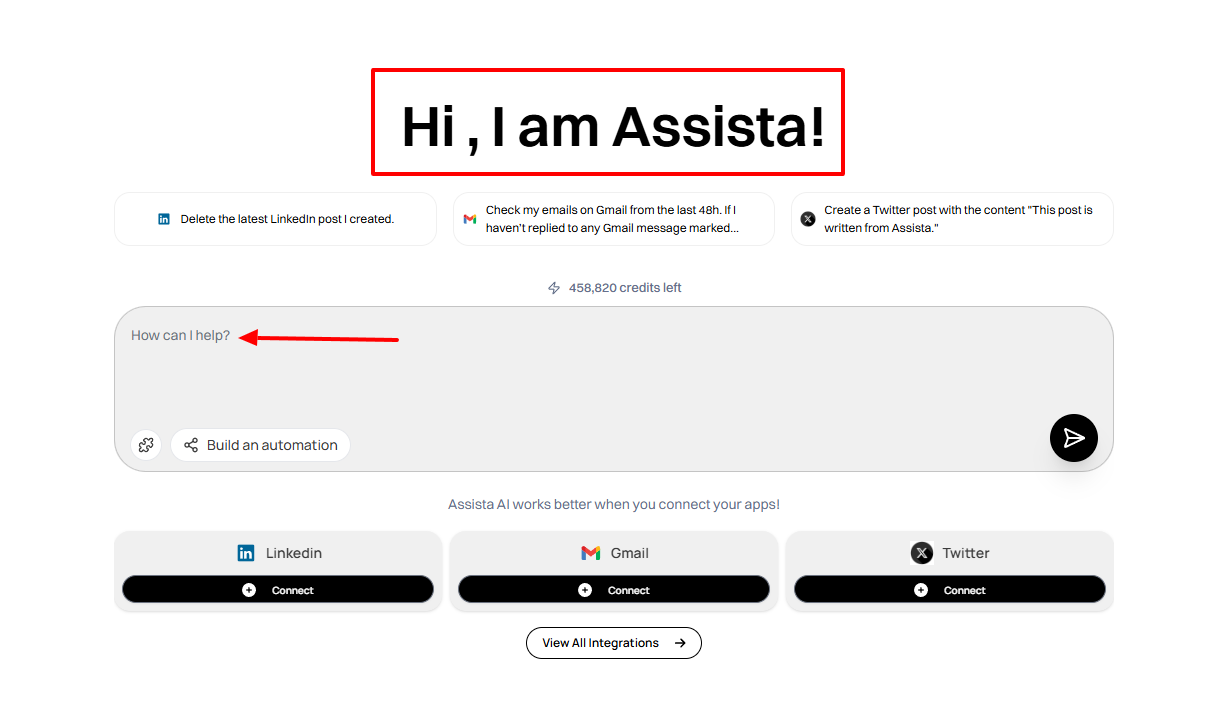
Assista AI
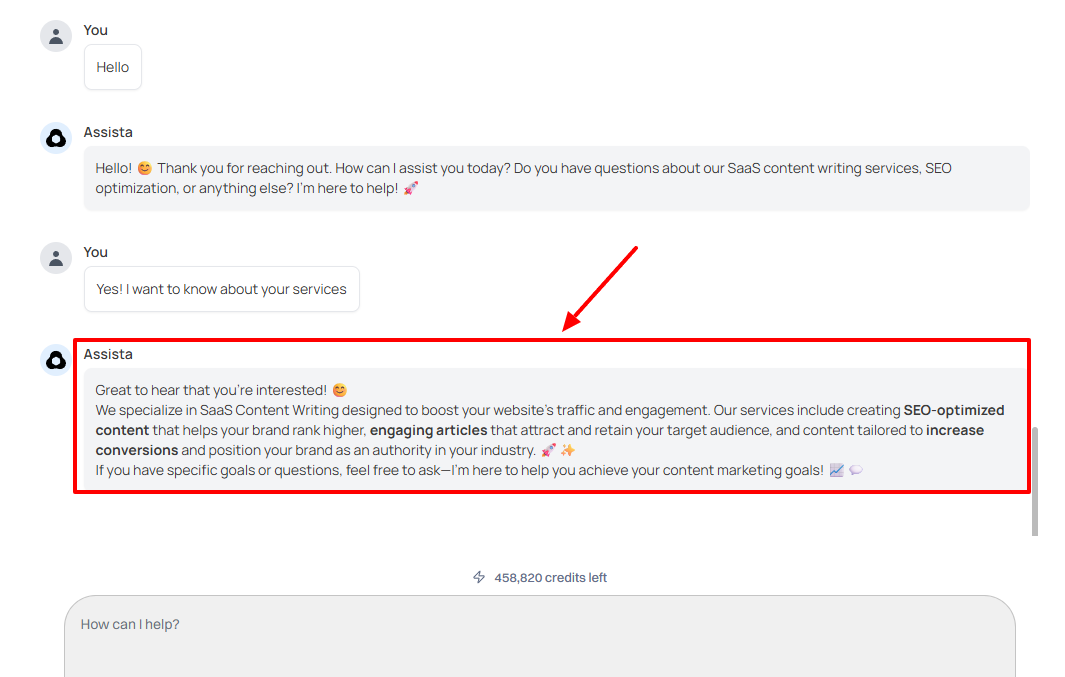
Assista AI comes next on the list of Best AI Agents for Customer Support.
It lets you create various automations simply by typing a prompt. You can enter “create an agent for customer support” as a prompt, add a description, mention the channels you want it to be run on, specify the type of support, and the tone to use.
With Assista’s Template feature, I can choose a template that suits my needs, add an automation name, and a command. I can also choose how often it can run, e.g., every two minutes, every day, week, or month.
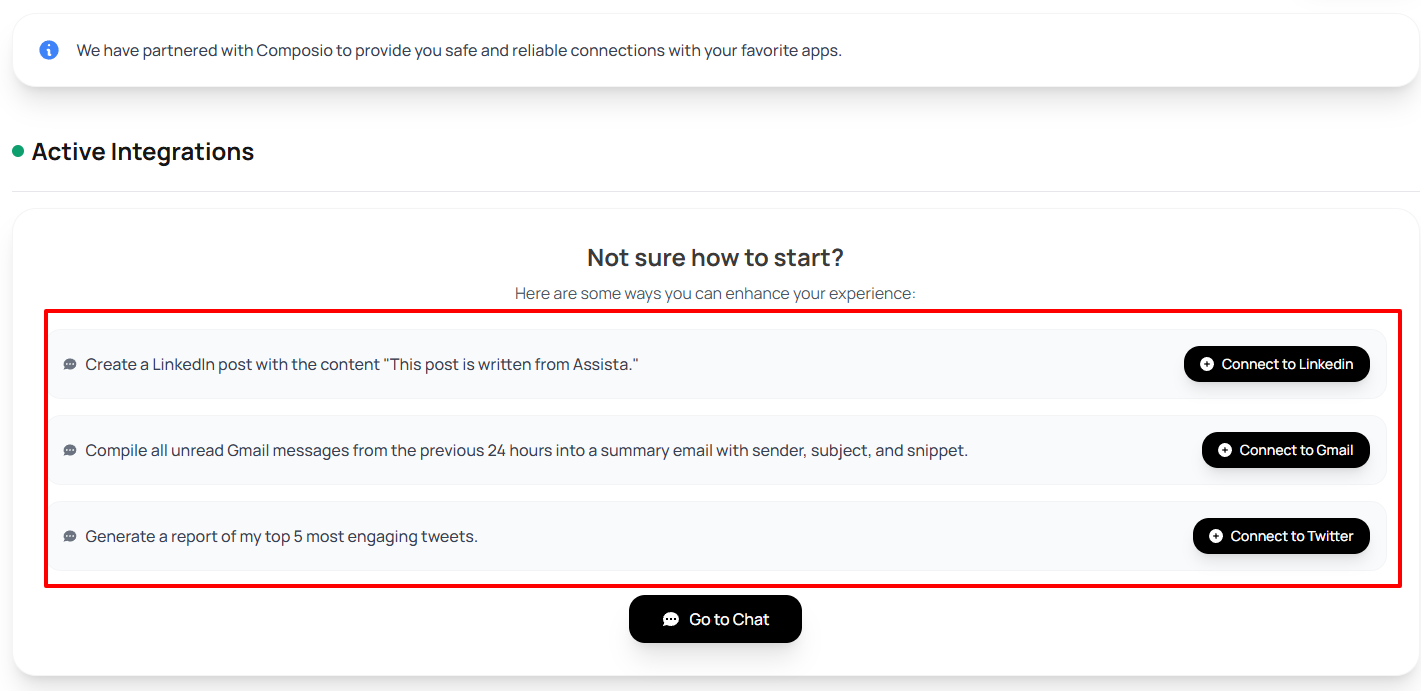
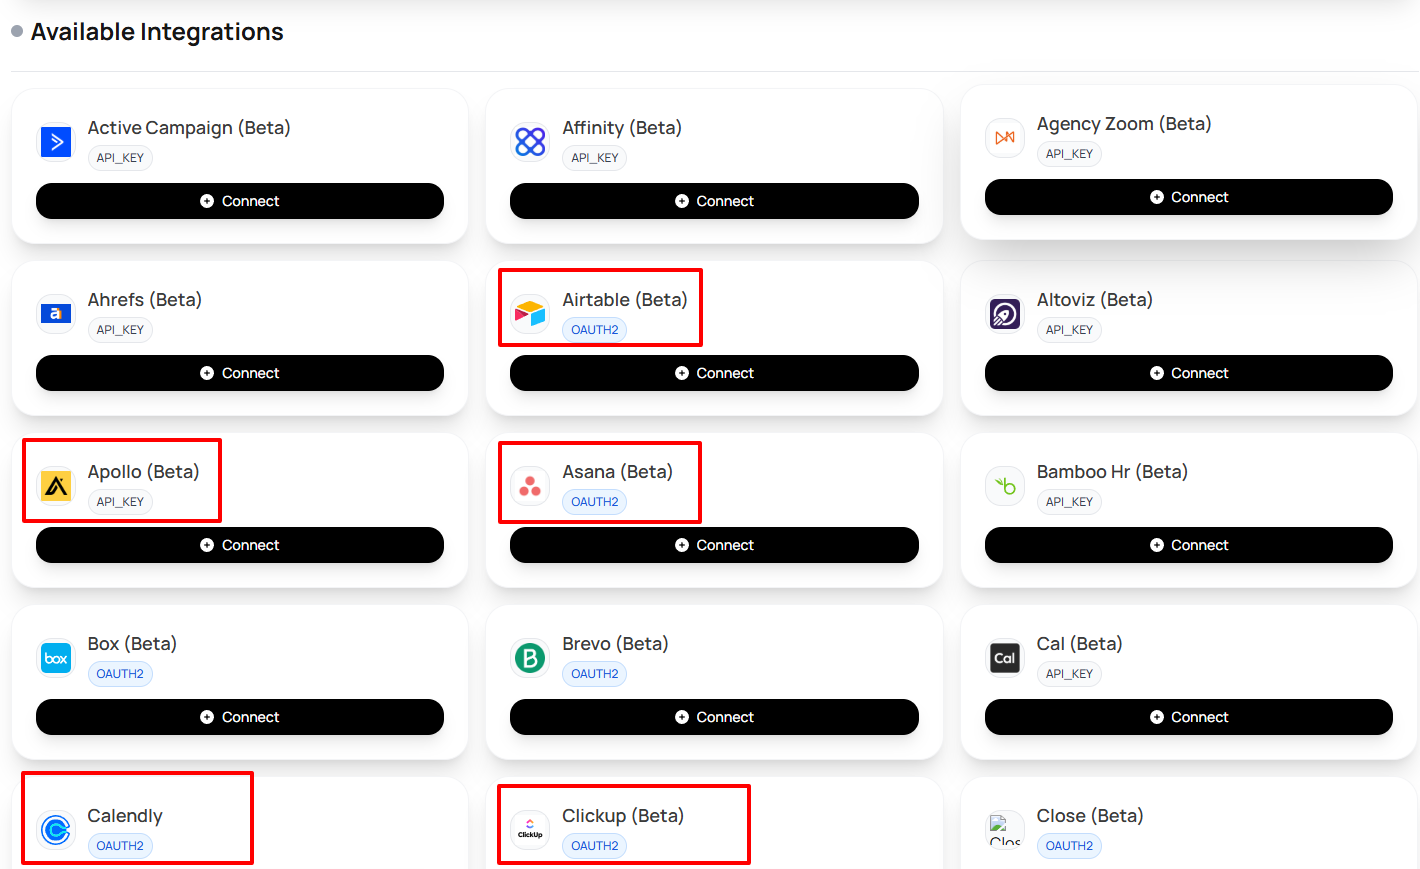
But there is more! The Integrations section shows you the active integrations you can start with. It also displays a large number of tools you can integrate. These include Calendly, Asana, Clickup, Airtable, LinkedIn, and many more.
Assista can help you save time as your AI agent for customer support. Your team will no longer have to do a lot of thinking in this regard because Assista will.
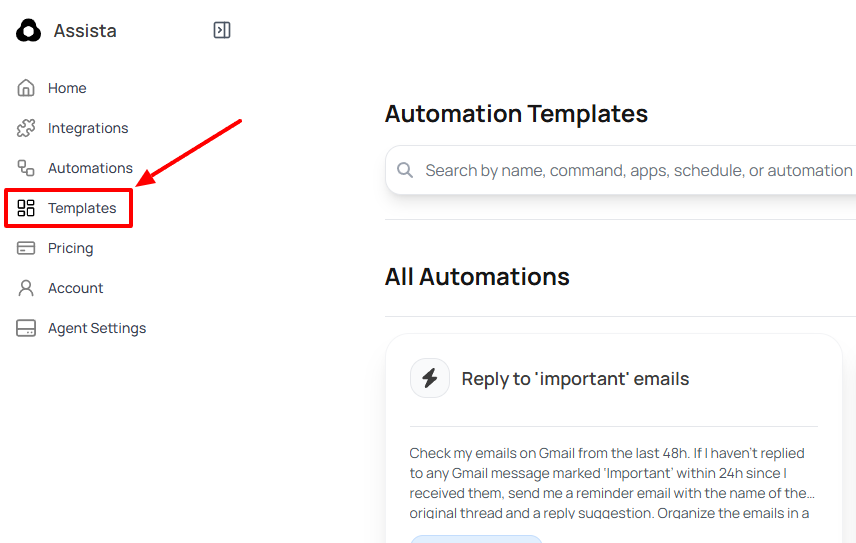
First, on the sidebar of the interface, head to “Agent Settings”.
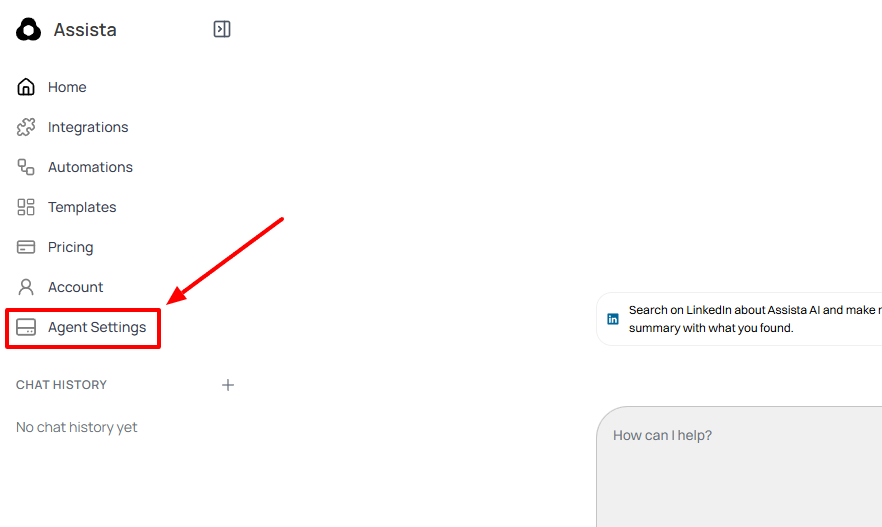
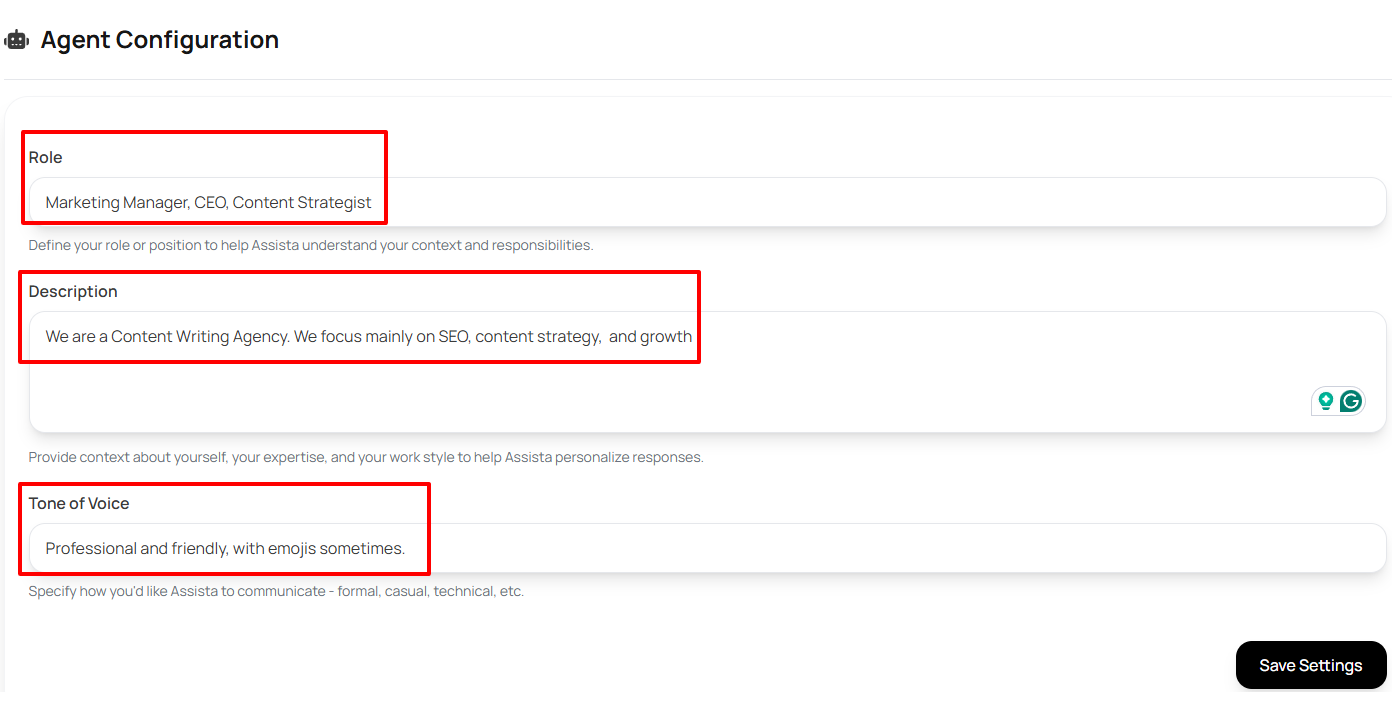
Configure Assista AI to match your brand. Enter the role, description, and tone of voice Assista will use to communicate.
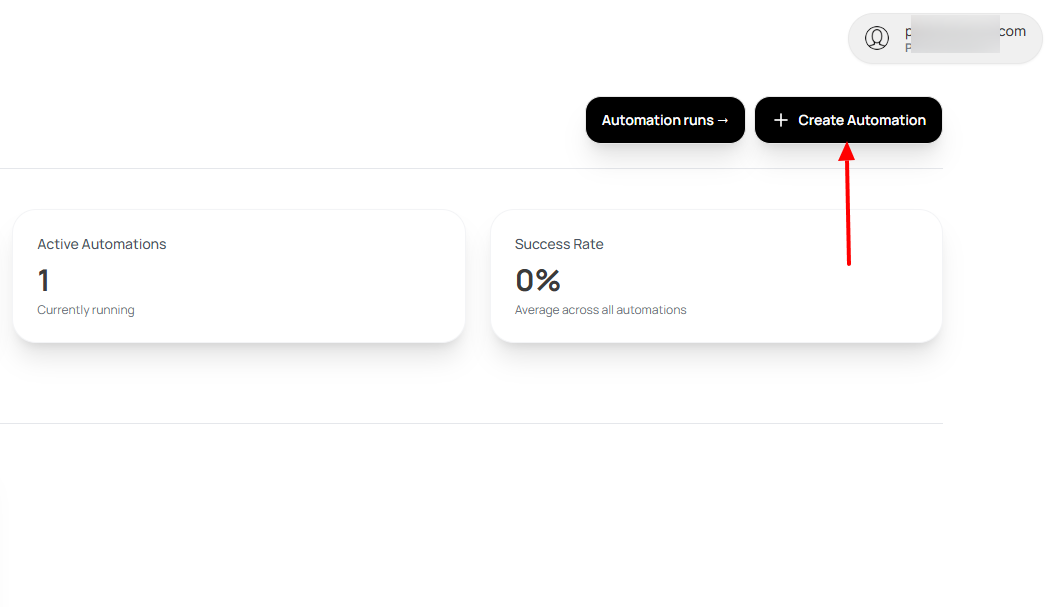
Once you are done with that, head to “Automations”.
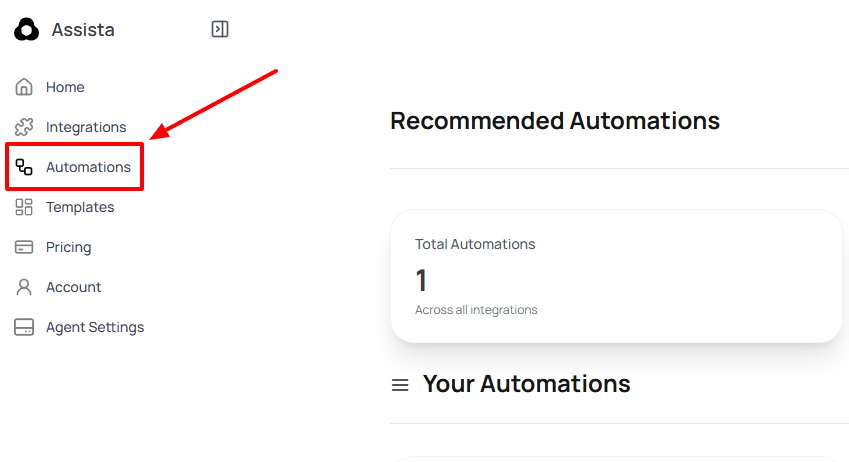
Click “Create Automation”.
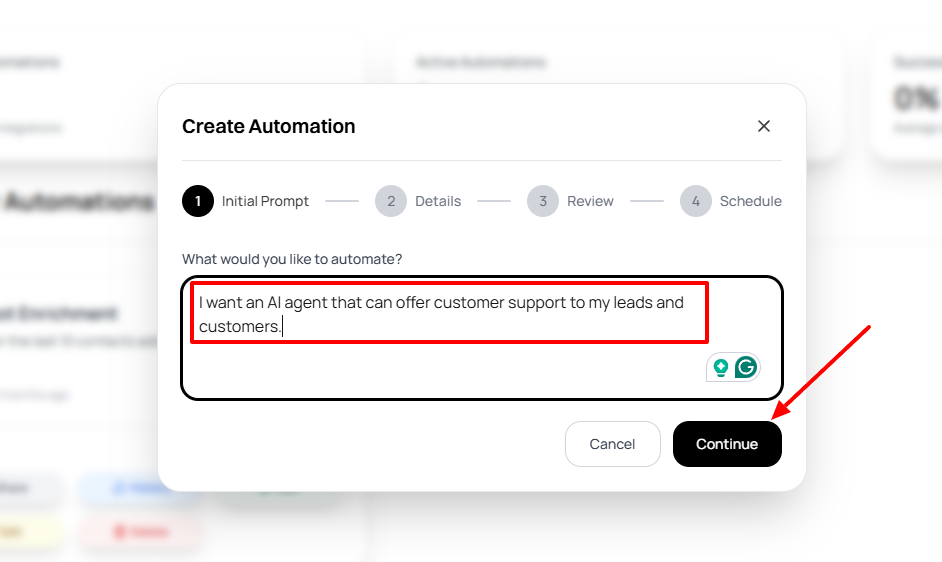
Now, type plainly what you want to automate. For example, an AI Agent for customer support.
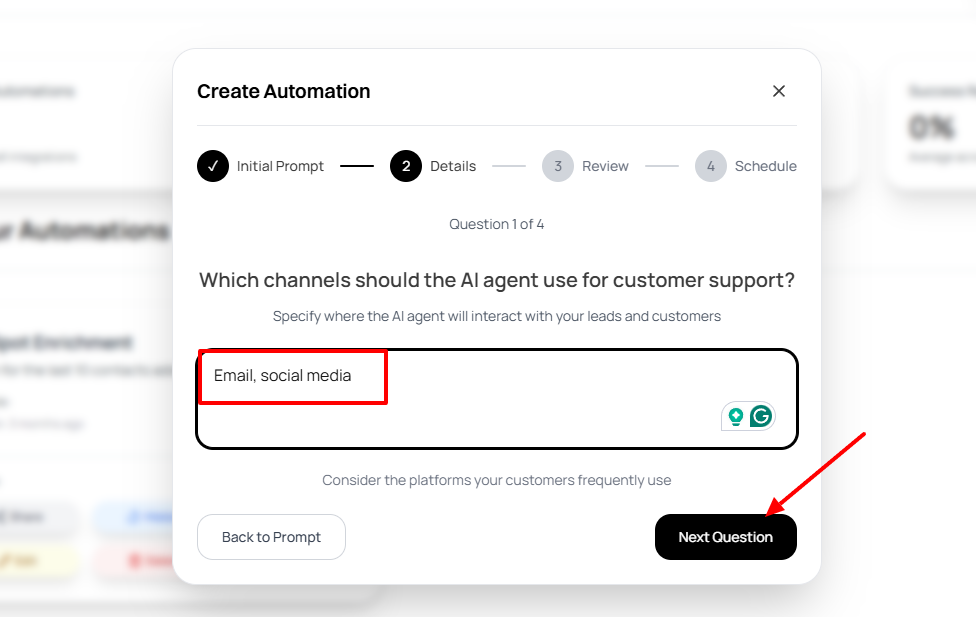
Afterward, enter the channels the AI agent should use for customer support.
In the following step, mention the type of support you want the AI agent to provide. For example, you may want the agent to deal with “Product inquiries”.
.png)
Then choose the tone the AI agent should use in communications.
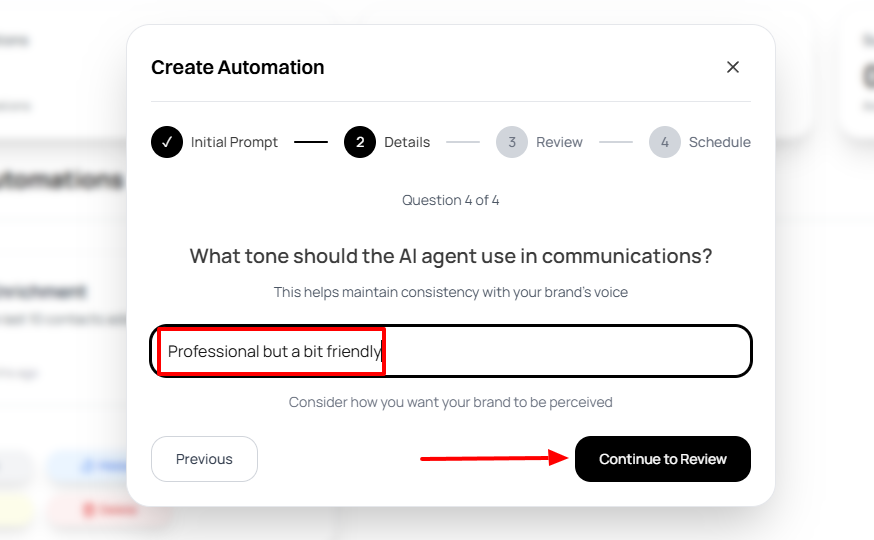
Before scheduling the automation, review all the information you have provided.
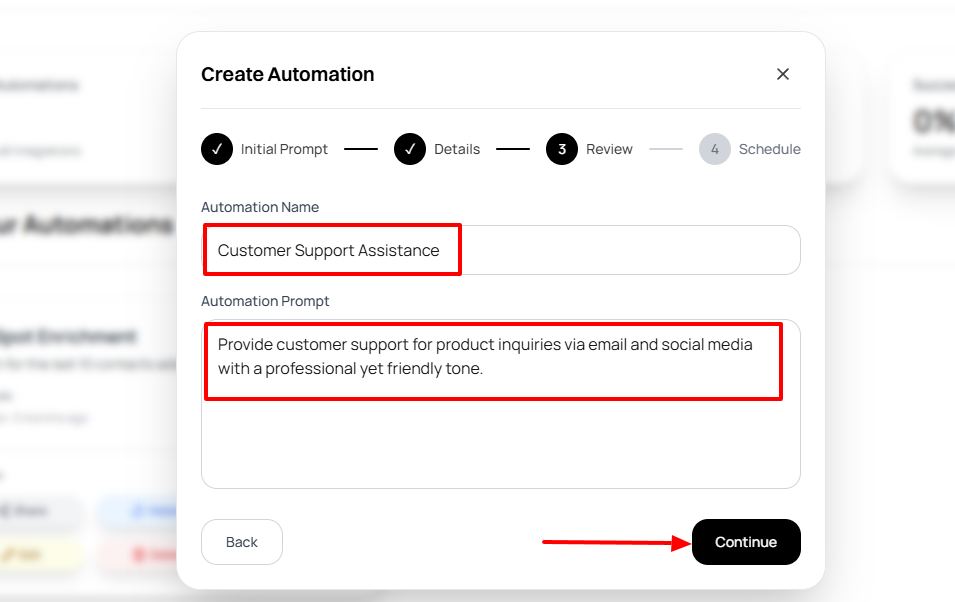
Finally, choose when the automation should run and save it. You can conduct a test run as well.
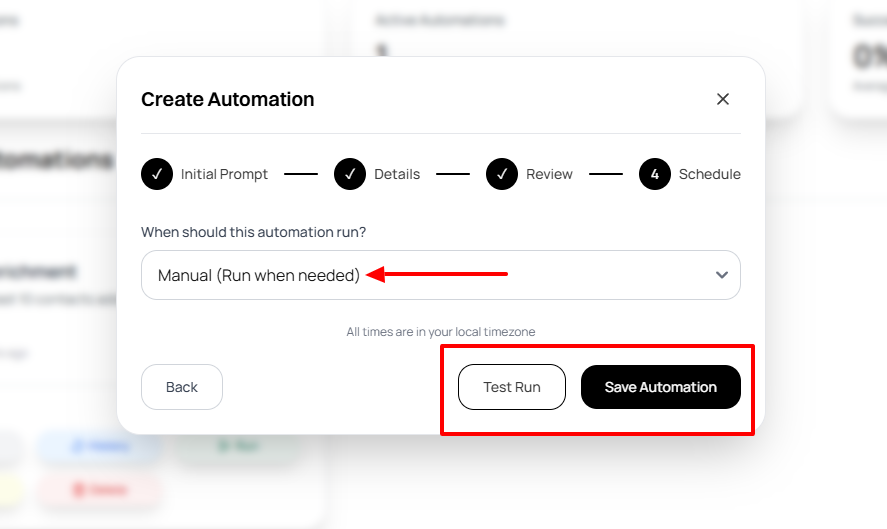
Reaching this point means you have successfully created your customer support assistant.
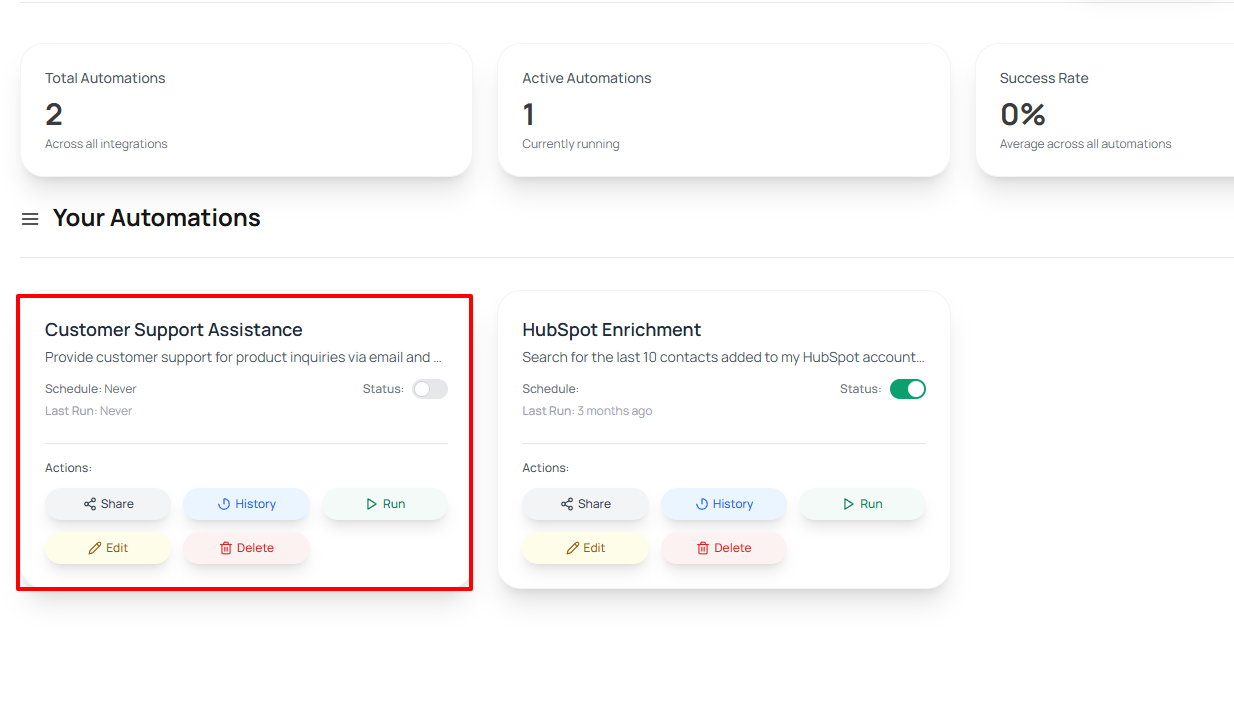
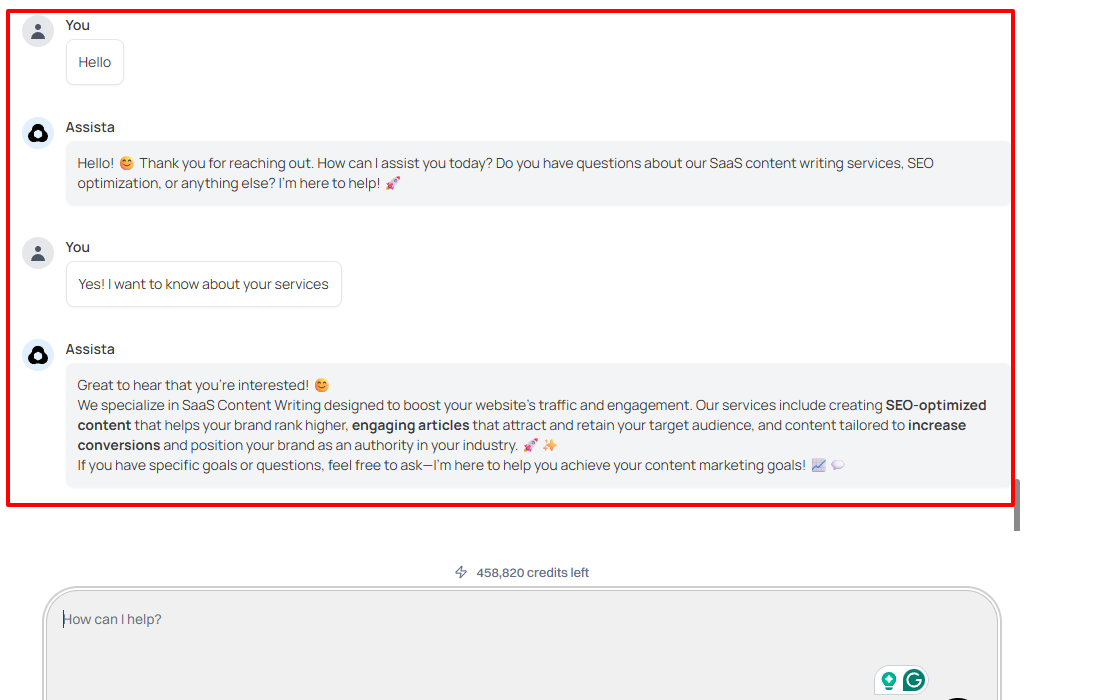
The AI agent will engage with you in real time, providing accurate information.
Assista AI has a lot more to offer. Let’s dive into a few more features.
Key Features
1 . Templates
If building an automation from scratch always feels difficult, Assista AI is a solution that can save you a lot of time. It offers a lot of templates you can start with.
Perhaps, you want to check out all unread payment-related emails. Assista has a template that can summarize unread emails from today that mention “invoice” or “payments”.
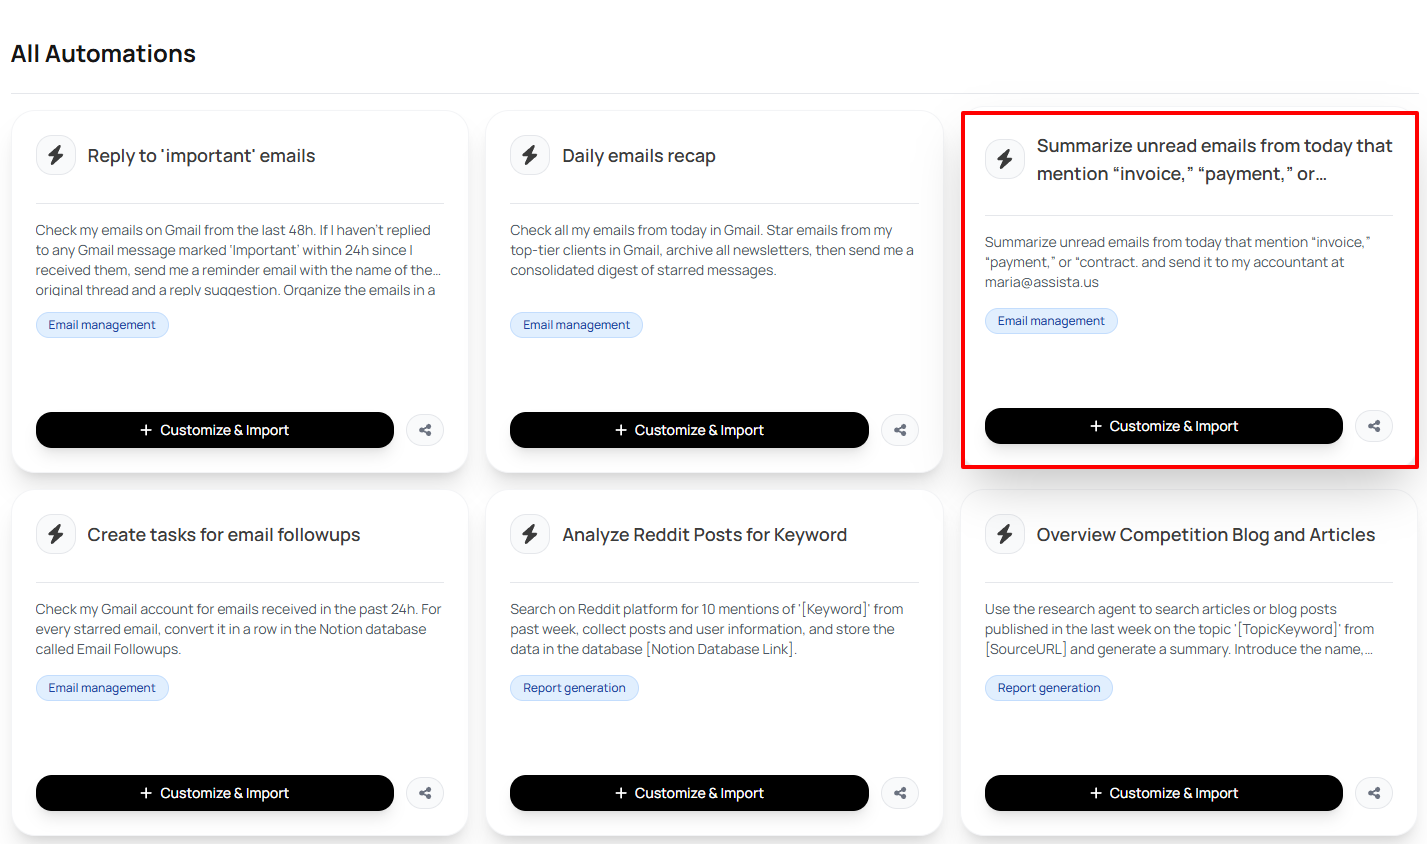
Moreover, you can customize any automation template you choose to use.
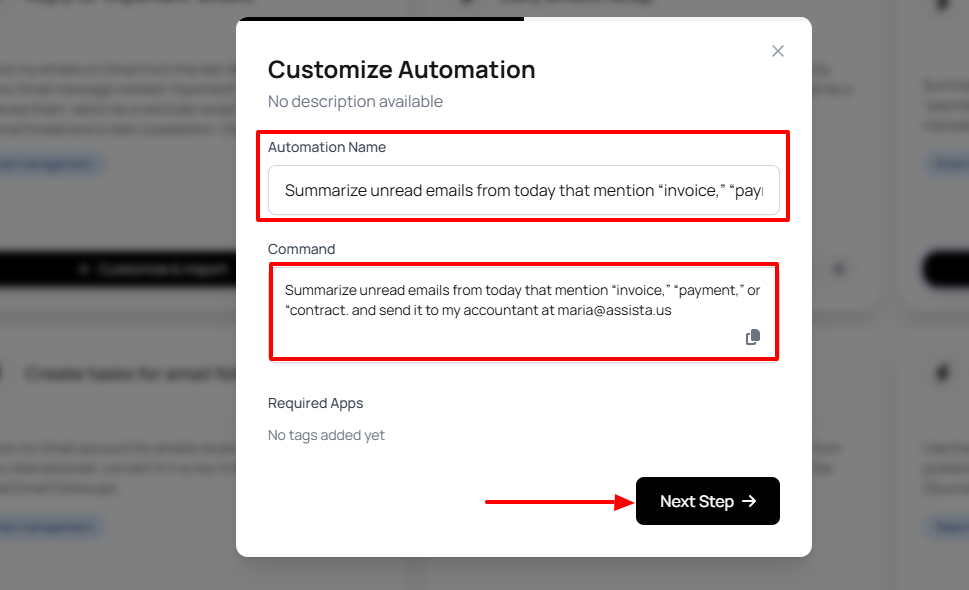
Apart from customizing it, Assista allows you to set how often the automation should run. After configuring these settings, create your automation.

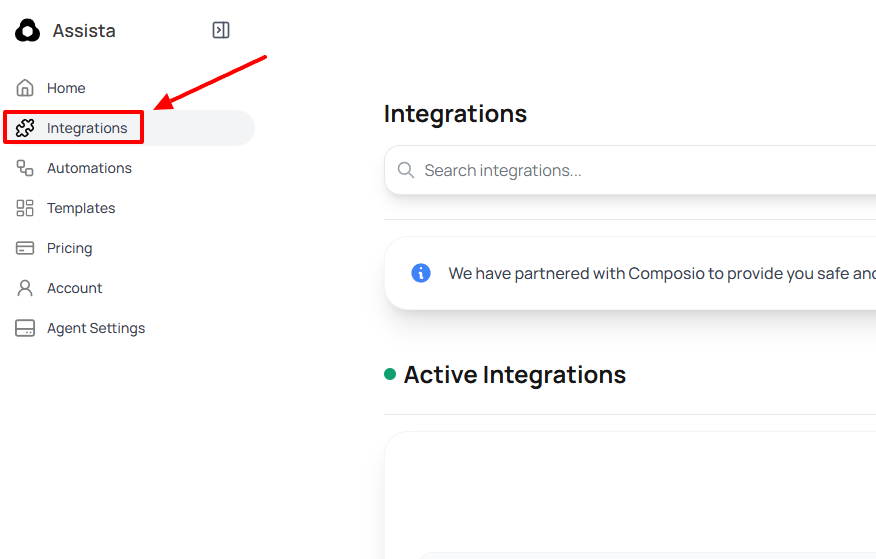
2 . Integrations
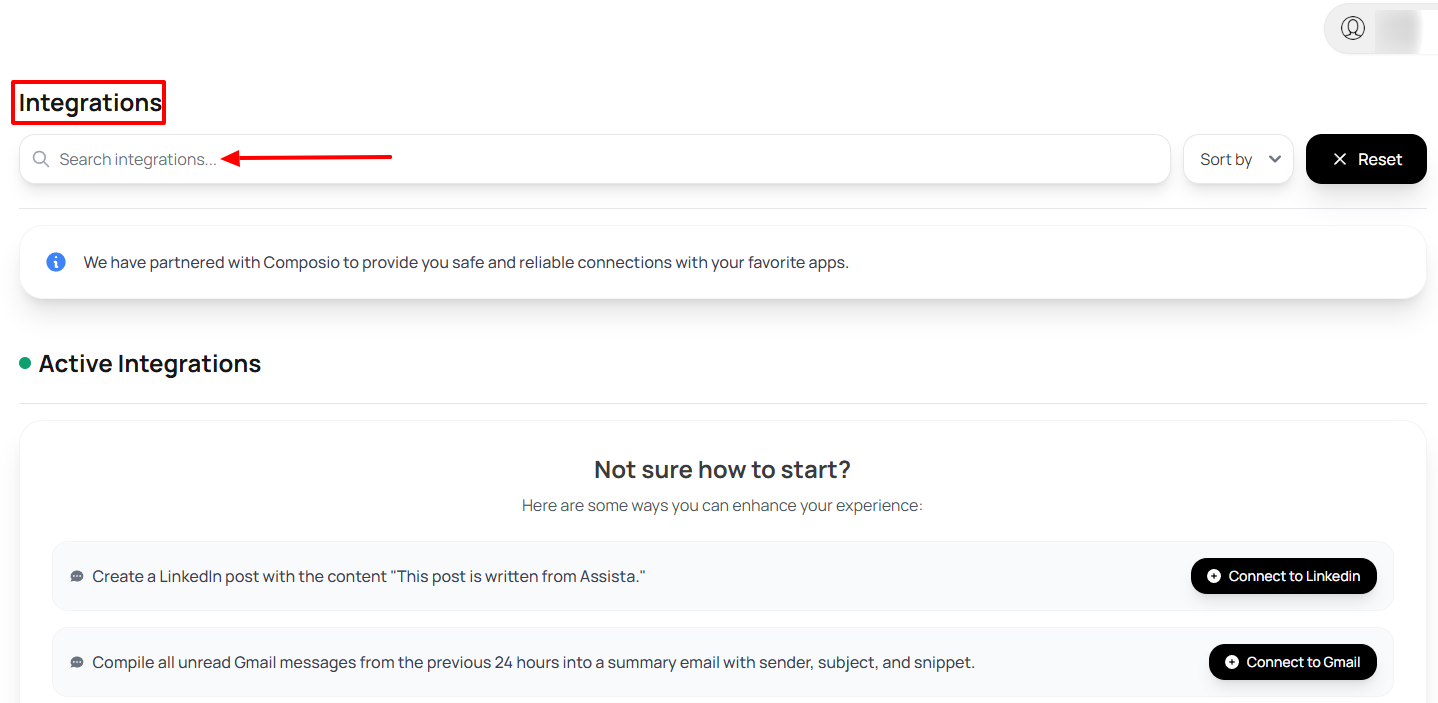
One thing I love about Assista is the advanced integration system it has. There is a wide range of connection-ready tools that you can take advantage of. Let me show you what it comes with.
Having LinkedIn as one of the integratable apps, you can, for example, create a LinkedIn post with the content” This post is written from Assista”.
With its Twitter integration, you can ask Assista AI to generate a report of your top 5 most engaging tweets.
The connections are endless. You can integrate with Apollo, Asana, Calendly, ClickUp, Airtable, and many more.
To search for a specific tool or platform to connect with Assista, you can use the search bar.
Best for:
- Small and large businesses seeking an AI tool solution with advanced automation and integration systems.
Pricing:
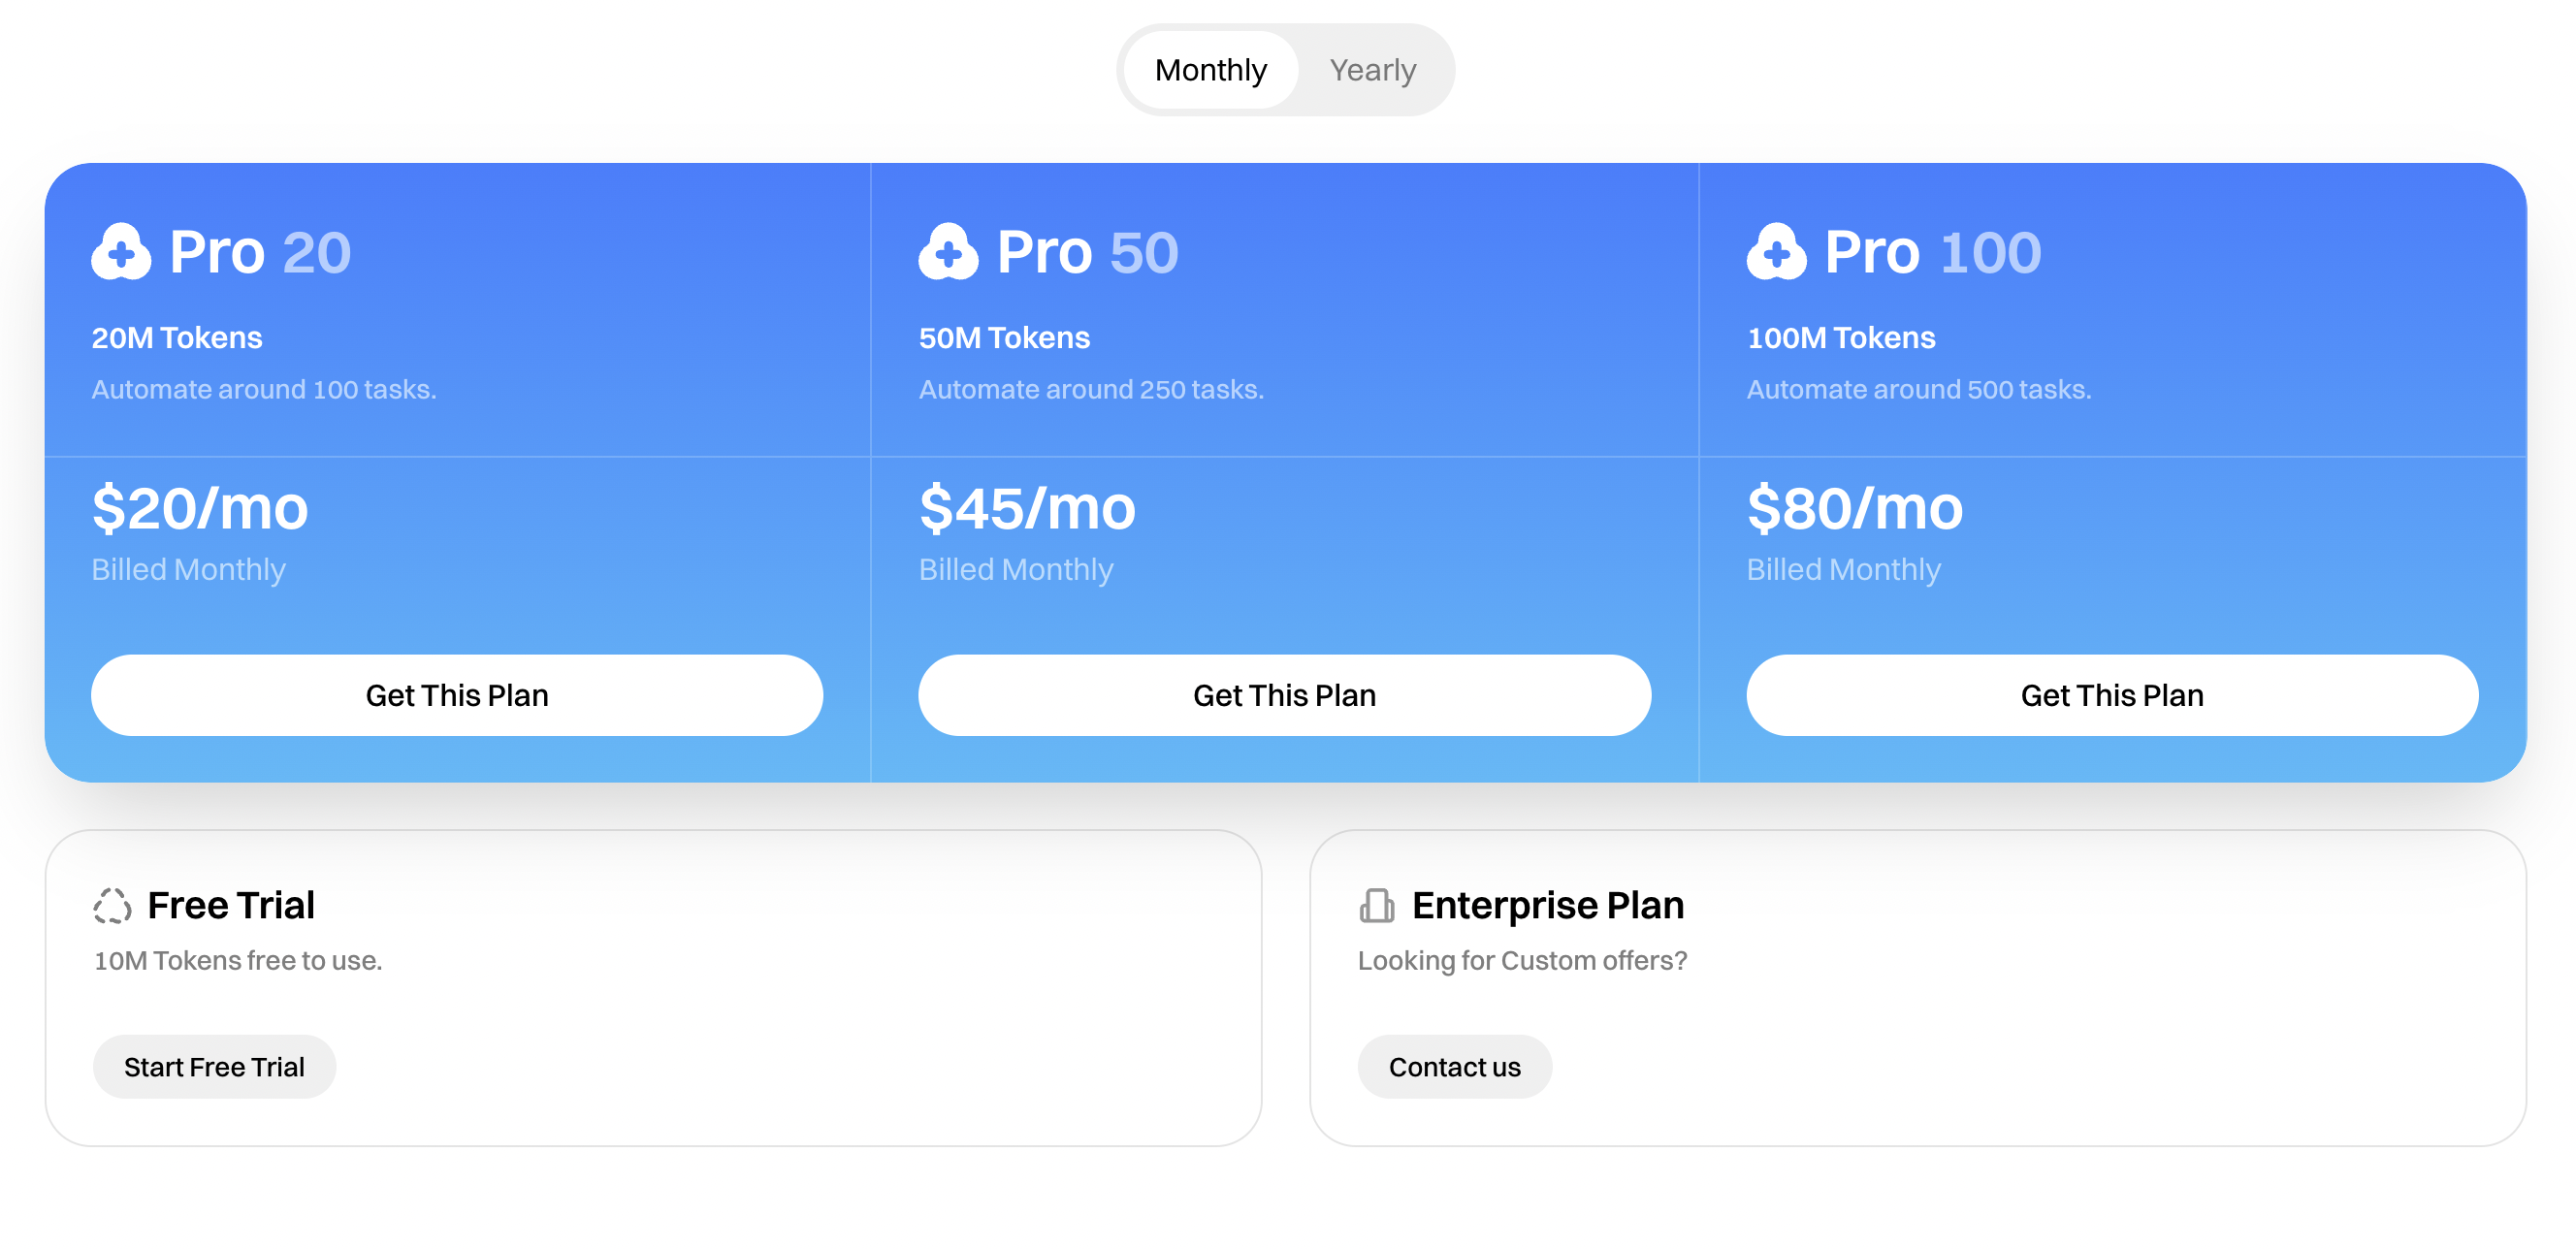
- Free Trial
- Pro 20: $20/month
- Pro 50: $45/month
- Pro 100: $80/month
Intercom Fin
Third on this list is Intercom Fin. It sports the Fin AI agent you can set up when you feed it with content you sync from a website, upload a document, create a new article, or a snippet. You can then add a website link and name.
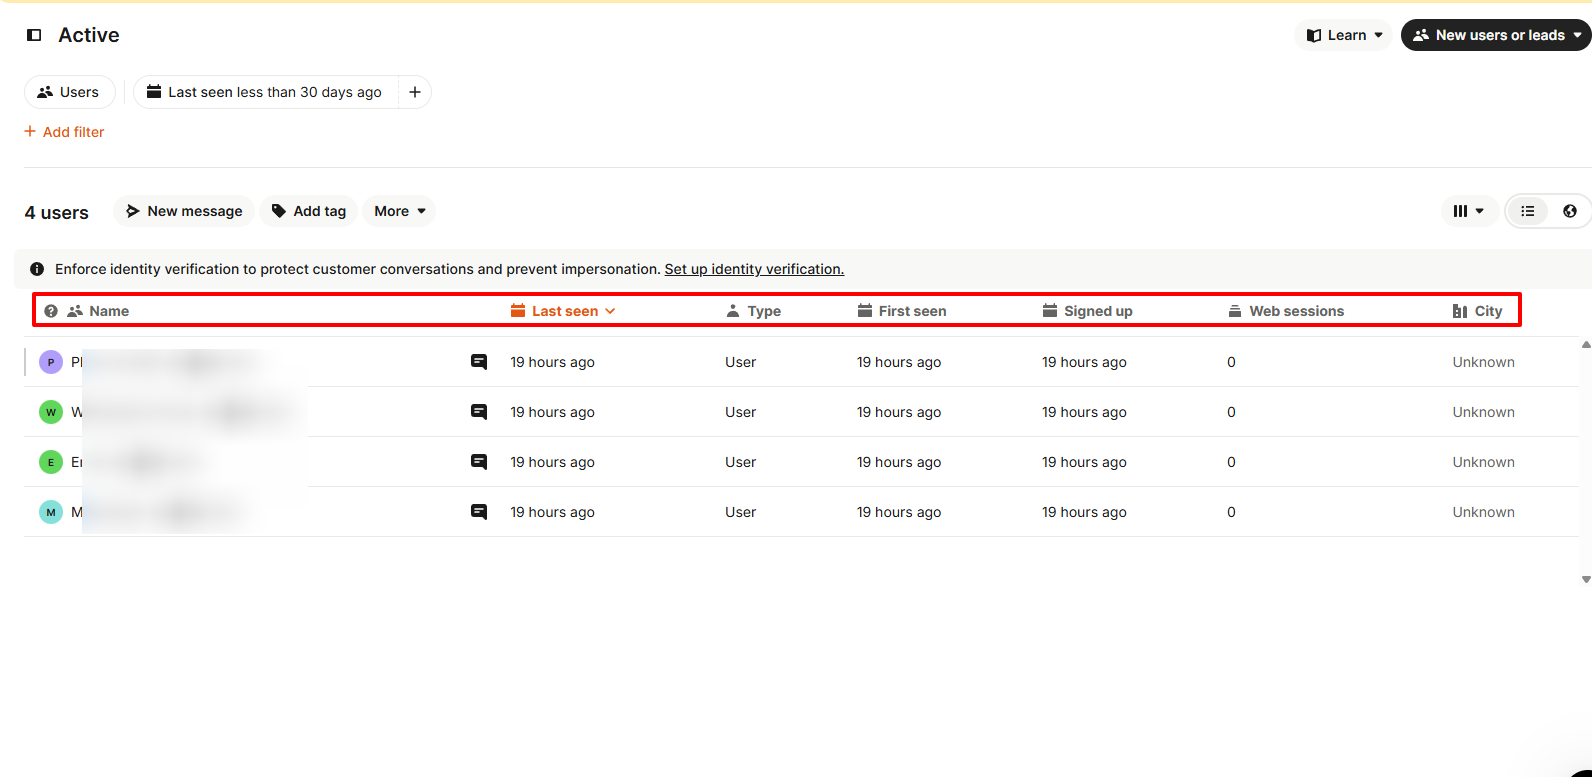
The Contacts feature displays all your users, companies, and conversations. If you go to users, you can view information like their name, type, city, first seen, etc.
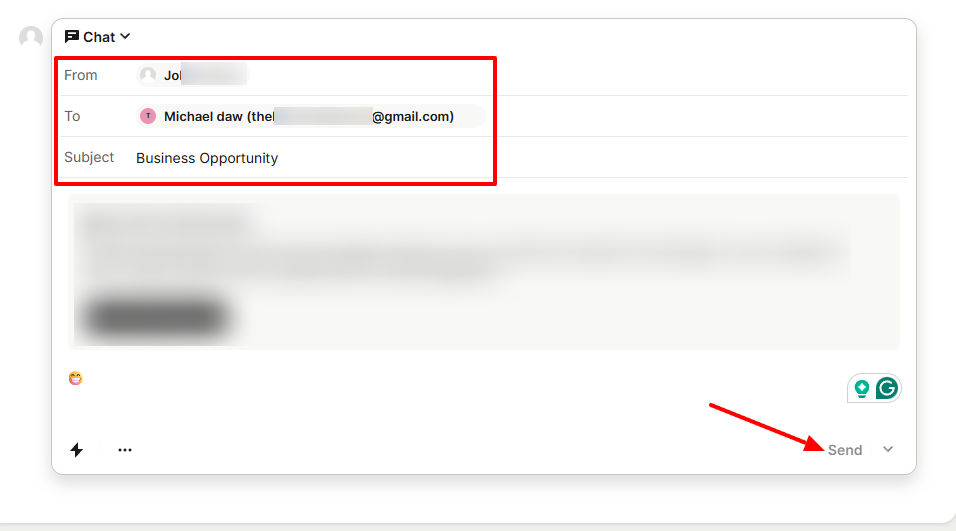
With its Outbound feature, I can send personalized messages to my customers. I can use a template or start from scratch and add an email, address, subject, and message. I can also add links in the message.
What’s more, there is a Reports feature that gives you an overview of all your conversations, including new conversations, the ones replied to, comparison of new conversations and replies, and the hourly distribution of new conversations.
Intercom is well-known for its AI Agent called Fin, and this is what we are going to set up.
To do that, locate “Fin AI Agent” on the sidebar.
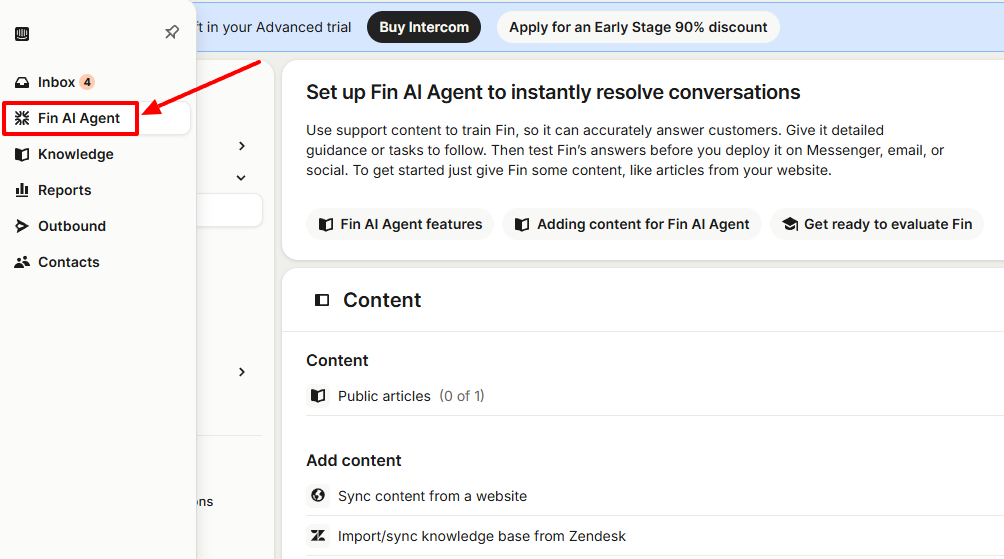
For the AI agent to function properly, you need to feed it with content. There are many ways to do that: upload a document, create a new article, or provide a snippet. In this instance, I will sync content from a website.
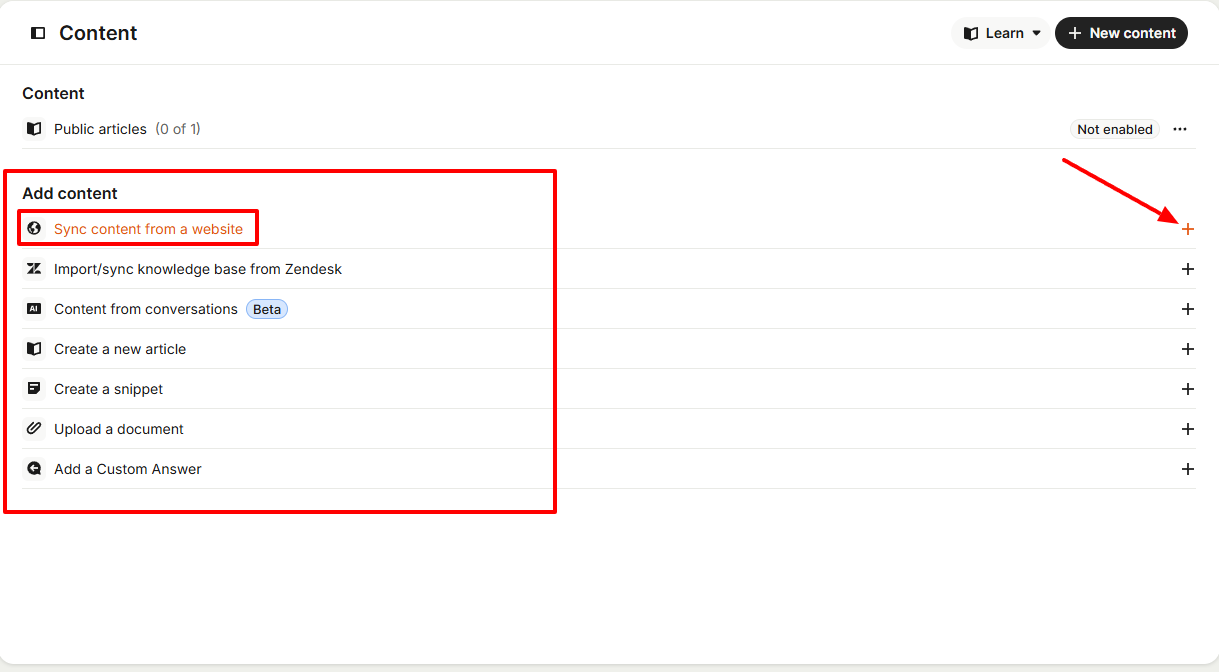
Next, add the website link and name.
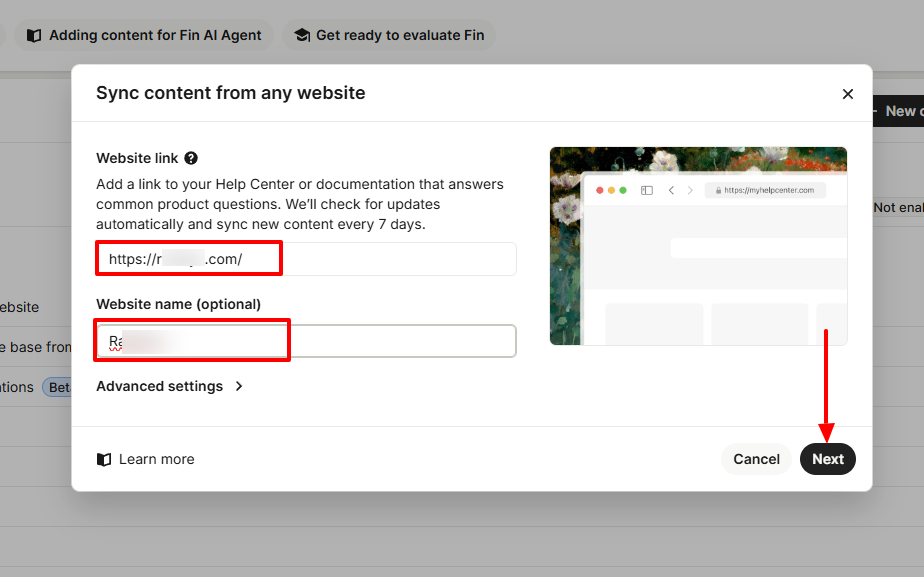
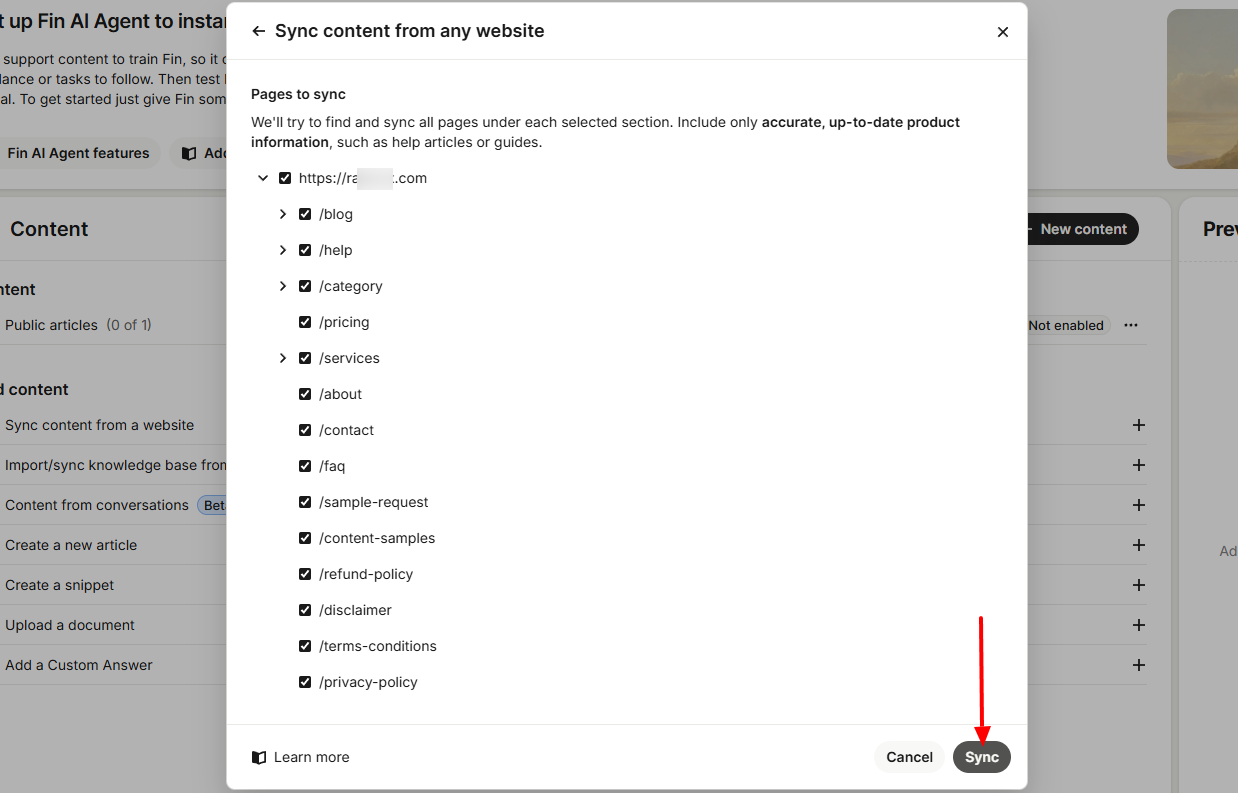
The AI will find and list the different pages of your website. When ready, you can click “Sync”.
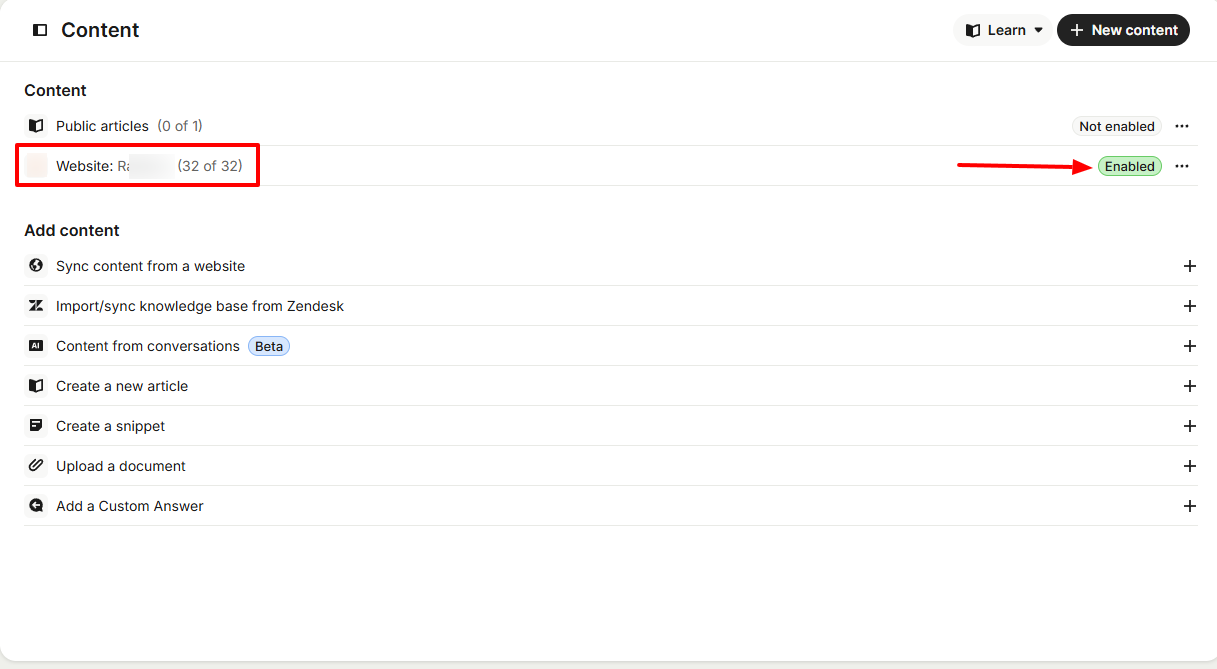
Make sure the website is enabled because that’s where the AI agent will fetch its answers from.
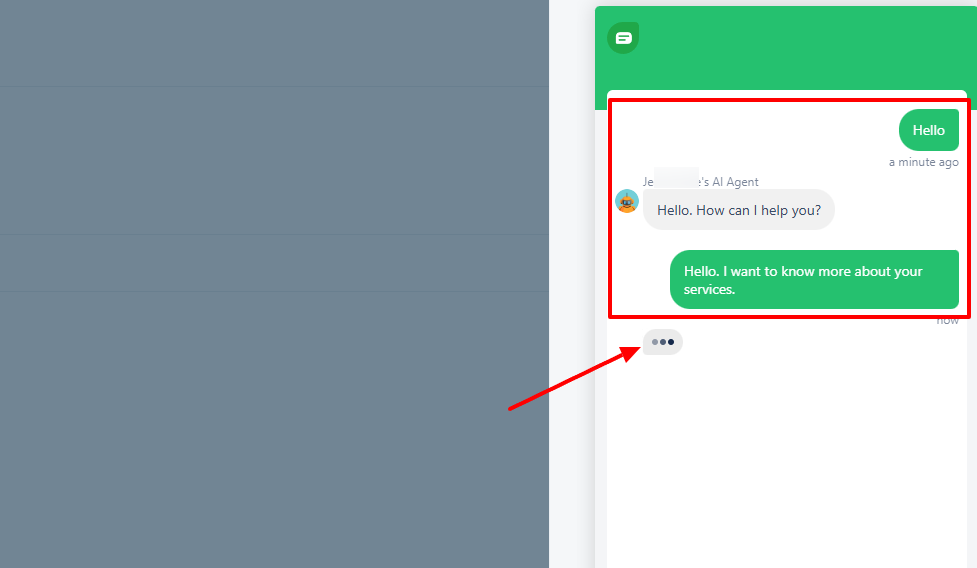
Now let’s give it a try! During my test, I asked for the prices of the agency.
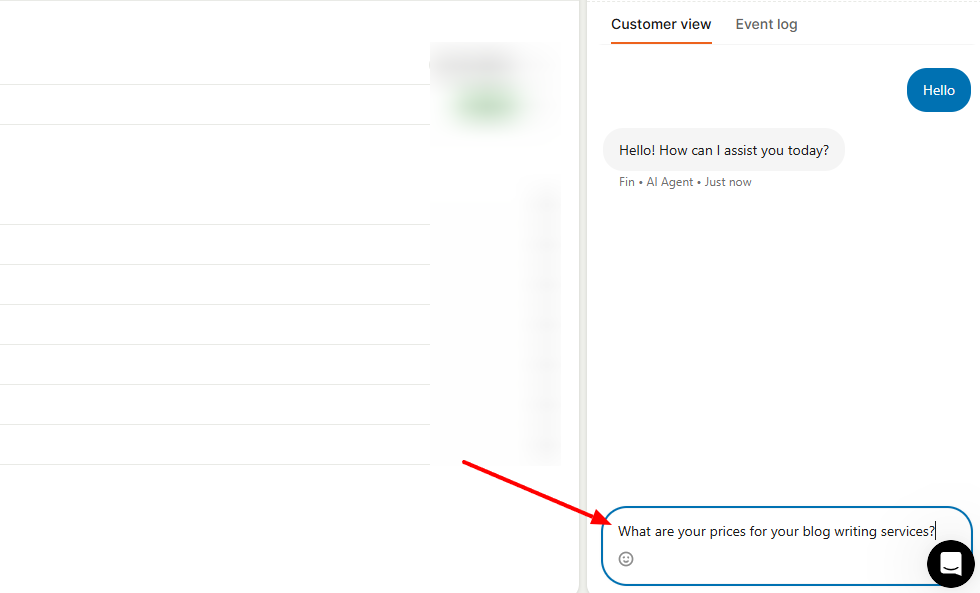
Interestingly, Fin AI Agent responded based on the information available on the website I connected to.
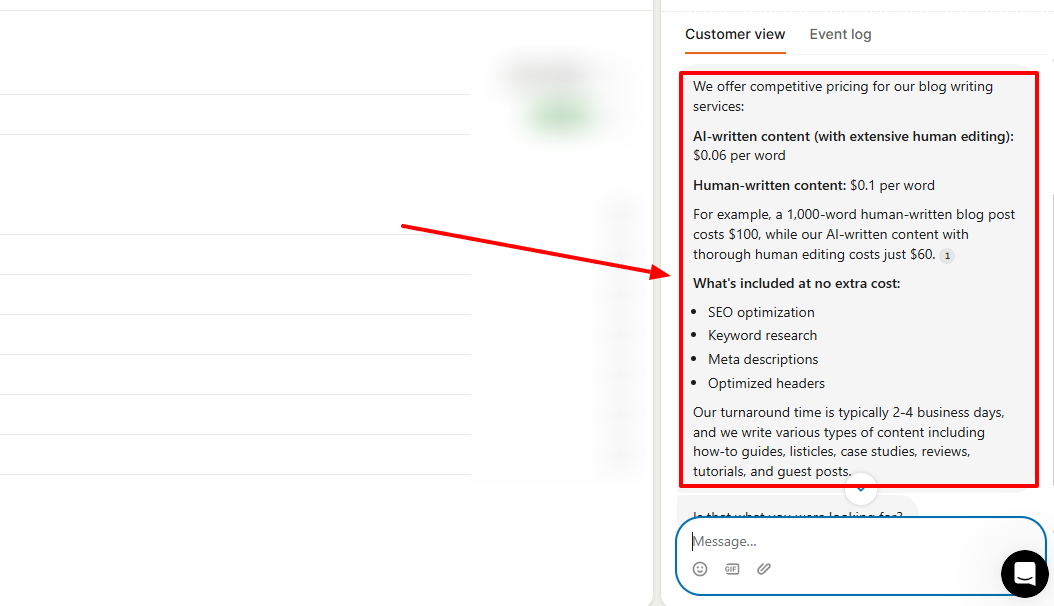
It went on to ask if I wanted more details about the services.
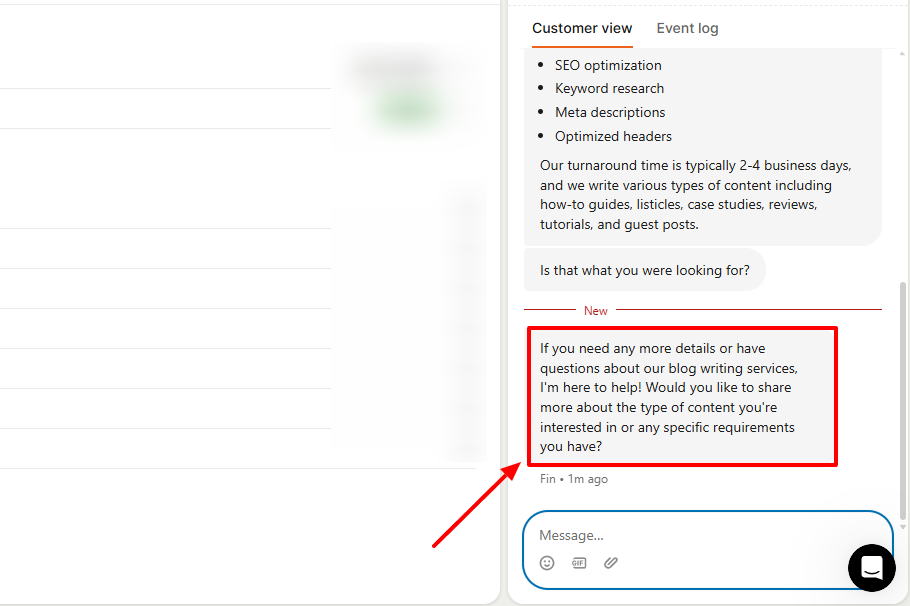
Now that we’ve successfully tested Fin AI Agent, we will also discuss a few other features.
Key Features
1 . Contacts
The contacts feature on Intercom serves as a database for all users, companies, and conversations.
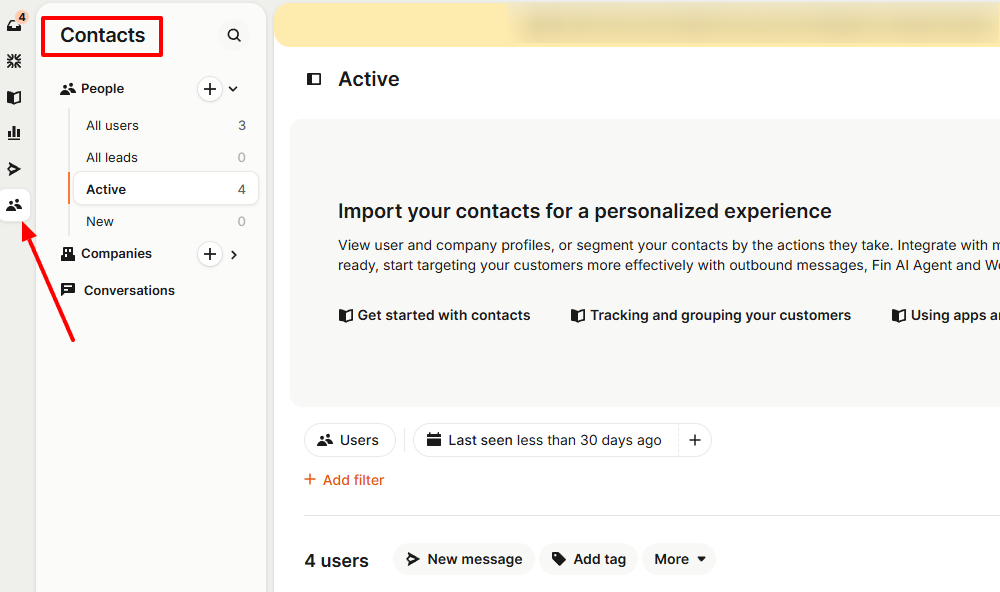
You can see data about users, such as their name, type, first seen, sign-up date, and city.
By clicking on a contact, you can view more details about them and their qualifications. There is also an option to start a conversation.
Since you have the recipient’s name and email, you can write your subject and message, and send it.
2 . Outbound
As the name states, the Outbound feature allows you to send personalized messages to your customers using various channels.
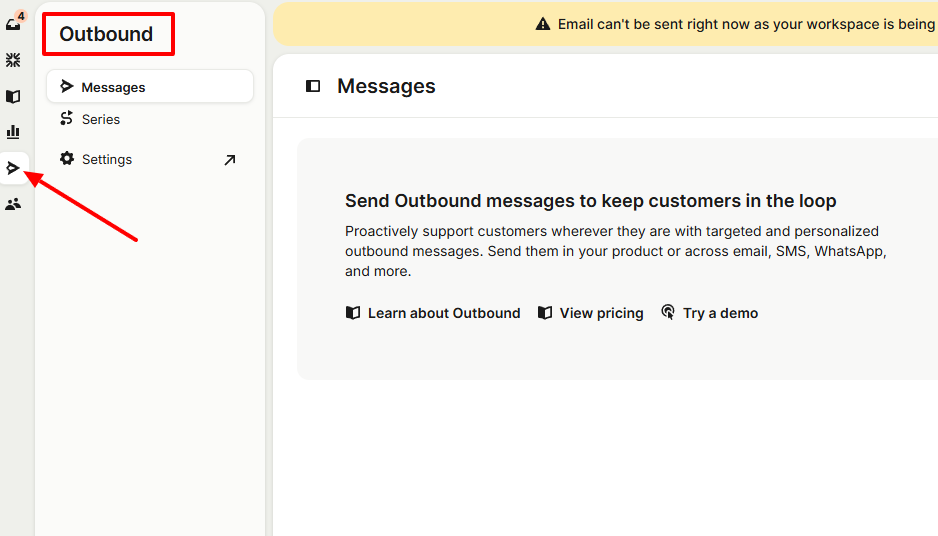
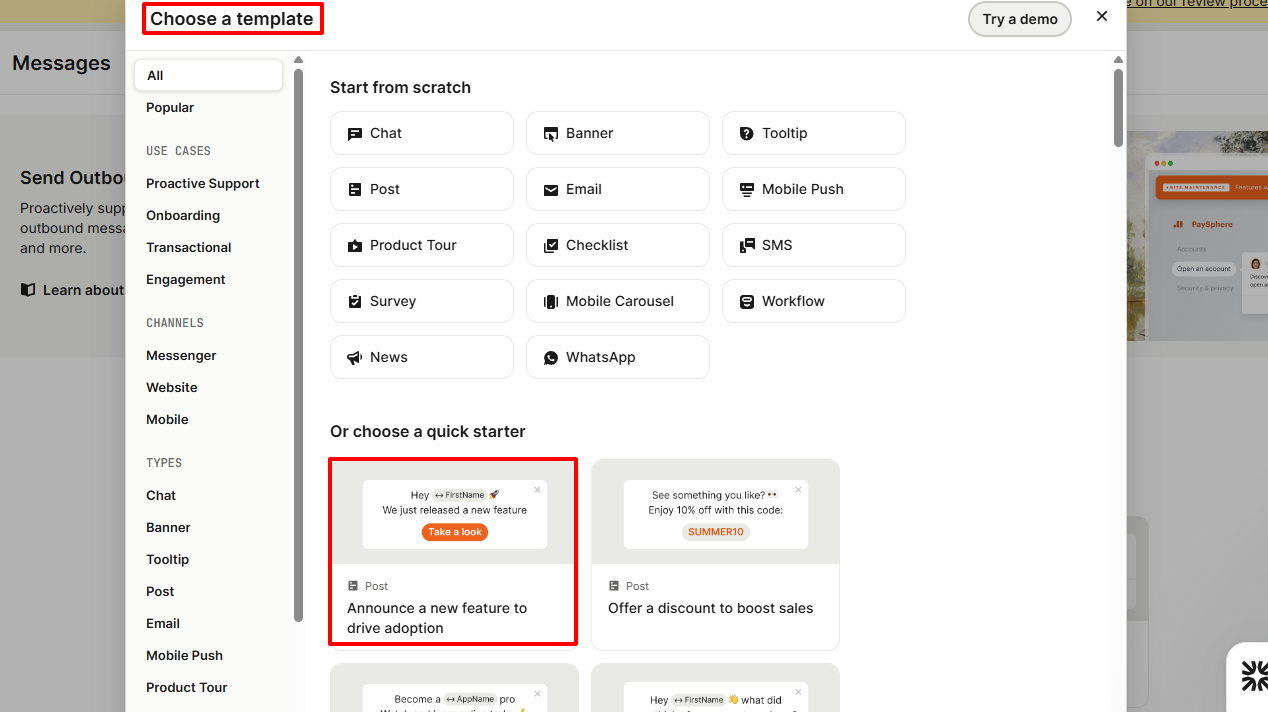
To use this feature, click “New message”.
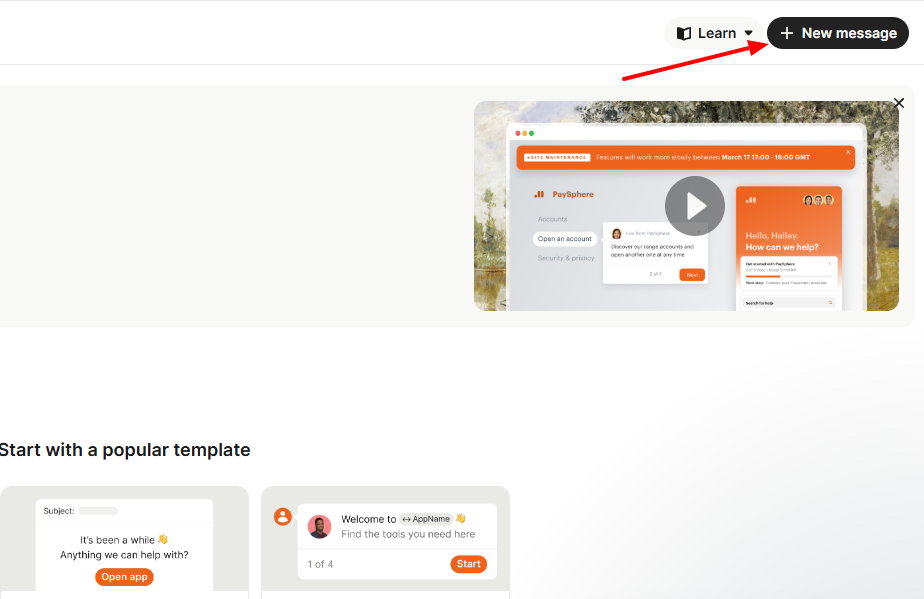
You can start from scratch or choose a template. Our quick starter will be to announce a new feature to drive adoption.
Next, enter the customer’s name and add the new feature’s name and link. That’s it!

Best for:
- Industries and businesses seeking an AI agent for customer support that can resolve complex queries.
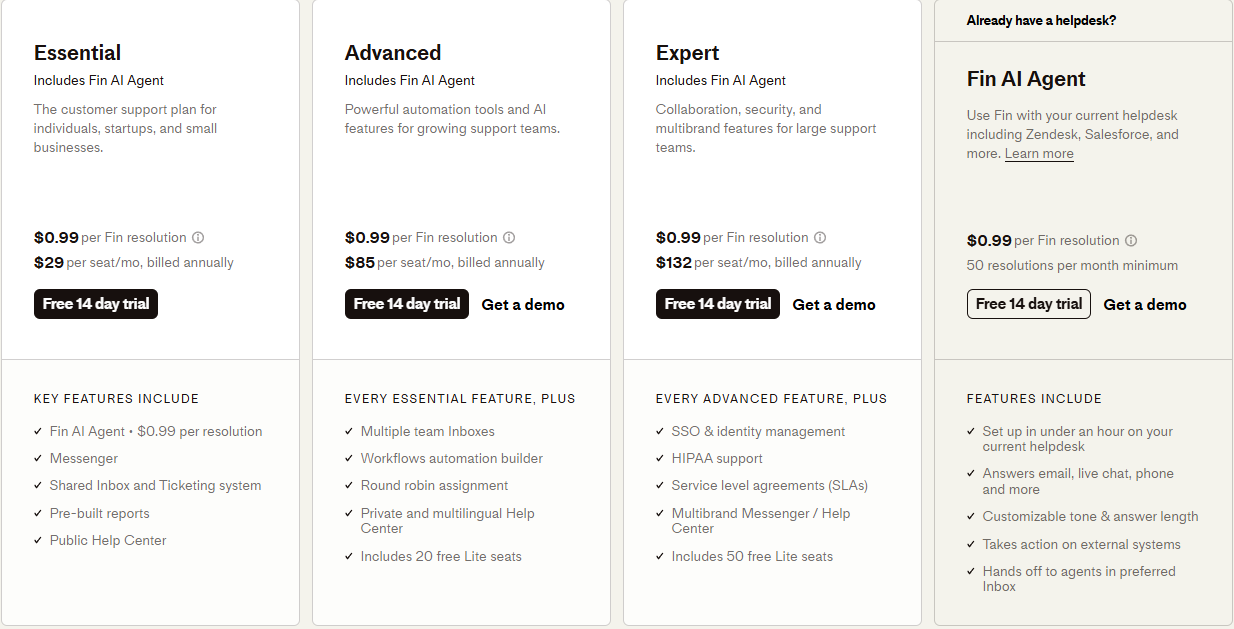
Pricing:
- Essential: $0.99/ per Fin resolution; $29/per seat/month, billed annually.
- Advanced: $0.99 per Fin resolution; $85 per seat/month, billed annually.
- Expert: $0.99/ per Fin resolution; $132/per seat/month, billed annually.
- Fin AI Agent: $0.99/ per Fin resolution.
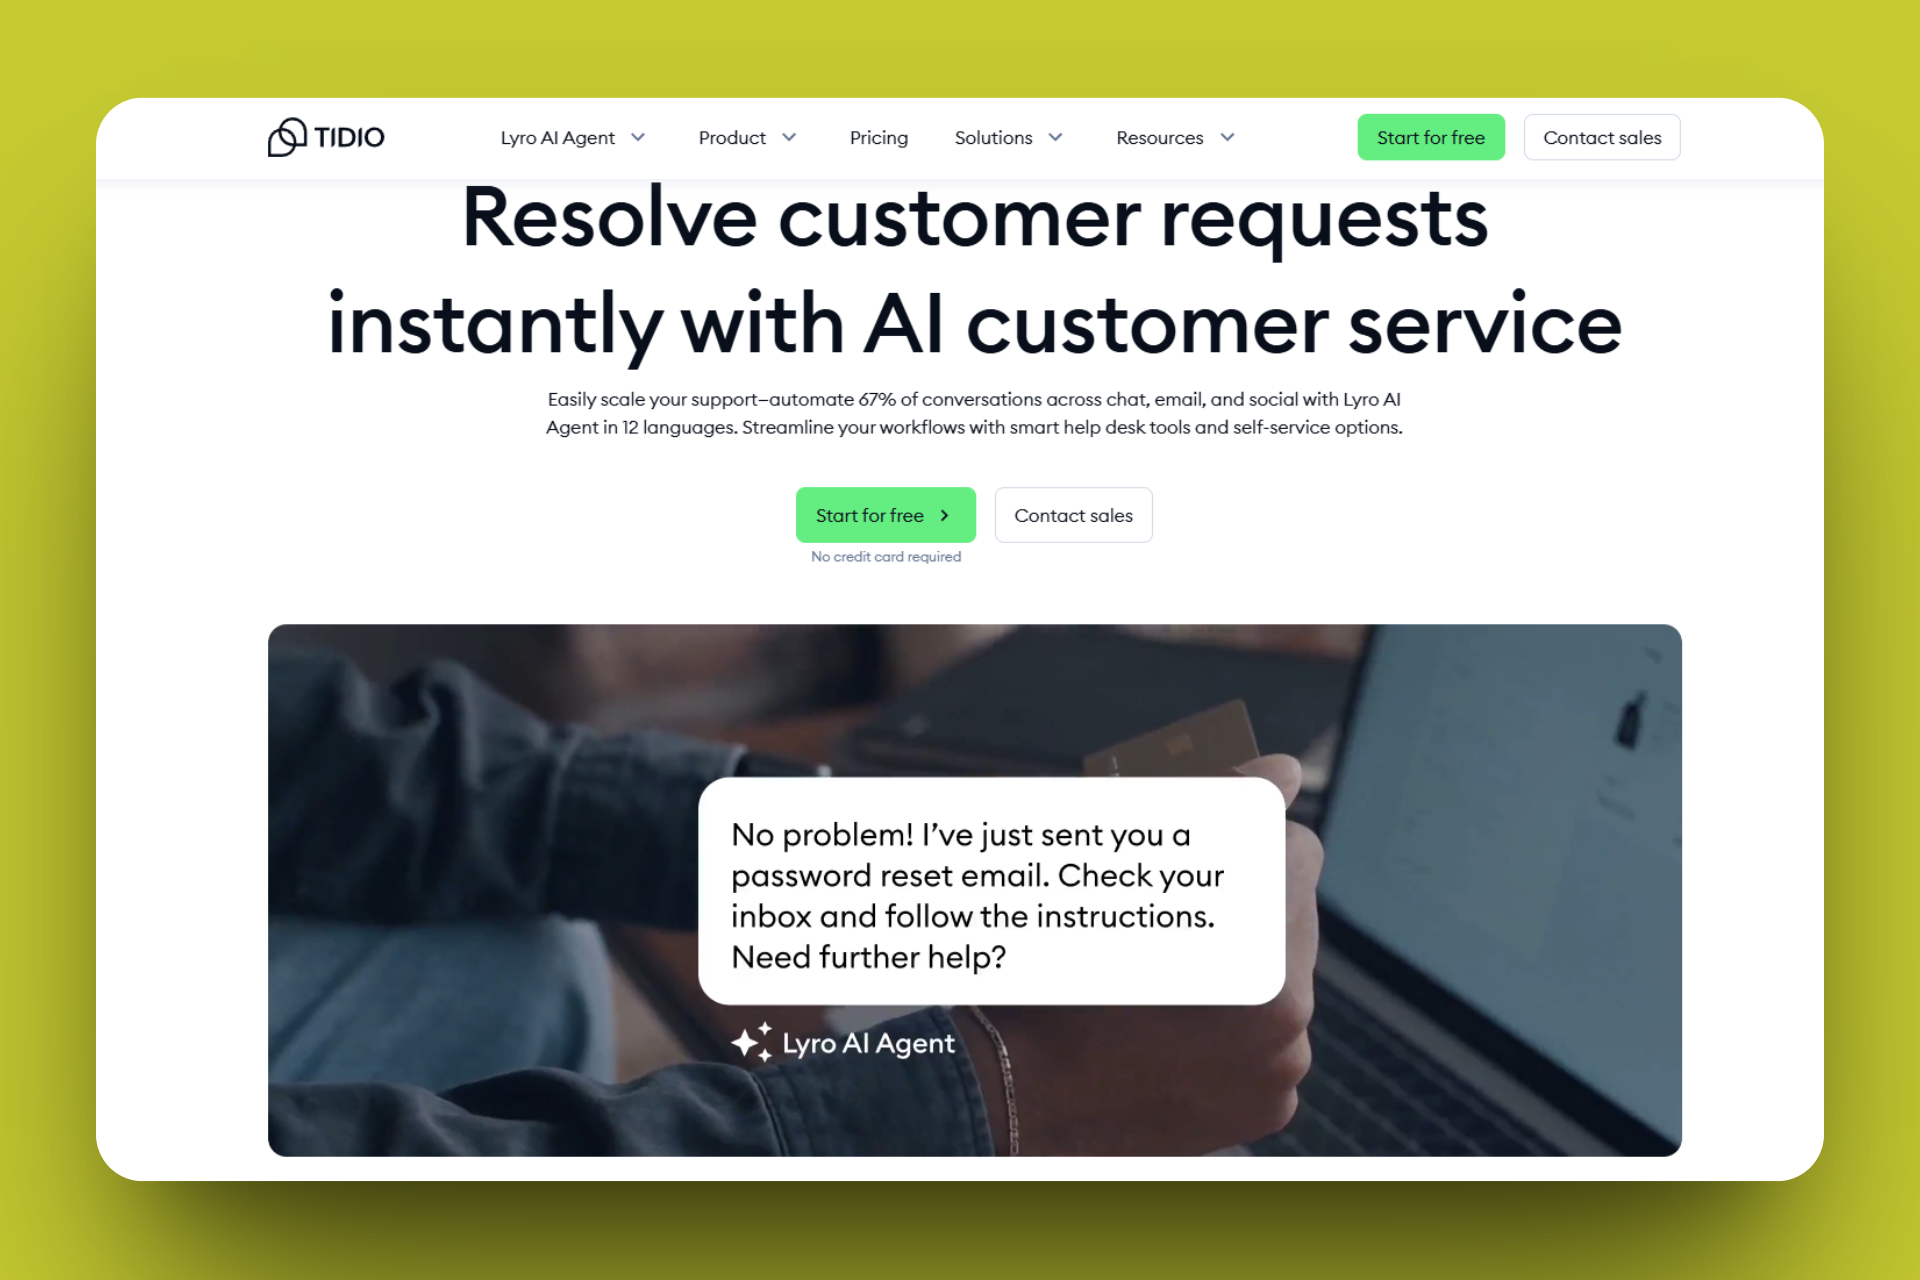
Tidio AI
The next AI agent we will look at is Tidio AI. Its AI agent is called Lyro, and you activate it simply by adding your website URL. Then, you choose the channels Lyro will run on and install the chat widget.
Additionally, Tidio comes with an Email feature that displays my email and status, the sender address, domains, and blocked email addresses. I can enter any email as a message for Lyro, and let it answer based on my sources.
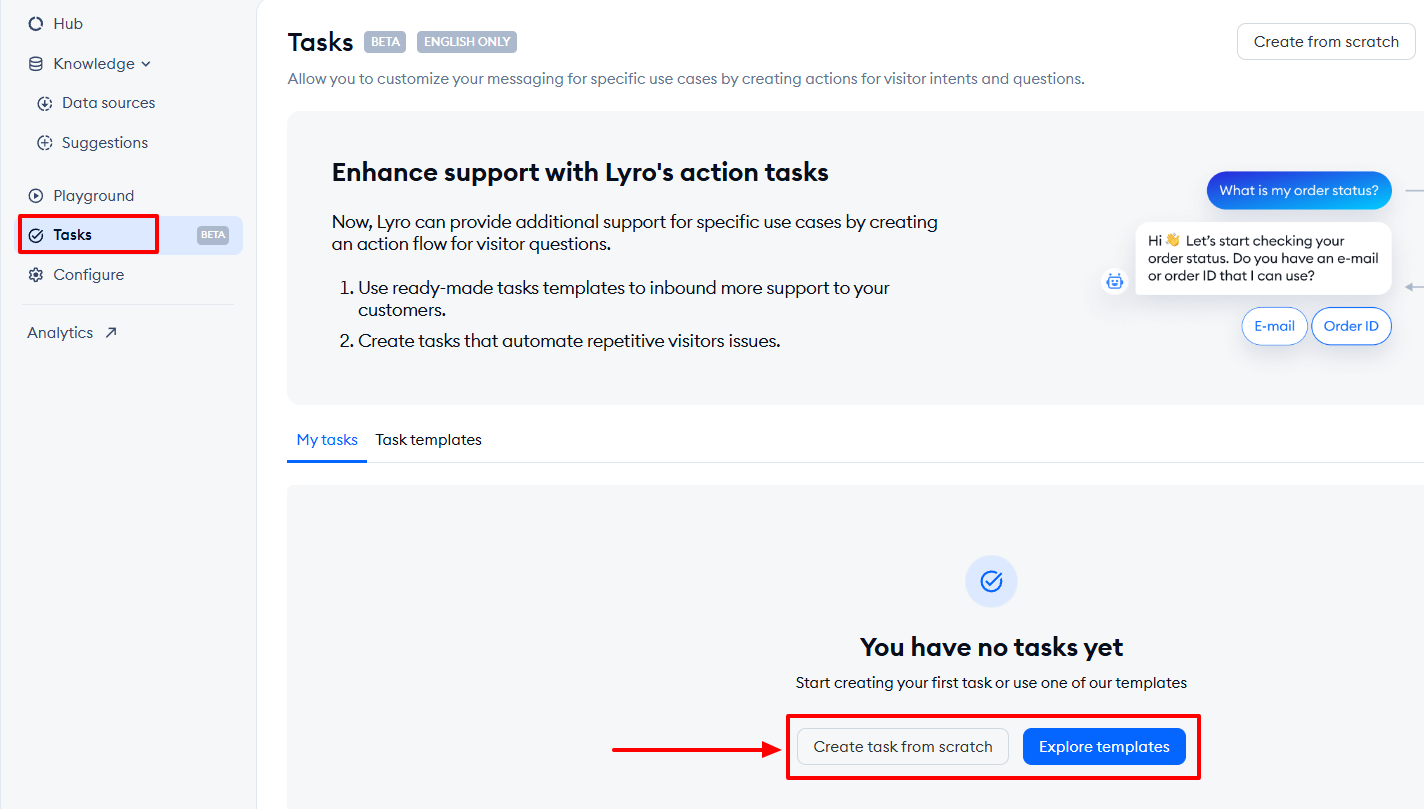
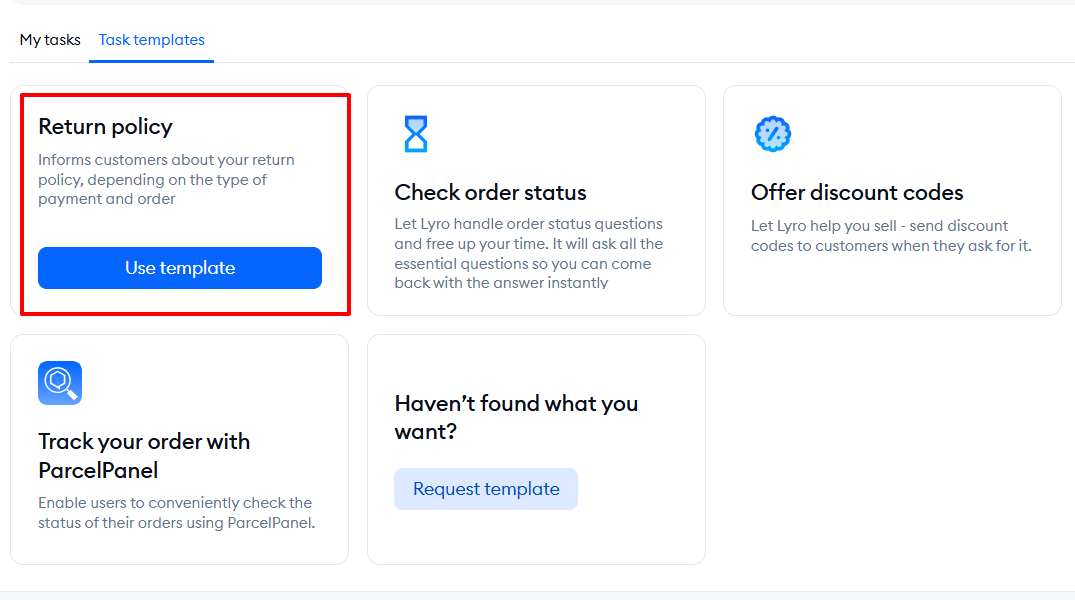
The Tasks feature allows me to create a new task, view all my tasks, or use a template. There are various templates to choose from. These include return policy, check order status, or offer discount codes, just to mention a few.
But that’s not all! The Inbox shows all my live conversations, including the unassigned, open, and solved. I can access my messages, contact info, and can even reply right from within with or without AI.
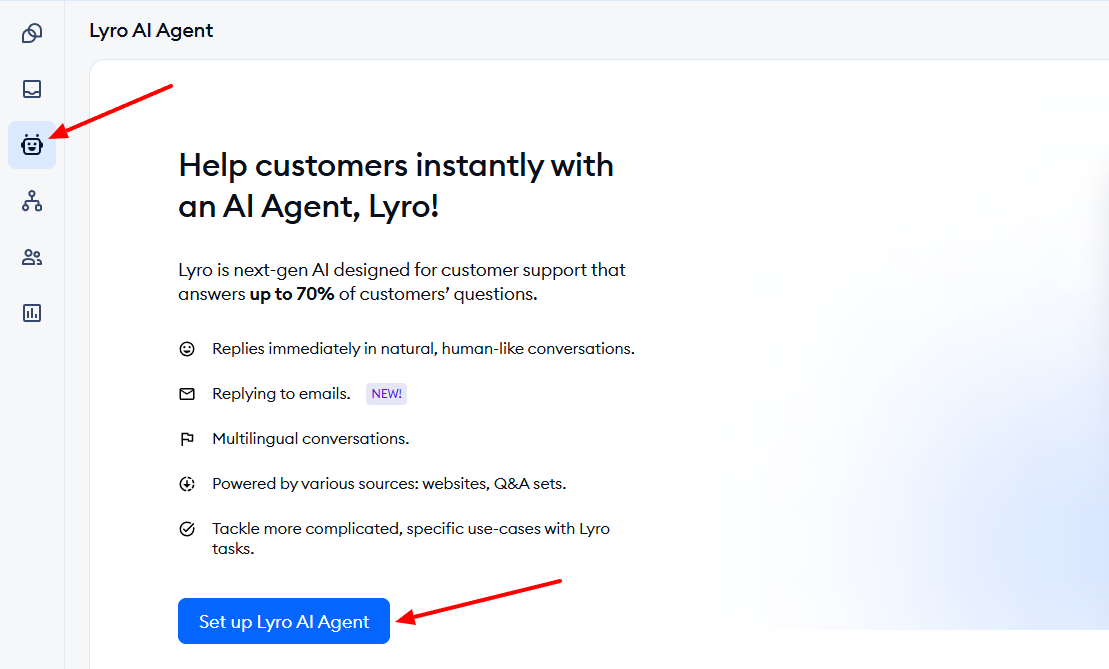
The AI agent for customer support on Tidio is called Lyro. Without wasting time, let’s set it up and see how this works.
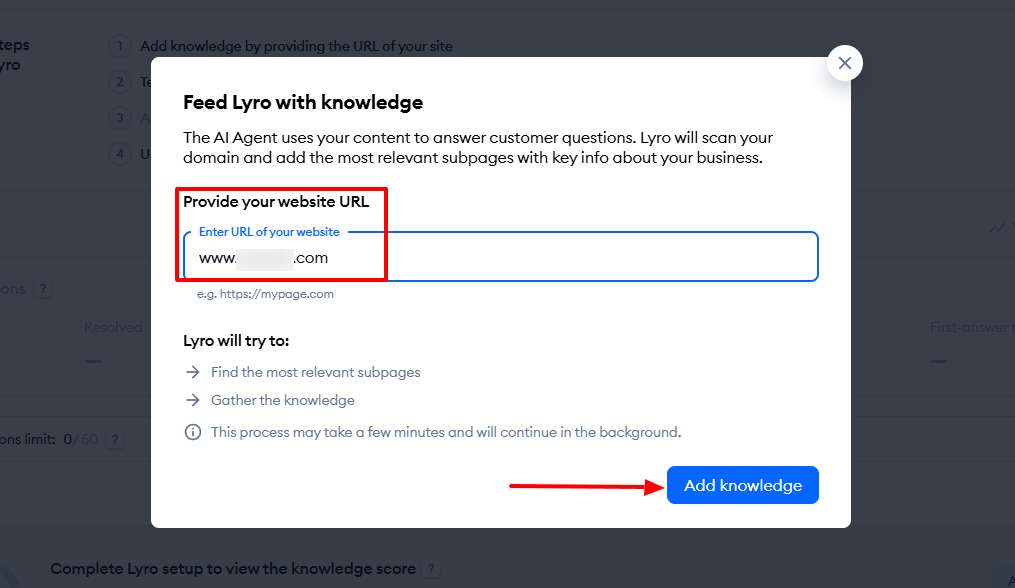
After locating Lyro on the sidebar, click “Set up Lyro AI Agent”.
Feed it with knowledge by providing your website URL and click ‘Add knowledge”.
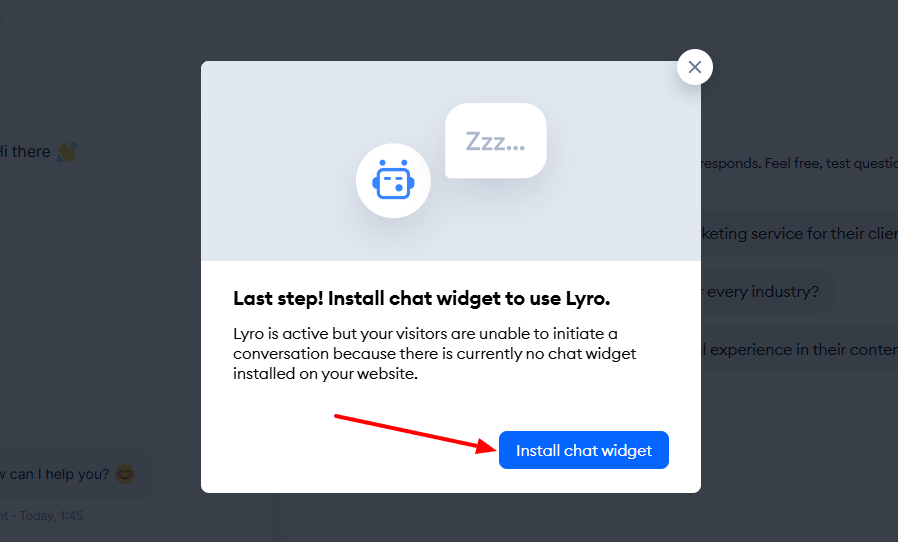
That’s it! Inside the hub, you can test your agent or activate it.
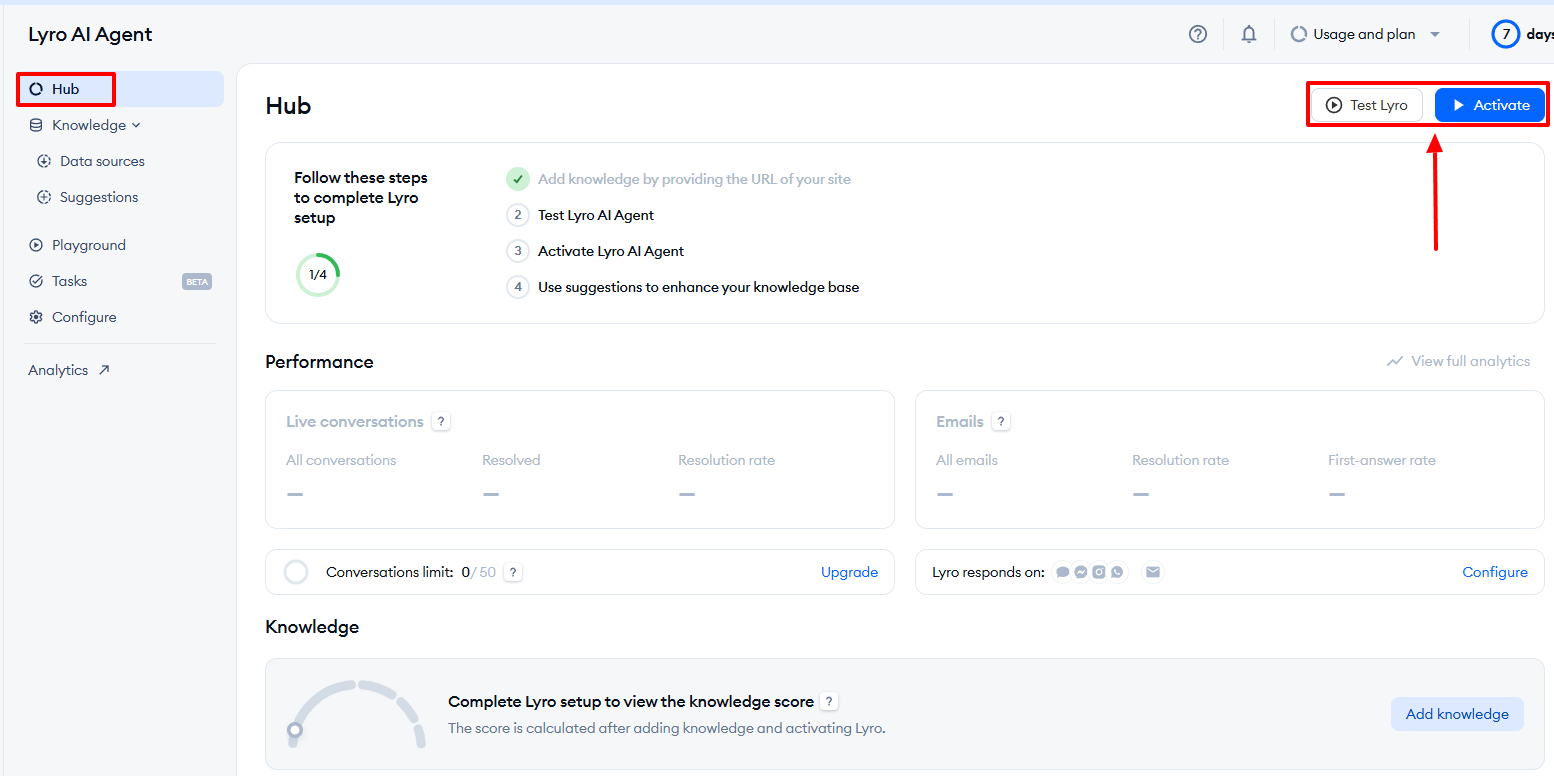
You can do that by installing the chat widget.
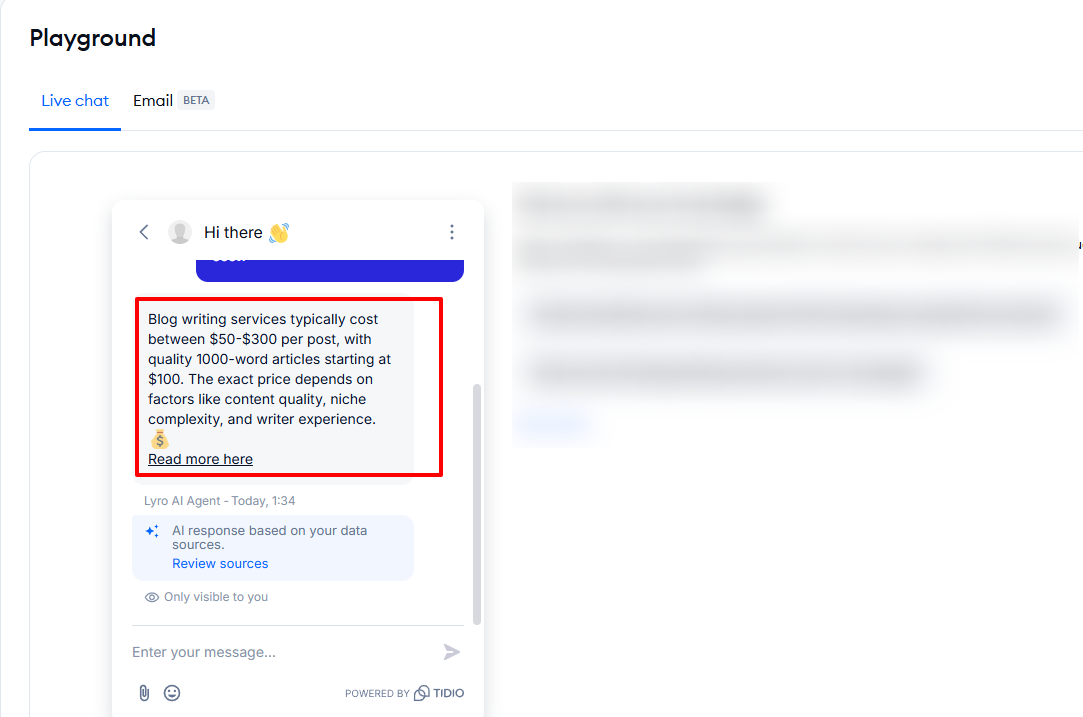
Lyro knows what your website is all about and can therefore reply to customers.
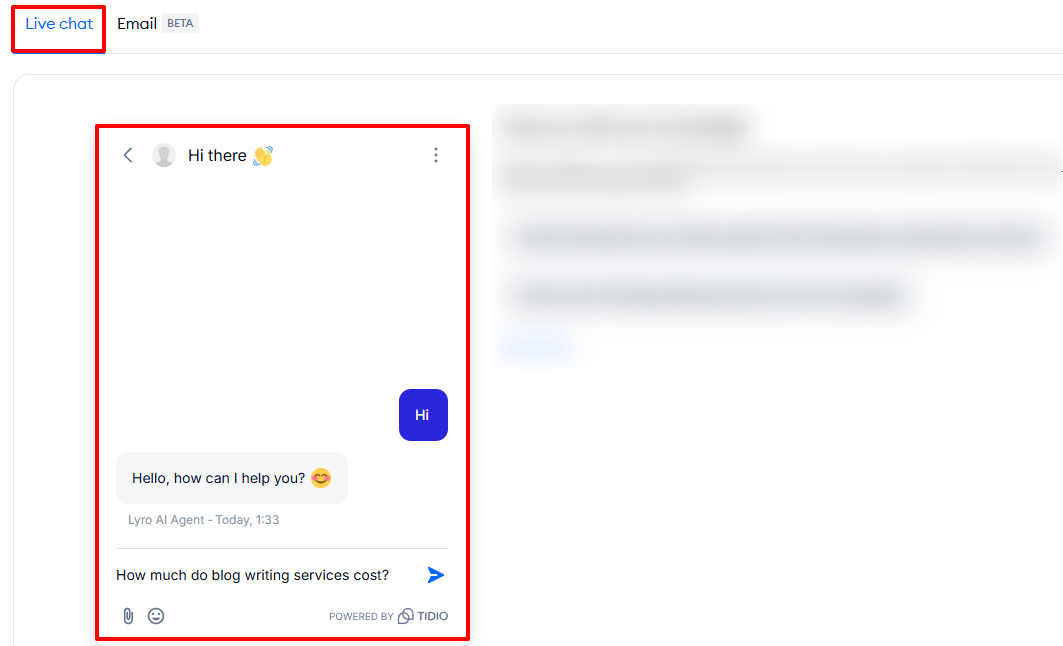
Without human intervention, your customers will get just the right information they need.
Key Features
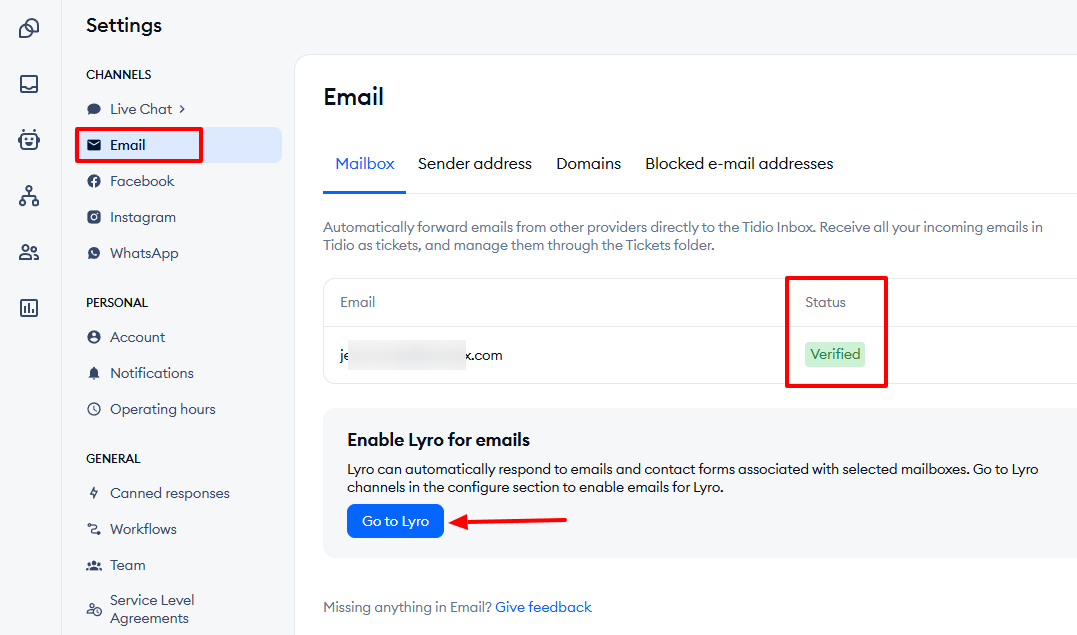
1 . Email
The Email feature is a channel on Tidio AI that displays your mailbox and its status. To enable Lyro for emails, click “Go to Lyro”.
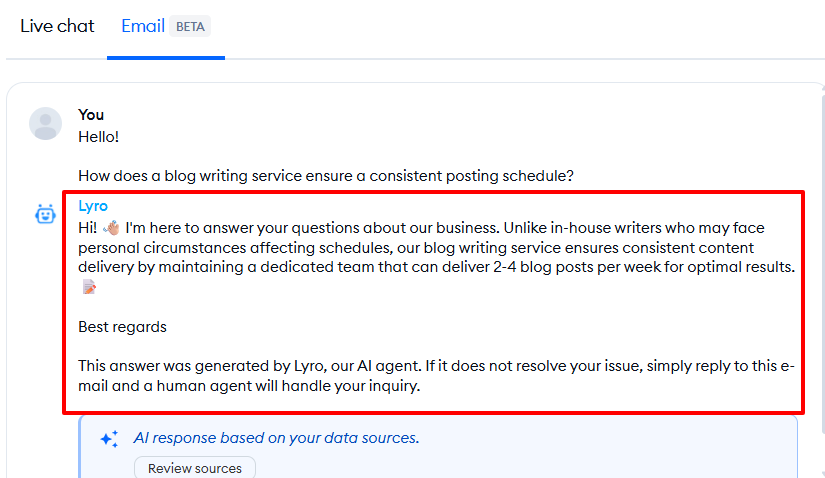
You can leave an email and let Lyro reply.
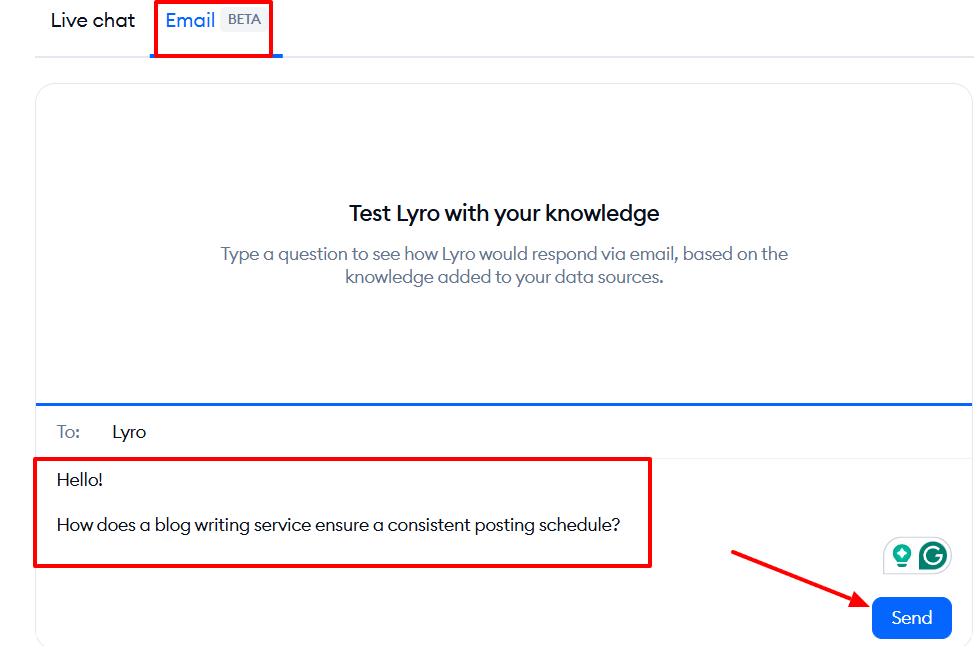
Lyro will answer the email based on your data sources.
2 . Tasks
With the Tasks feature, you can view all your tasks. You can also create a task from scratch or explore different templates.

Let’s try the first one: Return policy.
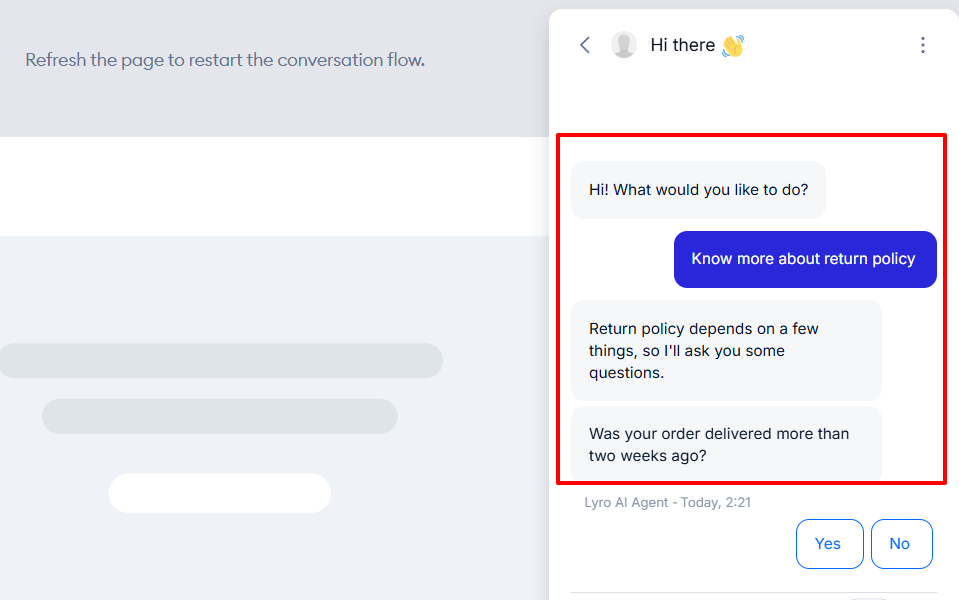
When a customer tries Lyro, the first three options that pop up are: “Return my items”, “Know more about return policy”, and “Check my return status”.
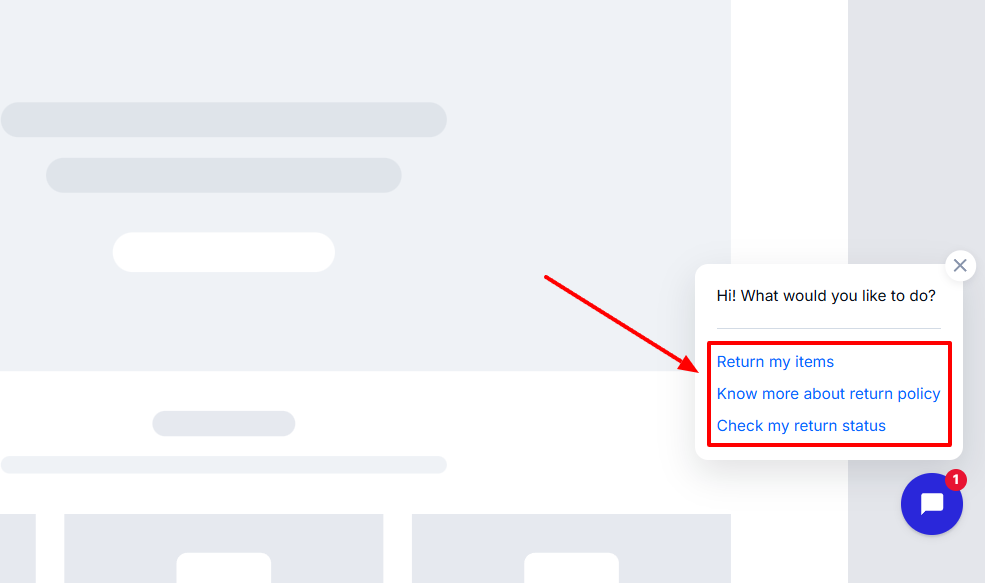
Whatever the customer chooses, Lyro will reply within the context.
Best for:
- Small and medium-sized businesses seeking to enhance their customer service with live agents and create internal tasks.
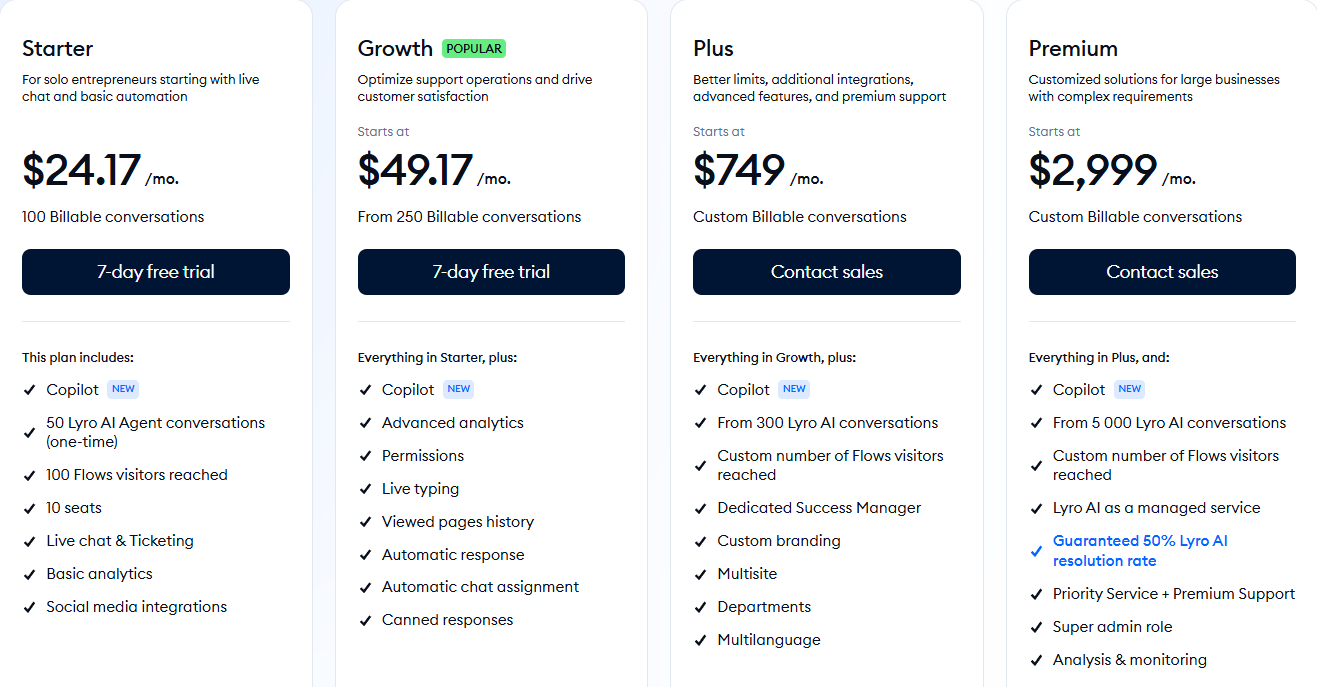
Pricing:
- Starter: $24.17/month
- Growth: $49.17/month
- Plus: $749./month
- Premium: $2,999/month
Freshchat by Freshworks
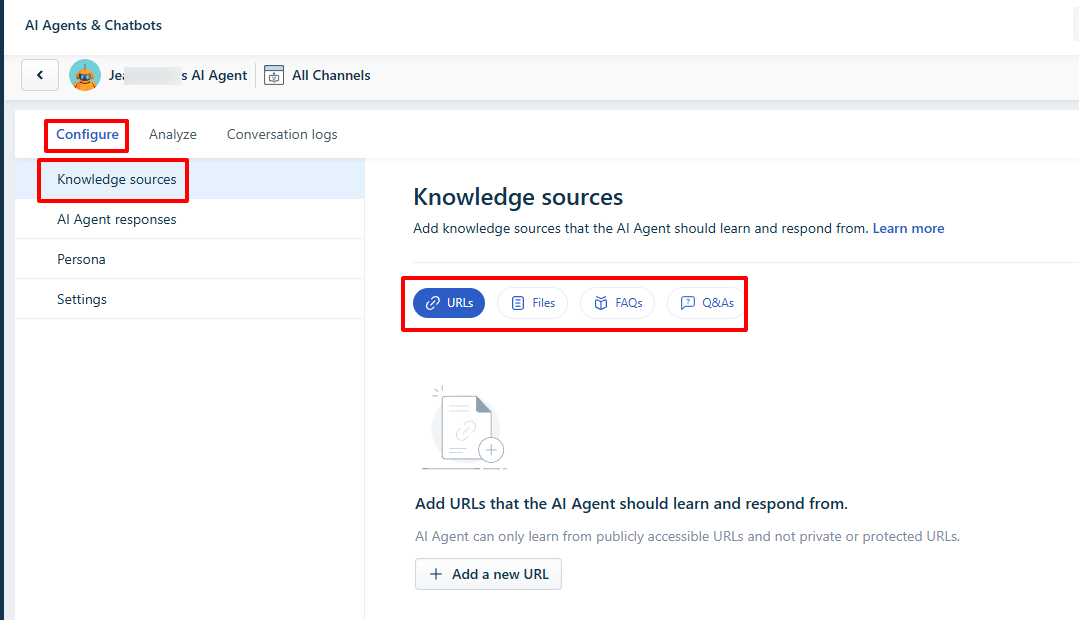
The last AI agent we will review on this list is Freshchat by Freshworks, an autonomous chatbot for sales and customer engagement teams. To use it, you must configure your knowledge sources by adding URLs, files, FAQs, or Q&As. Then, you will give it a name and sync your content.

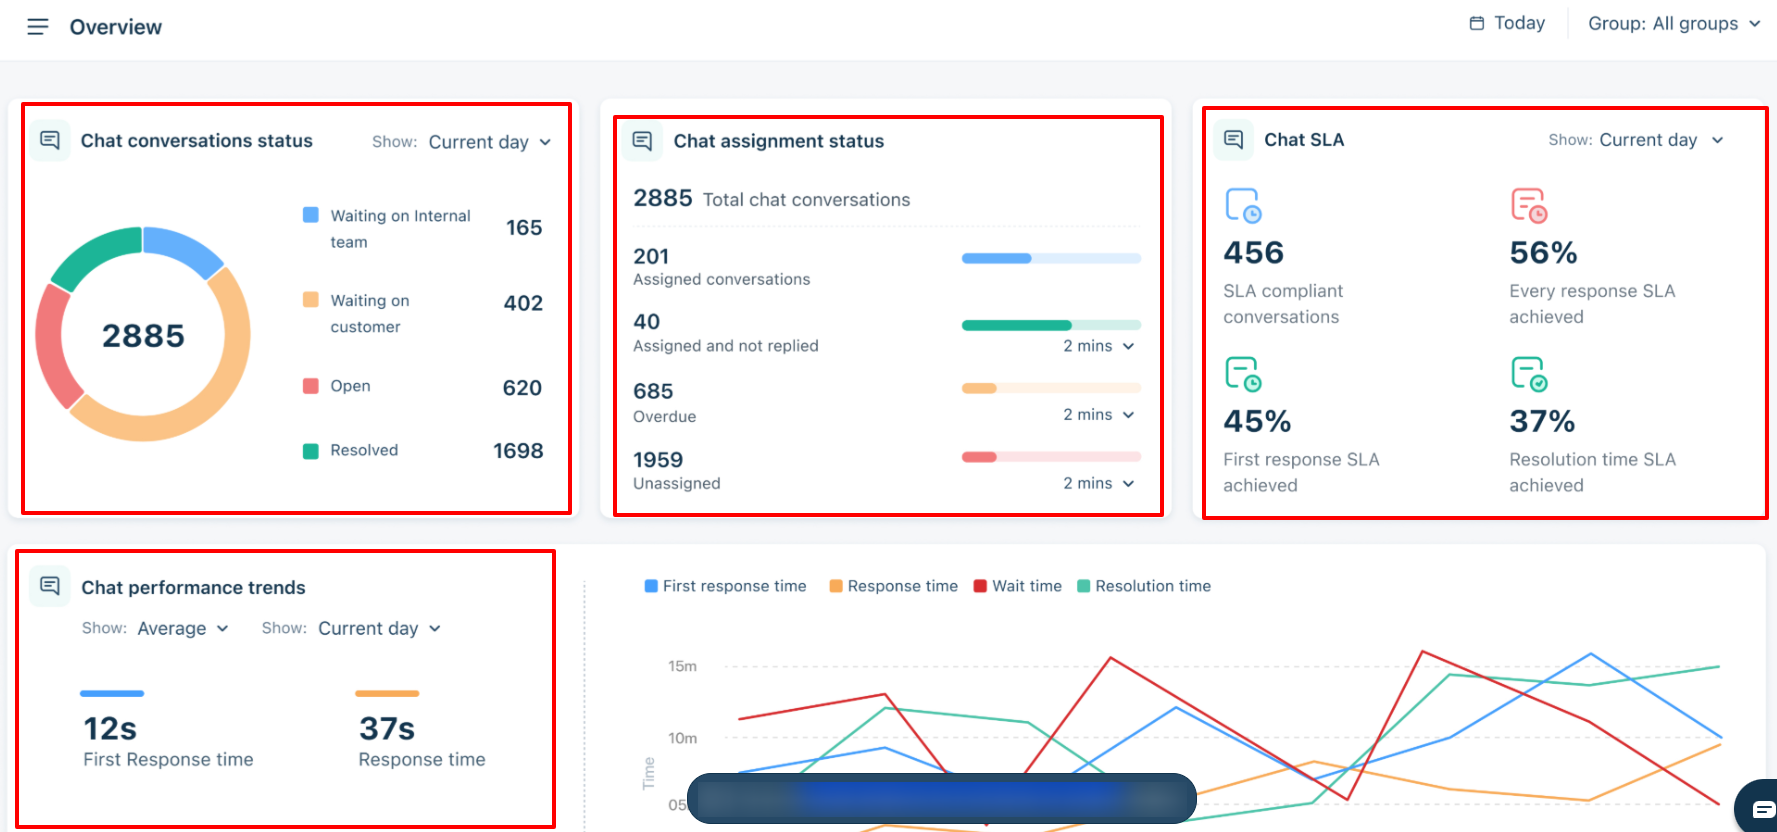
It offers Support Dashboards, a feature that displays an overview of the AI agent’s activity with details like the chat conversations status, chat assignment status, chat Service Level Agreement (SLA), and chat performance trends.
The Conversation inbox has an interface that displays all my open conversations. By clicking on one, I can view the whole conversation, and even reply manually or with AI.

Furthermore, its Support Analytics showcases all your reports, including your curated, private, and shared ones. You can see the report names, who created them, when they created them, who last modified them, and when.
With that out of the way, let’s create an AI agent for customer support on Freshchat by Freshworks.
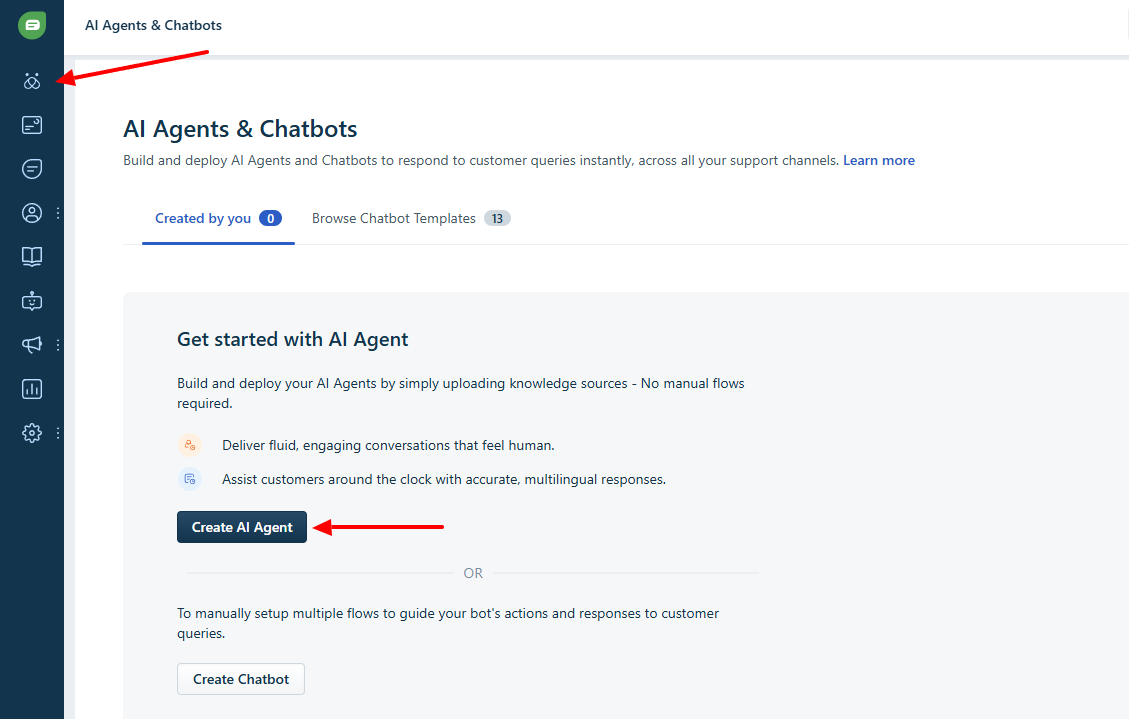
Locate the chatbot on the sidebar, and go to “Create AI Agent”.
The first thing to do is configure your knowledge sources. To do so, you can add URLs, files, FAQs, or Q&As.
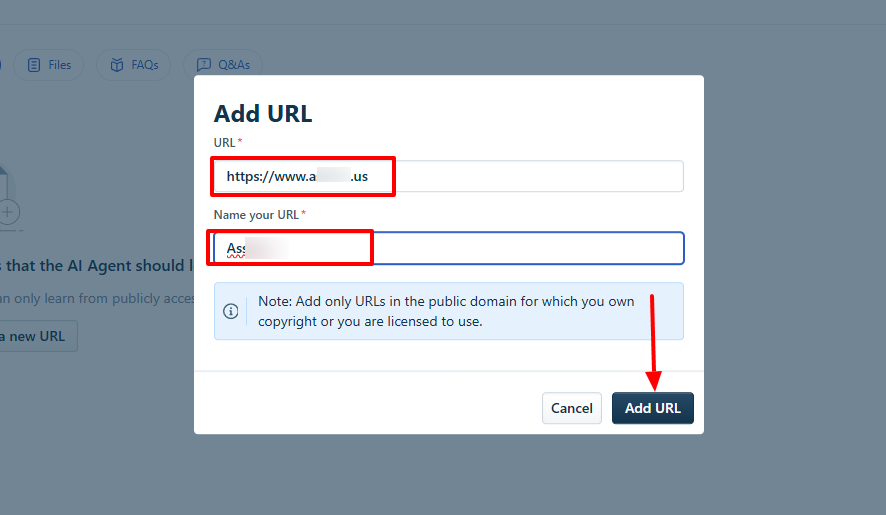
Let’s add a URL and name it.
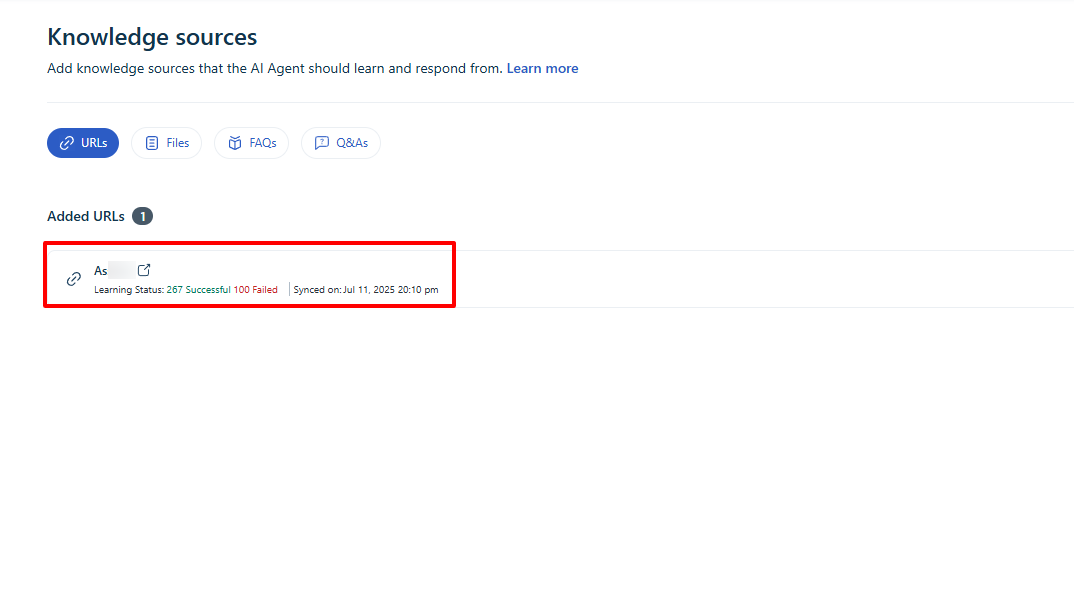
After syncing the content from the given sources, Freshworks will display the result of the learning status.
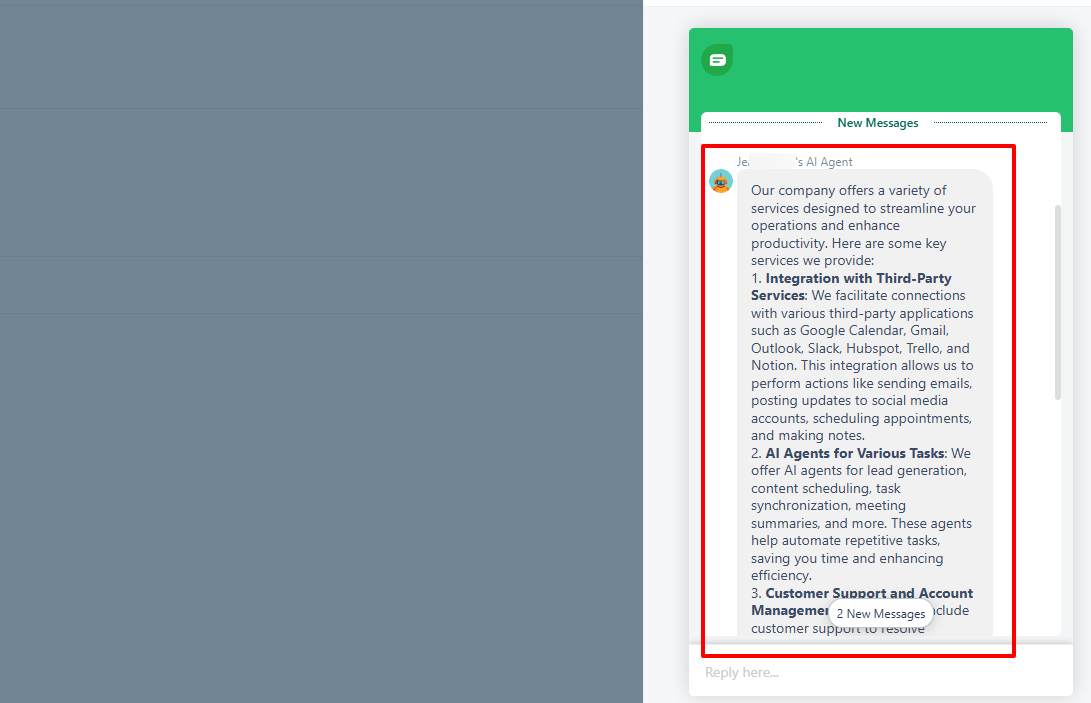
Voila! Your AI agent should now be operational. I tested mine by asking about services.
The AI agent replied with accurate information based on the knowledge sources.
Key Features
1 . Support Dashboards
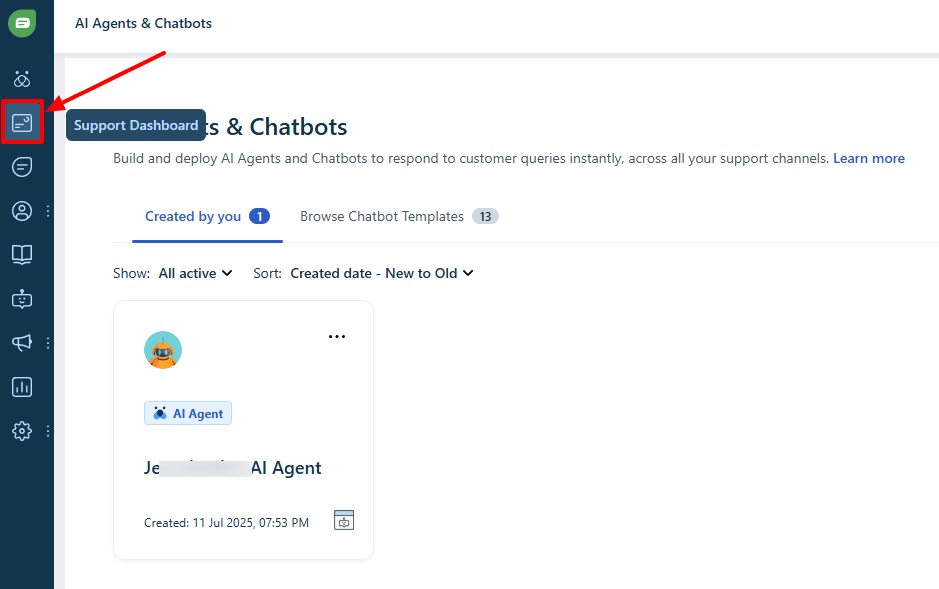
The Support Dashboards is a feature that displays an overview of the AI agent’s activity. You can access it from the sidebar on your account homepage.
It showcases the chat conversations status, chat assignment status, chat SLA, and chat performance trends. Such data is useful for helping you refine your agent and make more informed decisions based on customer activity.
2 . Conversation inbox
You can view all your interactions using the Conversation inbox. On the left side of the interface, you have your open conversations.
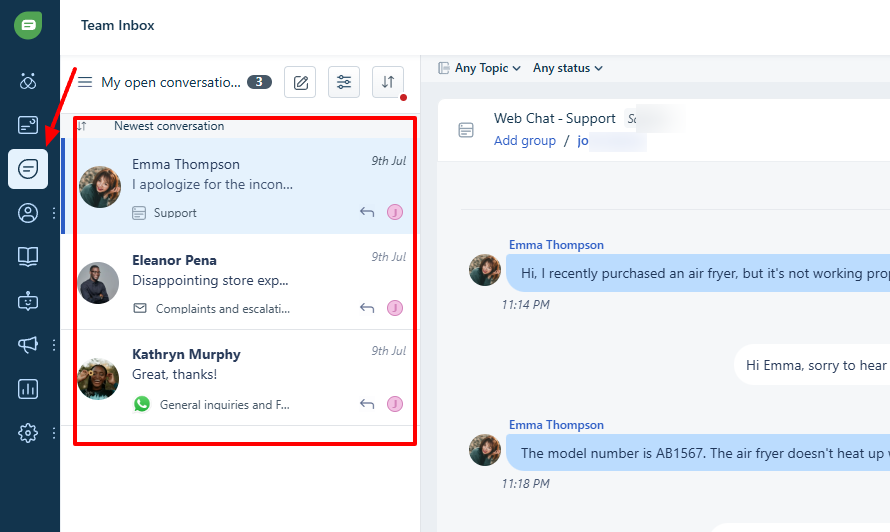
If you click on one of them, you can access the conversation and reply from within. You can also write with AI.
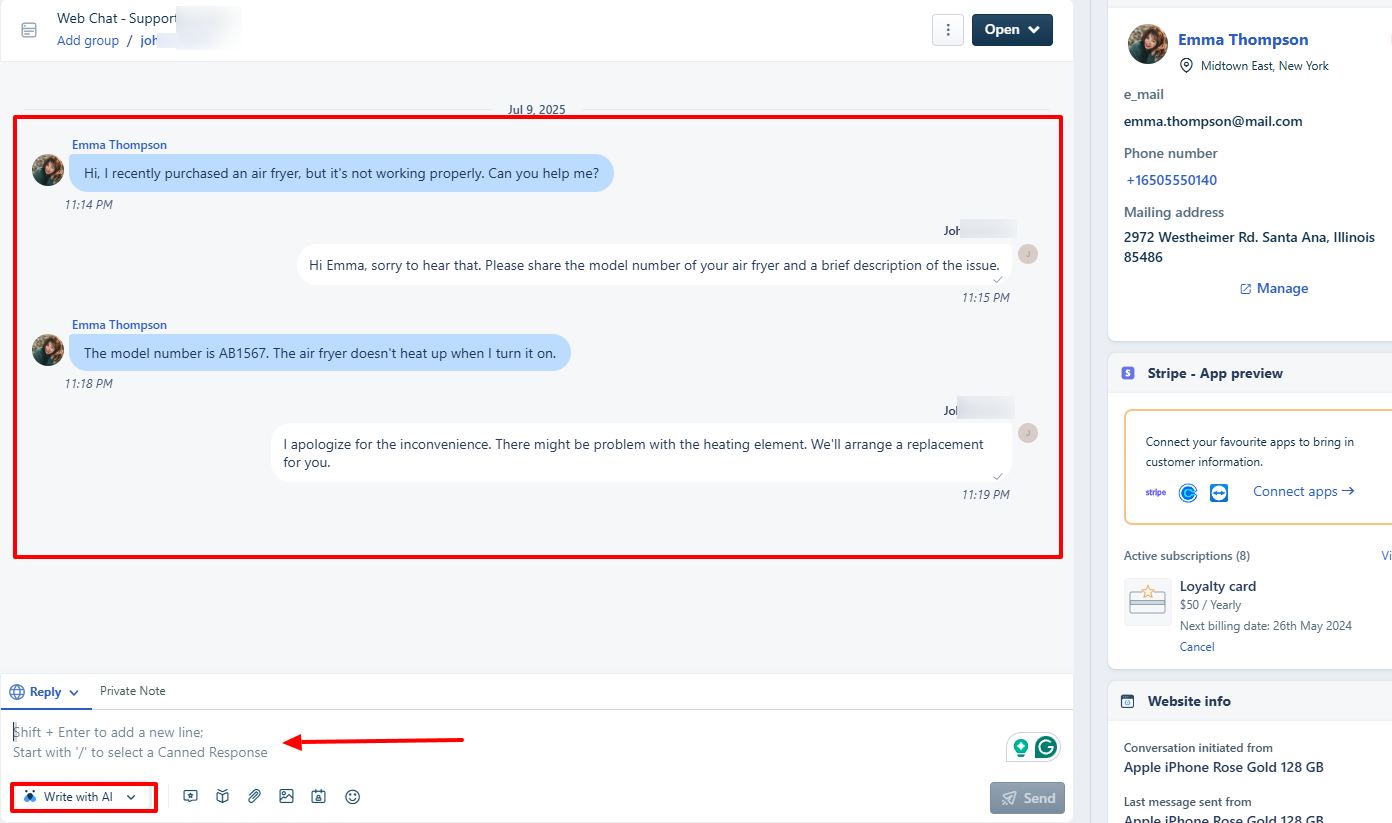
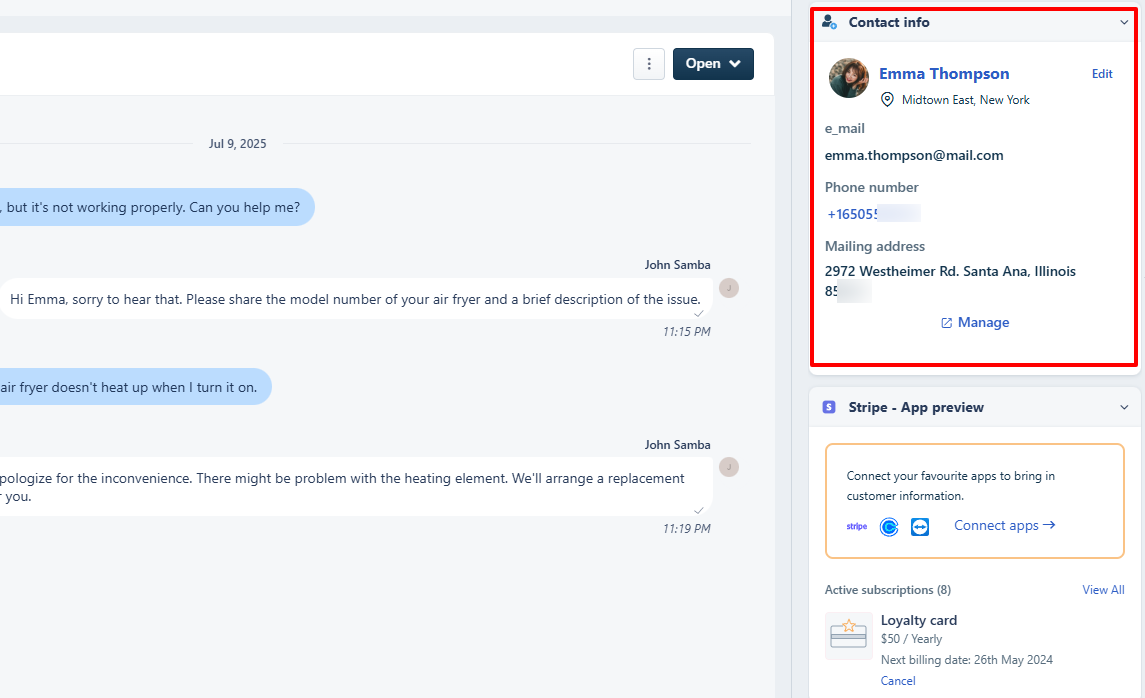
The far left side of the interface displays your contact info, including the name, email, location, phone number, and mailing address.
Best for:
- Sales teams looking for an AI tool solution that offers an AI agent, sales engagement, and manages all interactions in one place.
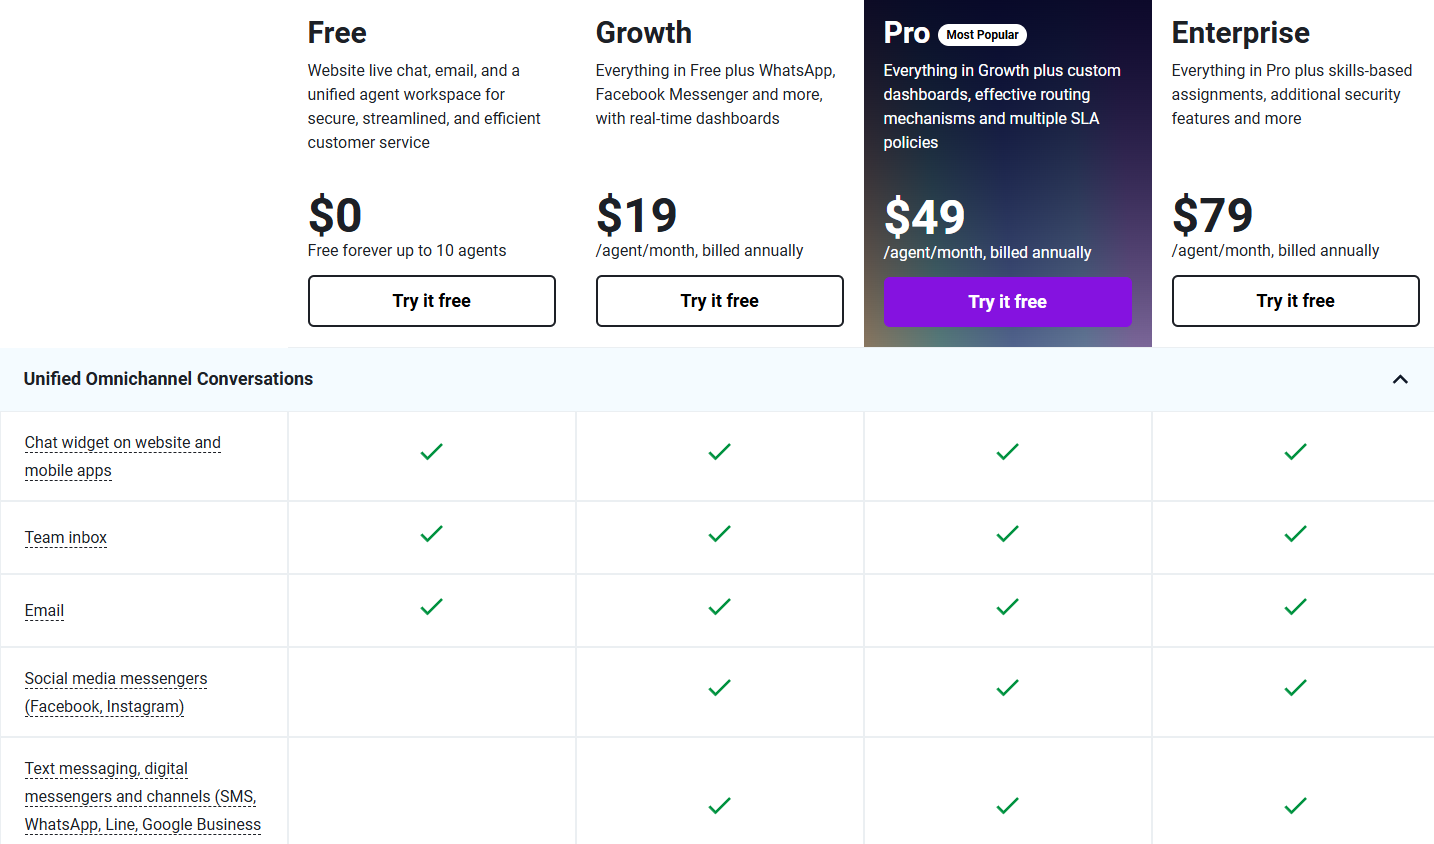
Pricing:
- Free: $0/ free forever/ 10 agents
- Growth: $19/agent/month, billed annually
- Pro: $49/agent/month, billed annually
- Enterprise: $79/agent/month, billed annually
What is an AI Support Agent?
An AI support agent is an autonomous digital system powered by AI that helps companies offer customer support. In other words, it’s a system that handles customer service without human intervention.
AI support agents are not basic chatbots, and they don’t just give static answers. They understand context and reply as if they were human.
That’s not all! The AI support agent replaces humans to a certain extent. For example, it can create a LinkedIn post on your behalf, compile and summarize all your unread emails, or even generate a report of your top five most engaging tweets.
In the words of Jeff Su, an AI expert, in a video he shared on YouTube:” AI agents reason, take actions, and observe”.
He further explained that the most common configuration of AI agents is the ReAct Framework, which means combining Reasoning and Action.
In a nutshell, AI support agents like Assista help you save time while allowing your team to focus on other important tasks.
Join over 3000+ professionals who reclaimed their time and sanity by letting AI handle the busywork.